In this walkthrough you will find directions to treasures and information on the bosses, as well as a general outline on where you need to go.
After the introduction, you’ll be forced into a battle against a large, robotic enemy. Don’t worry though, it’s not hard due to being the first battle. View the tutorial to become familiar with the battle system and honestly, there’s no need to do anything else other than use the auto-battle option. After beating the enemy, a cutscene will play and you’ll be forced to fight it again. While it has a more damaging move with Wave Cannon, you should be okay using auto-battle again without resorting to healing.
After the battle and next cutscene, set the camera up and save the game at the save point straight ahead. Don’t bother looking at the shop inventory because there’s really nothing worthwhile. Just a potion and a phoenix down that’s available to buy. Seeing as money is scarce and you should be able to get through the opening sections with few, if any healing items, there’s no need to buy them.
Final Fantasy XIII Walkthrough: Chapter 1 - After the opening
Defeat the PSICOM Wardens up ahead. They’re easy to beat and when they’re clumped together, use Blitz so it hits them both. Proceed on and defeat the enemies as you come to them. By not fighting encounters, the only thing you’re going to miss are items. Talking of items as well, most of the loot gained after defeating enemies is used for upgrading. A guide on that can be found at Final Fantasy XIII Upgrade Guide . Also, a guide to help with grinding for CP and Gil can be found at Final Fantasy XIII: CP Grinding and Gil Farming . After the second batch of soldiers, there’ll be a floating orb a bit further head. These orbs contain items. Open it for a potion and a cutscene will play a bit further down that introduces a new enemy type. Defeat them using the same tactics and before using the save point up ahead, take the stairs to the right to find two potions.
Final fantasy XIII Walkthrough: Chapter 1 - The PSICOM Marauder
After saving, move on and defeat the next group of enemies. Take the stairs to the left for an Iron Bangle. Equip it on Lightning because if the character you control dies, it’s game over. Eventually, another short cutscene will play and during the fight that follows, a tutorial on item usage will appear. Using items is pretty self-explanatory though so you may want to give it a miss. One important thing to note about the items you have at the moment though is that potions work differently from other Final Fantasy games, as they heal the entire party.

After that fight and a cutscene, you’ll have control of a new character, Snow
Final Fantasy XIII Walkthrough: Chapter 1 - The Resistance Front
Open the orb behind you when you gain control for fifty Gil, then save your game at the save point straight ahead. A cutscene will play when you’ve moved a bit further on and then you’ll enter your first fight as Snow. At this point, he doesn’t play much differently than Lightning. He has the normal attack, plus an AoE one. The difference lies in the fact that the Hand Grenade attack takes a second or two to activate once the grenade has been thrown, whereas Lightning’s seems to be used quicker. The battle itself is easy. Continue along the path fighting battles as necessary. Eventually, you’ll run across another cutscene where the story marker is.
Final Fantasy XIII Walkthrough: Chapter 1 - The Beta Behemoth and the Myrmidon
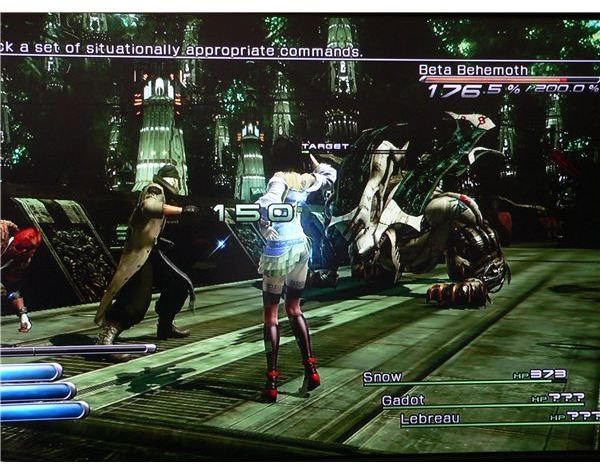
After regaining control, open the orb by you for an Iron Bangle. Equip it. Then proceed down the linear path, fighting enemies as you go. Eventually, a cutscene will play and you’ll need to defeat a Beta Behemoth. Again, this fight is rather deceiving. Due to it being a big enemy, you’d expect it to be tough to dispatch but it’s not. Later Behemoths are tough though. You don’t need to worry about healing as well, as your allies will heal you automatically if it’s needed, so just pummel the boss.
Following this fight, you’ll regain control of Lightning and will enter into another fight following a cutscene. Again, the enemy isn’t challenging. If the Myrmidon focuses on Sazh, you won’t need to heal. But if it does attack you, then you may need to. So be prepared to use a potion. If Sazh falls though, don’t worry about it too much. In any case, just keep up the assault so that you stagger him and you’ll be fine.
Final Fantasy XIII Walkthrough: Chapter 1 - Aerorail Trussway
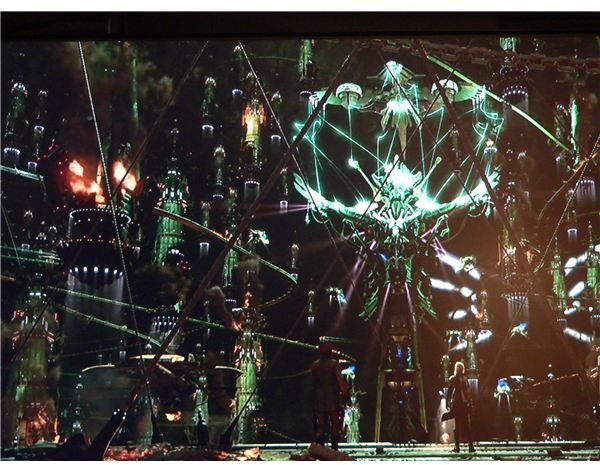
After beating the Myrmidon, another cutscene will play showing the Pulse Fal’Cie and after it ends, you’ll regain control of Snow again. Open the orb in front of you for a Power Circle, which is a new weapon for Snow. It is a definite upgrade, so equip it. Then save your game and follow the linear path. After beating the enemies after the save point and taking the stairs, there’s an orb behind you that you should open. It’ll give you a hundred Gil. Then carry on and examine the vehicles at the story marker indicated on the mini-map.
When you’ve examined the vehicles, another cutscene will play and you’ll be in control of Hope for the very first time. There is no fighting in this section and there are no items to collect. All you need to do is move ahead a few paces and examine the vehicles. This will end the first chapter.
If you’re interested in reading about the history of the Final Fantasy series, then you may also wish to check out this article:
This post is part of the series: Final Fantasy XIII Walkthroughs
A chapter by chapter walkthrough of Final Fantasy XIII.
- Guide to Chapter 1 in Final Fantasy XIII
- Final Fantasy XIII Walk through: Chapter 2
- Final Fantasy XIII Walkthrough: Chapter 3
- Final Fantasy XIII Walkthrough: Chapter 4
- Final Fantasy XIII Walkthrough: Chapter 5
- Final Fantasy XIII Walkthrough: Chapter 6
- Final Fantasy XIII Walkthrough: Chapter 7
- Final Fantasy XIII Walkthrough: Chapter 8
- Final Fantasy XIII Walkthrough: Chapter 9
- Guide to Chapter 10 of Final Fantasy XIII
- Final Fantasy XIII Walkthrough: Chapter 11
- Walkthrough of Chapter 12, Final Fantasy XIII
- Final Fantasy XIII Walkthrough: Chapter 13