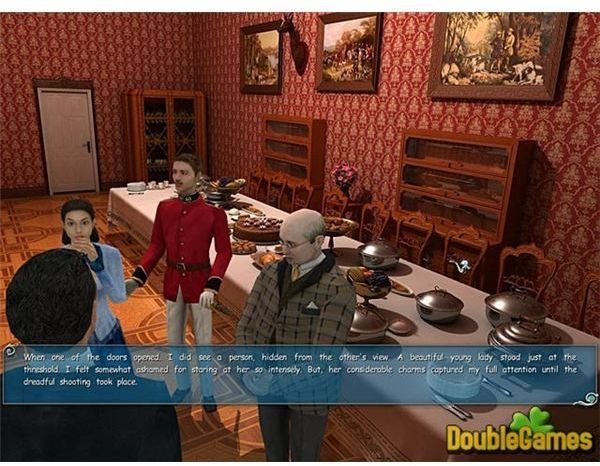
Go back to the Tower of London and see if you can stop Arsene Lupin. Holmes gets to fire a cannon as well, so it’s not a total loss even if you as a player fail to stop the thief.
The Byward Tower
Now get ready to go to the Tower of London and Big Ben. Holmes stays back from the party that Watson forms. The astute player also finds that they now have matches in their inventory. It seems more than likely that you will need to light something or start a fire in this section.
Enter the tower and find the guard standing there. They have little to do with the game, although there does seem to be one less warder than their should be. Examine the body to find out that he is Schick. He also has quite a mustache. How very. Take the box of cartridges lying beside the prone guard.
The cartridges most likely get put into something, either a pen or a gun, we will guess gun since we found them on a guard. Find the weapons room. Someone has sensibly locked the door. Follow the steps until you come to an archway. You’ll see a rope coming out of Wakefield Tower. Someone in your party warns of the possibility of Lupin using the rope going to the jewel tower. The same person also suggests that you prevent other people from using it.
Return to the Scaffolding
Use the handy mini-map that comes in many of the Sherlock Holmes games to get to the scaffolding at the Tower of London. The warders of the Tower of London apparently have a policy that allows them generous time to sleep while on duty. Examine this warder to find out that his name is Kirkpatrick. Look closely at the right hand. It is marked with green paint for some bizarre reason.
The Storeroom
You cannot enter the store room at this time, but you will find a hat nearby. Inspect the hat to find out that it belong to the chief warder. Where the chief warder is at the moment remains a mystery. The drag marks that lead to the door to the storeroom seem to be misleading.
The Bloody Tower

It might be curious to know how the tower got this name, although it is also called the Queen’s Dormitory. There is a conscious warder here who offers some important information. Find out that a person named Smith has the keys to the storeroom. Tracking down Smiths in an English speaking country is not as easy as it sounds, even if one assumes they are skulking around the grounds of the Tower of London. Fortunately, the cook has a set as well. A person known as Fatty also has a duplicate key that should not be in his possession
The Dormitory
Despite the fact that it appears to be nap time for the Tower of London warders, the dormitory does not contain any people at the moment. Walk in and pick up a few items of note. Take the letter and read it, there is also a handbill detailing the charges for 2 hot air balloons.
Walk over to the next cubicle and take the funny looking lamp shade. (This seems an odd thing to have in the Tower of London.) Finish up in the dormitory by removing the key to the cloakroom from a table and borrowing a book about cannon ammunition.
Now that you have the key, enter the cloak room and get the key to the storeroom in this area. You will need to solve a bunch of puzzles leading to the end of the game.
Clues from the Cloakroom
Start by reading the note from the sergeant:: warder #1 and warder #3 have had difficulty getting along with each other lately. You’ll also find a piece of tartan most likely form a Scottish kilt hanging out one of the lockers. The presence of a step stool suggests one of the guards is short. Identify Schick’s locker by locating green paint and Kirkpatrick’s locker by locating mustache hair.
You find another guard in a conscious state in this room. He will not be awake for much longer, so you might want to see what information you can get from him before he’s unavailable.
The Locker Puzzle
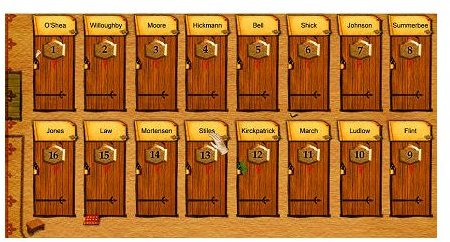
Holmes finds out that Johnson is the short guard who has the 16th locker. 15 is Law’s locker, March’s and Murdoch’s Locker are close together. The sergeant gets locker #1. Place the names in this order
- O’shea
- Willoughsby
- Moore
- Hickman
- Bell
- Schick
- Johnson
- Summerbee
- Jones
- Law
- Morrison
- Stiles
- Kirkpatrick
- Marich
- Ludlow
- Flint
Open up Stiles’s locker and take the contents of the locker from it.
The Cook’s Apartment
Use the map to return to the storeroom you visited earlier. Take a left turn to find the cook’s apartment. You need to get a small cake mold, a nutcracker, a string and a waxed doily from this room.
Johnson’s Locker
If you were performing the next act on the parliament building, the British might have had a holiday celebrating you. Good thing the wardens are all getting fourty winks. You are going to use the items in your inventory to make a bomb. Combine the cartridges with the nutcracker to get gunpowder. Combine the gumpowder, the string, and the waxed doily to make a bomb. Use it to force Johnson’s locker open. You’ll need to use your matches to light the fuse, by the way. Take the key to the storeroom and the haggis. (How many people really want to know what this is used for?)
Meet Chief Warder Smith
You have deduced that the man is in the storeroom. Now it is time to use the key you have. You will find the warder unconscious in the cold room. While the lower temperature may slow down body temperatures, he probably cannot survive prolonged exposure to this area. Take the bucket of water and pour it on his head. This should wake him up.
Smith seems to be more lucky than some of his compatriots. Lupin used a blow to the head to knock him out. Listen to his story about tomatoes making the other guards sick and then the doctor giving them an injection. The doctor’s name by the way is Dr. Paul Sernine and Holmes asks Watson what this name reveals. It is of course, another anagram for Arsene Lupin.
Get the key to the flask and the key to the weapons room. Take the 4 ounce flask from this room.
Finding Out How to Open the Crown Jewel Room
Chief Warder Smith awaits you in the storeroom. Jump to this location if you have not done so already. Smith does tell you that you will probably need a cannon to gain entry into the area where Lupin is working. Good thing you have all that information about cannons, and their ammunition. Give Smith the nail file. When Holmes asks for a scarf it will appear in your inventory. Go to the scaffolding near the Wakefield Tower. You need to burn down the rope.
Making Two Hot Air Balloons
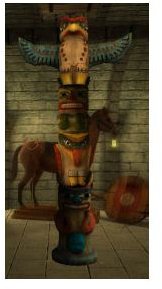
Open your inventory , combine the helmet stand you just took with the rather bizarre haggis to get the first air balloon. The dish and the string combine to make dish with string. This, for some reason, makes the base of a hot air balloon. Use the string on the cake mold to get a cake mold with string. Combine the items with with the string to make the baskets for two hot air balloons.
The pieces of the wood allow you to make two hot air balloons with a splint, but they are not yet ready for prime time. Use the flask of oil on them and then tie them together with a scarf. Use the mini-map to get to the Green tower. Go to the area where the rope is and launch your new found hot air balloons. The fire passes near the rope. The rope does not collapse, but it probably will not be able to support the same amount of weight that it originally did.
Preparing the Cannon
Use the mini-map to go to the white tower. Talk to the warders who should not be here. The game reveals a cut scene that shows what is happening at Big Ben.
Take the follow items from the arsenal:
- lid of the crate
- 44 oz billycan
- 2.8 oz glass
- 2.5 diameter cannonball
- small barrel of gunpowder
Stopping Lupin

Holmes needs to make a small stop in the queen’s dormitory. Look around for the skates. Use the screwdriver on them to get the wheels from them. When you finish in the queen’s room, return to the weapon’s room.
The first thing you need to get are the cannon cartridges. When you have these in your inventory, open the inventory screen. Combine the skate wheels, the board, and the screw to get the board on wheels. Place this underneath the middle of the cannon. The goal is to move the cannon into the firing position in the middle of the steps. When you get to the bottom of the steps, look for the sleeping guard. Use the screwdriver in your inventory on the hinges of the door. The door drops down and you can move the cannon into the middle of the stairs. The cannon is now in firing position.
Load and Fire the Cannon
You need 478 cubic centimeters of powder for the caliber you have chosen to use. Fill the powder bag with 1 charge of 250 centimeters and 19 charges of 12 cubic centimeters. There are other solutions that will give you the correct amount if you want to experiment with them.
When the powder charge is ready, place the powder in the cannon, place the ball in the cannon, and then use the matches in the inventory to light them. Congratulations, you have beaten the game! But Holmes and Arsene Lupin have not proven who is superior, they have only proven that they are equals.
This post is part of the series: Sherlock Holmes Versus Arsene Lupin Walkthrough (Nemesis)
Figure out how to outwit French Master theif Arsene Lupin in this adventure involving Sherlock Holmes.