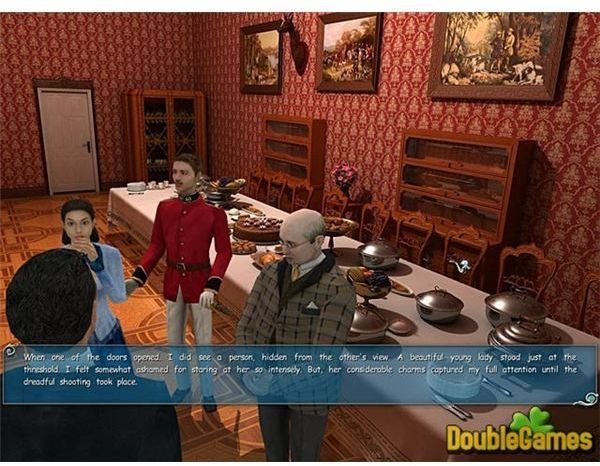
Watson has been having a recurring dream in his room at 221B Baker Street. Unknown to Watson, this nightmare will cause Holmes to come up against something darker and far more sinister than he has ever faced
London, September 1894
Watson’s nightmare will wake Holmes up. The only thing the famous detective needs from his apartment right now is a book of matches and a knife. As keeping up on current events is vital for anyone, Holmes needs to talk to the newspaper boy passing by Baker Street at the time. The tale he relates about the Scandinavian princess visiting London can be ignored for the most part, but the newspaper article should be read.
The greatest detective and one of the world’s foremost intellectuals will most likely find the news about a new bookstore opening near his domicile intriguing. The smart player will go to the Barnes bookstore and pick up two books. The subjects deal with Desperate Pirates and Undersea Fauna. Walk out of the bookstore.
The astute player will notice that they have not been confronted with a mystery to solve yet. Naturally, as the world’s greatest detective, Holmes will soon be confronted with something for him to solve. When heading back to Baker Street, he meets his friend and adventuring companion, the well-known Dr. Watson.
The Mystery Unfolds
Watson will stop Holmes on the way back to the lodgings that they share. The street name does not matter much, but more important is the matter of Watson’s patient, one Captain Stenwick. One of his servents, an islander from Maori has disappeared recently and he needs Holmes’s help to find him.
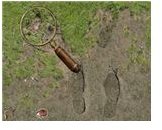
Talk to Watson, the police inspector and Captain Stenwick to get valuable clues regarding the Maori servant’s disappearance. Go around to the shed where the servant lived. Pick up a piece of cloth hanging from the nail, note strange pictures on the wall, take a ball from the hut and most importantly follow the footprints to see what happened to Stenwick’s wayward employee. Use the magnifying glass to find a fish scale and pick it up.
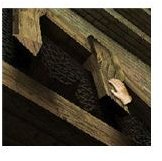
Follow the footprints on the ground. They lead to a gate that Holmes chooses not to enter at this time. Near the gate, however, is a ladder which will come in handy for finding the last and final clue. Ascend the ladder and pick up the piece of fiber.
Analyze the Data
Holmes and Watson have found all the clues needed at Captain Stenwick’s House. Using his analytical powers, the great detective determines that the servant has been kidnapped by a large man and one man of Indian descent. Holmes will return to Baker street and use his lab.
Pickp up the solvent and other items from the table Place the opium bal under the microscope.Cut it and find that it contains mustard seeds. Place the cloth under the microscope and not what Holmes says. He says that the cloth was not dyed in England. Place the rope under the microscope. Use the tweezers to get fiber from it. Use a match to light the lamp Find out that the rope was on a coal burning vessel that runs in fresh water Click on the lamp to finish the analysis
Dr. Watson Takes Control
After Holmes completes his analysis, the player will take control of Dr. Watson, who has been sent on an errand by his longtime friend. Leave Baker Street and talk to the newspaper boy. Note the information that he provides and then go to Barne’s Book store again. Watson will be directed to a nearby table where a book on the Maori can be found. The user has completed his shopping trip and must return to 221B Baker Street, where he will be quizzed by Holmes. When prompted to anser the question, the user must type in “Thames”, “docks” or “wharf.”
Investigating the Docks
Watson and Holmes are now on the trail of the kidnappers. When you reach the docks, the London night will be chilly and foggy. Go outside on the street and click on the cab with the horse. Use the map to go to the docks.
It is not a warm night in London when they arrive, and Watson does not think exposure to the cold air is what he or the great detective need. As luck would have it, there is a pub not far from their drop off point. Enter this pub. The Cursed Mermaid contains a drunken inhabitant and a bartender. The drunk will tell a story about a missing hook. Holmes engages the bartender in a dialog, but gains little useful information from it. He will learn of a sailor with an anchor on the front of his house, not far from the pub.
The player will find the house in the dock area farily easy if he just follows the road out of the pub. The door will be locked, however. Get the rope from the top of the sacks beside it. Note the young boy will be seen staring out the window. Enter this house and find out that a Nepalese family lives here. Sherlock is familiar with this dialect, and a conversation proceeds in Nepalese. The woman’s son has been kidnapped by a man with a silver eye. You will be allowed to take anything from the shrine that might help you locate her missing son. Walk over to the dresser where the shrine has been set up and take an odd looking medallion from it.
Go out of the shrine. A postman will stagger in from the street. As strange as it may seem, he did not go on his drinking binge voluntarily. A gang of young toughs mugged him down and forced him to try a new brew. The postman then gives you the bottle, which is placed into your inventory.
Not far from the ill postman is a warehouse with a green door. This door is locked, but on the way to it, there will be a smuggler hide out. Take the bottle out of your inventory and knock on the door. The smugglers will give you some information and attempt to sell you moonshine before closing the door. You will be given a package when the conversation ends.
Select the pelican pendant in your inventory and knock on the door again and the smugglers will give you information that will lead you to the missing child. Once this is done go back to the warehouse and find the locked door. Above the door is a broken window. Note this for now and go back to the cursed mermaid. Talk to the bartender and find out about Dusty Sammon, the man with the silver eye who fits the earlier description. The bartender will tell you to about a table he used and visited. Go examine the table and look at the carvings on the top.
Now, remember the man with the hook hand? That hook won’t be there for long, and it will be needed to get into the warehouse. Open the inventory screen and combine the package with the knife. The package will open and reveal a prosthetic hand. Talk to the drunk again. He will place his hook on the counter. Pick up the hook and open the inventory screen again. Combine the hook and the rope. You can open the map to travel to the warehouse or walk there if you desire. Use the hook on the broken window above the doors. Control will pass to Dr. Watson. Watson must go around the building to the right and find a dirty window in a dark alleyway.
A mini-game will start when the window has been cleared off. The object is to hook the lock on the floor and use it to unbar the door. The controls are difficult but you should be able to figure them out with a little experimentation. Once the door has been locked, enter the warehouse.
Investigating the Warehouse on the Thames
You will need to collect several items from the warehouse. The first one is an iron bar.The iron bar will be used to open two nearby chests. One contains sails, but the other contains a lantern. Take the lantern out of the chest. Examine the area near the chest and pick up an American passport with a peculiar drawing and a hat pin that has been bloodied.
The astute player will notice the footsteps leading to an iron trap door. The door can not be opened at this time, but in the room is a pully and a cauldron. On the far right side of the warehouse is a faucet. The cauldron must be moved underneath the spigot and the faucet turned on. When the cauldron has been filled, it must be moved to the area underneath the pulley.
How you will accomplish this task depends on whether or not the remastered version is loaded on your computer. In the remastered version, the cauldron must be physically pushed underneath the pulley. Ascend the planks, click on the rope and then move the cauldron to tie the rope to the cauldron. Go back to the trap door, click on the other end of the rope and then click on the trap door to secure the other end. Go back up the planks and use the knife to cut the rope. Holmes will hear screams from down below. Select the lantern in your inventory and desced the stairs.
Sherlock Holmes and the Temple of Doom
You will follow the dark path into the temple until you come to room with a pedestal on the center and a door with two panels on either
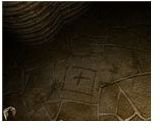
side. Each panel has three buttons. Click on the pedestal to see the drawings on the wall. The drawings correspond to the strange markings Holmes saw at the table back at the Cursed Mermaid.
The door panels must be pressed in the order below. Left - Middle Right Glyph Right - Top Glyph Right - Bottom Glyph Left - Top Glph The door opens when the panels are pressed in the correct order. The player needs to pick up the following things from inside the temple: coal near the beds, an advertisement from the shirt on the floor and a box containing an Edelweiss on a workbench near the far end of the temple. At the far end of the temple entrance is another set of stairs where a body lies. Holmes must examine the body. The areas that will show up are the neck, the right hand, and the left hand. The right hand contains traces of coal dust, and the middle finger of the left hand bears a pin prick that was used to make the drawing of Cthulhu on the passport. Pick up the small statue of Cthulhu on the floor near the altar. Select the advertisement from the inventory. Left click on the platform on one side of the wall and the advertisement will be placed upon it. Select the coal from your inventory and trace the drawing. Holmes will use his amazing powers of deduction to figure out what happened to the man and then the game will use a cut screen that looks like something out of movie Aliens.
Holmes’s Second Analysis in London
This analysis is fairly simple compared to the first. Holmes will go back to Baker Street and send a letter to his brother Mycroft. When that is done head to Holmes’s desk. Open the inventory screen and use the knife on the metal box to obtain a white powder. Place the opiate under the microscope and select the tweezers to pick out the seeds. Place the seeds on the strange looking apparatus to find out that they contain the same type of opium found at Stenwick’s house.
Holmes deduces that large quantities of opium have been used, but that it would be difficult to bring such a large amount into England. Watson’s medical experience gives you the information that medical academies in England and Europe have an arrangement that allows large quantities to be transferred in for use by hospitals and other medical establishment. If the logo on the crates where the opium was shipped can be found, they can figure out where the opium came from.
Finding Out Where the Opium in London Came From
Holmes’s adventure in London is almost done, but he must return to the docks one more time. After you complete the analysis, Holmes will urge his comrade, Dr. Watson to make haste. Although the duo has not yet had their tea, Watson acknowledges the importance. Open the map and head to the Wharf.
The drunken patron in the Cursed Mermaid has left, but the bartender has information that Holmes needs to help crack the case. He will tell you that a man named Beddoe is often found near the docks this time of day. Go to the nepalese house and enter the building marked customs. Beddoe is not there but a ledger and a note will be found there. The note will tell you that you need to go to Warehouse 16. Click on the map or travel to Warehouse 16.
The doors say that the factory is closed due to a general strike. Click on the door to find out that it cannot be opened. Pan the camera angle down to look at the foot prints on the door. You can measure them and examine them to find out that they are the same size as the ones found outside of Stenwick’s house, and in fact, come from the same shoe. Follow the footprints until they lead to the door. Open the door and pick up the scrap of paper. Holmes will quiz you again about where you should go next. Players who want a hint should realize that the Alps are nice this time of year, but everyone else probably just types in Switzerland and presses the enter key.
Resources
Gameboomers.com
Sherlock Holmes: the Awakened – Screenshots
Personal Experience
This post is part of the series: Sherlock Holmes the Awakened Wlaktrhough
Find out if the powers of the rational mind can stand up against represantives of irrational fear in this game from Focus Home Interactive and Frogwares Development studios. This part of the Sherlock Holmes the Awakend Walkthrough will take you through his adventures in London.
- Watson’s Nightmare Puts Holmes on the Case
- Sherlock Holmes the Awakened Walkthrough – Investigating the Cthulhu Cult near the Thames (Part 2 of 5)
- Sherlock Holmes the Awakened Walkthrough – Part 3 of 5 – Encountering the Cthulhu Cult in New Orleans
- Sherlock Holmes the Awakened Walkthrough – Part 4 of 5 – Fighting the Cthulhu Cult in Scotland
- Sherlock Holmes: Confronting the Cthulhu Cult in Scotland