Holmes and Watson have traced down the source of the opium coming into London in large quantities. They have also picked up a mysterious statue that looks like an octopus with wings. They have followed the trail to Switzerland, and this section covers the Black Edelweiss Institute.
An Interlude on the Victorian Era Train
Holmes and Dr. Watson more than likely used a boat to cross the English channel. The train ride reveals that Holmes will be leaving Watson to take care of some business in Lyon. Watson is expected to proceed to the Black Edelweiss Academy himself. When the conversation ends, the game will zoom in on the statue beside the doctor and then will be replaced by a carriage making its way slowly up a mountain in the Alps.
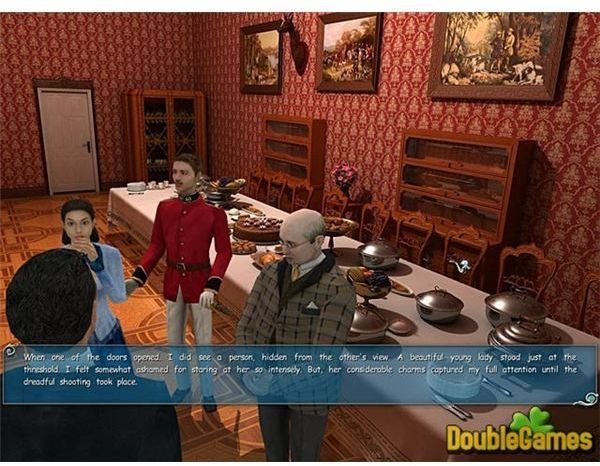
You will be controlling Waston as you enter the academy. A brusk man tells you that you need to talk to the woman behind a counter. Before arriving there, a girl will be brought out to her parents who are waiting to see her. Talk to the woman, who will then bring out Dr. Gygax. Shortly after, a man will walk into the academy claiming to be Amos Colby. Watson lets the people know that the man is an obvious fraud and then is quickly shown the door.
When Watson leaves and Colby gets diagnosed with paranoia, the woman who is being visited by her parents starts screaming.
Holmes may have faked his death in Switzerland in the Arthur Conan Doyle tales, but in order to investigate the Cthulhu cult and to see if the London kidnappers have any accomplices, he has arranged for his abduction. The fake Colby will be captured by the agents of the asylum and taken into the treatment room with the girl from the previous scene. Take a syringe and the sedative from the table. Mix the syringe with the water. The screen will black out and you will wake up in a cell next to a drunk man.
Holmes has a topcoat, a hat, and a hairpiece in his inventory. Use the topcoat and hat to make it look like two people are still in the cell. Take the spoon and the metal tin from the room. Use the spoon on the door and a puzzle will come up to pick the lock.
The puzzle consists of ten numbers arranged on a row and four rows in which to place the numbers. The numbers must be arranged on the cylinder from one to ten in order. Here is solution that works:
1st Row- 2
2nd Row – 7,6,5,4
3rd Row 10,9,8
4th Row - 3
The one will be left on the bar. Exit the cell.
Exploring the Black Edelweiss
Holmes is now free in the sanitarium. The sedative remains in the inventory, but you will need to find something to inject it into the guard that will come out later. Go out the door to the right then take two lefts to find Dr. Gygax’s Lab. (One wonders if this is a reference to the late creator of Dungeons and Dragons.) Pick up the syringes and then go back out to the cells, get accosted by a man named Maruzzio. Listen to his tale about a hidden key and a stored crowbar in a maintenance room.
Go into the labratory, crouch down and pick up the syringes. Be careful not to be spotted by the nurse. Go back out of the room until Maruzzio starts screaming at you.
In the maintenance room, pick up the crowbar, the anvil and the calipers. Use the calipers to measure the iron bars and pick up the 16 mm bar. Combine the bars with the syringes to make a blow gun, which will be used later. Go back to Maruzzio’s cell, select the crowbar from the inventory and talk to him again. Maruzzio will open the door and cause a diversion. Go up the stairs to the work room and find the keys on the floor. Use the spoon on the cabinet and get a white coat. Go back downstairs and go back to the work room. Equip the blow pipe and knockout the nurse. In the remastered version, these pieces cannot be picked up until they are needed.
Go back up to the workroom. Take the keys from the floor and use the spoon on the cabinet to take out a white coat. Go outside into the aviary, where two conversations will take place that do not make much sense at this time. You will need to free the birds later. Go back out and see the sign that says Frau Muller. You cannot go into this room at the moment. Go back downstairs and into the labratory. Before leaving the aviary go over to the fountain and fill the empty meal tin withwater.
Go to the door outside of the labratory, select the blow gun from equipment and walk into the room. It is not necessary to crouch this time, as Holmes will use the blow gun to knock out the guard. Go into his work area, take the bottle with the Black Edelweiss. Search the unconscious guard and find a note from Dr. Gygax. Look at the pink crystals. (You cannot take these yet in the remastered version.) Combine the crystals with water. Look at the ledger and take the letter from underneath it. At the far end of the hallway are two containers, containing potash. You will need these to make a smoking device later.
Holmes Checks on the Ohter Asylum Inmates
Go back to Holme’s Cell and go to the left of it. Open the door and talk to the woman in one of the cells twice to find out that she is looking for someone named Heid.
As if the hints of a Chtuhlu cult abducting people in London were not enough cause for worry, the great detective must now enter the Gates of Hell . Fortunately, this is not a literal description of where he must go, but rather another part of the asylum. The patients that have been deemed the most dangerous have been placed in the area past the cell door from the maintenance room. Open the door (select the keys from the inventory if you have not been here before) and walk through it. There may be a guard wondering through the area. If you are caught by this guard, the game ends, so this is a good save point. Sneak around carefully until you find the cell where Becker has been improsoned. (He will be wearing a straightjacket.)
He will mention something about pink crystals. If you have combined them with the water, give them to him. If not, go back to the labratory and repeat the sneaking process. Then Becker will tell you that another patient who goes by the name of Gerda hid the keys in a doll named Heidi. Heidi, happens to be nothing more than the doll in the labratory. Go back to the labratory and pick the doll off the table, go back to Gerda and give her the doll. The woman will tell a story that sounds like something out of the Green Mile, but when the conversation is over, she will give you another key. This will give you access to Fraulein Muller’s room and the rest of the academy.
Continue the Asylum Search
Go back upstairs and locate Fraulein Muller’s room. (There is a sign above it for people who cannot remember where it is.) Select the key from the inventory to unlock it. Do not worry about violating the woman’s privacy and go through her belongings for anything that might help Holmes unravel the mystery that he faces. Pick up the macrame pot holder, the bottle, paper, spectacles and most importantly the key to the aviary cage from her room. Walk back out into the well lighted restful room and open the bird cage. The nurses and guards will now be too busy chasing after birds to chase after a wayward patient.
After the birds are released, the next step is to go to the kitchen. Frau Mayer presents the next obstacle, but pay attention to the comments Holmes makes about causing the staff to think that there’s a fire. Go back to the fountain in the aviary to fill the bottle with water and then go downstairs to the labratory. The area with the sleeping nurse contains the potash and the bottles of chlorine. Use the meal tin filled with water on the potash.
Take the chlorine from the shelves. The laboratory contains a scale that will be useful in measuring out the precise amount of potash to mix with water and chlorine. Go back out to use the scale in the labratory. Place the meal tin upon it. Then place the bottle of water on it, and then the bottle of chlorine. Mix the water with the chlorine, then mix the bottle of water with chlorine with the potash, taking them from the containers. Walk Holmes back up stairs as the proud new owner of a smoking device. Select the smoking device from inventory and place it in the kitchen. Wait for chaos to ensue as the staff starts yelling that there’s a fire. The items you will need from the asylum’s kitchen are a truss and a note on the table that reveals the sequence in which the bells need to be rung to call the lift to Doctor Gygax’s office.
Entry into the Second Basement
Before descending down the stairs, Holmes needs to talk to Becker once again. The asylum inmate will tell the tale of foreigners with strange dialects descending to the depths below. The men do not suffer from any signs of mental illness and come and go from the lower levels. Now that the game is afoot, go to the hallway and descend down the stairs. The Gates of Hell,as it turns out are not guarded by a demon, but rather by two levers. You cannot proceed into the next area unless both levers are held down. Go back to the maintenance room and pick up the anvil. Go back past the maintenance room and get the rolling trolley not far from Becker’s cell. Go back to the levers. Use the pot holder, anvil, truss and trolleys to hold down both levers at the same time. Walk down the stairs and the real investigation can begin.
Uncovering the Nature of the Cthulhu Cult’s Experiments
The first person that Holmes will encounter is another patient in a straitjacket that goes by the name of Wolff. Wolff may be amazing, but he will not talk to you right now. Instead, he maintains that he will only talk to a Professor Schwartz. Note a sign pointing to Dr. Gygax’s office and head forth towards the disposal hole.
Clicking on the disposal hole will reveal another lock similar to the one in Holmes’s Cell. The number must be arranged in ascending order again, but the solution is different. The door will open to reveal a site not meant for mortal eyes. More important than further evidence of the Cthulhu cult, is the key to the good doctor’s office. Pick it up where it lays on the nearby floor.
Proceed to the head Doctor’s office, and use the key in the inventory to open the door. Holmes will need the poker, Wolff’s medical records that come complete with a photo of Professor Schwartz, a classroom key, a handwritten note, and a telegram which will all provide valuable clues as to what has been going on. The documents reveal that the cult has connections in the city of New Orleans.
In the room is cabinet, use the poker on this cabinet to enter the room where the gruesome experiments have been carried out on unwilling patients.
Who is the One?
An old man will be found in the secret room will recite a poem and then you will be given a brief quiz. This is not difficult as the answer is the one. Unfortunately, the crazy old hermit will start screaming about how the Great One is coming. This will alert the guards and if Holmes does not escape soon, he will be captured.
Go back out to Dr. Gygax’s office quickly. Note the pull. Pull the short rope 3 times and the long rope once. (If you need to check before hand, there is a document in your inventory that contains the exact sequence.) The lift will be lowered and you should climb up it. Use the lift to get safely get away from the nurses of the Black Edelweiss institute.
Holmes Makes His Escape
After getting off the lift, go to the right and find the unlabeled cell. This cell contains none other than Holmes’ nemesis, Professor Moriarty, who tangled with the detective at Reichenbach Falls. Use the spin to open the lock on the cell. The staff knows there is an intruder on the premises. The memories of the intruder, according to Dr. Gygax, need to be removed. The nurses are searching for Holmes. Thinking quickly, the great detective urges Moriarty to remember his nemesis. The Professor will start chasing after the nurses allowing you to aid Holmes in making his bold escape.
You need to go foward, right, up the stairs, and left. Here you will take the topcoat and hat. Use these items and the headpiece to resume the guise of Amos Colby, a detective from the Northwood Agency. Use the door to make the exit and be greeted by Doctor Watson and a Superintendent from the local Swiss constabulary. The adventures in the Asylum are over and now the duo takes the train. While on the train, you will be quizzed again about where to pursue the investigation next. The answer is New Orleans.
While this guide will extend into a second part, the author would like to take the time to give thanks to certain parties in the grand tradition of many walkthroughs. He would like to thank Arthur Conan Doyle and H.P. Lovecraft for giving us the tales that are intertwined in this game; he would like to thanks the Elder Gods for expelling Cthulhu and the Great Old Ones from the Earth; Frogwars Development Studios for giving us this game; and lastly he would like to thank the reader for reading this so far.
Sources:
Gameboomer’s The Awakened Walktrhough
Softpedia’s The Awakened Walkthrough
This post is part of the series: Sherlock Holmes the Awakened Wlaktrhough
Find out if the powers of the rational mind can stand up against represantives of irrational fear in this game from Focus Home Interactive and Frogwares Development studios. This part of the Sherlock Holmes the Awakend Walkthrough will take you through his adventures in London.
- Watson’s Nightmare Puts Holmes on the Case
- Sherlock Holmes the Awakened Walkthrough – Investigating the Cthulhu Cult near the Thames (Part 2 of 5)
- Sherlock Holmes the Awakened Walkthrough – Part 3 of 5 – Encountering the Cthulhu Cult in New Orleans
- Sherlock Holmes the Awakened Walkthrough – Part 4 of 5 – Fighting the Cthulhu Cult in Scotland
- Sherlock Holmes: Confronting the Cthulhu Cult in Scotland