This is part 2 of the Overlord 2 walkthrough series for the Xbox 360. It is filled with spoilers describe detailed information about the Elven Sanctuary, finding the Red Hive along with the other creatures and obstacles you will encounter.
The Elven Sanctuary
**
Stuff to look out for in this section: Spell Stone, Minion Stone, Brown minion gate, gnome side mission
Walk into the cave. You will notice that Borius (Nordberg’s town mayor) has taken the Spell Stone. This is an item you need in order to build your Tower. Not too far away is a “possession stone” which is inactive at this point. This will allow you to take possession of one of your minions so you can walk around into smaller areas that you normally cannot reach and a brown minion portal. Before you can take the stone, you need to take out some gnomes. You will now have a new side mission to kill off 1000 gnomes. However, will not be able to complete this during this part of the game.
Nearby is the Spell Stone, but you will need a portal so you can take it into the Netherworld. Look out for a wooden bridge. Have your minions carry the Spell Stone and follow you. You are officially in the outskirts of Nordberg and you will soon see the portal where you transport your spell stone. Put it in. A new quest is now triggered that will ask you to subdue and kill some local peasants. First, subdue 3 peasants. With your Xbox 360 controller, target them with LT. Make sure you are close to them and use the X button. Press it until the peasant falls to their knees. If they run, you can target the peasant and have your minions hold them by directing them to your target. After you get 3 subdued, you need to kill 3 of them. This is the part in Overlord 2 that lets you know you have two paths you can take, chaos or tyranny.
Now, backtrack across the bridge again and continue to go north. You will find an area that has a special minion stone and some gnome dwellings. Kill off any gnomes and grab the item (which will increase your minion number to twenty). Carry it back to the portal. Then put your minions back into their own portal (LT the portal, then RT the minions in). Then go through the netherworld portal to leave this area.
A Nordbergian Seeks an Audience
This is your next mission. (All new missions and tasks can be found in the Throne interface while you are in the Netherworld). The Nordbergian is a power seeking peasant who wants you to make him mayor of Nordberg. Accept the mission since you need to go to Nordberg because the empire is seeking to control it. As you may have observed in the end of the last mission, the pathway to Nordberg is blocked by fire barriers. So to be successful, you will first need to go to the Elven Sanctuary and find the red minions who will be able to help.
When you arrive in Nordberg, get a bunch of brown minions from their portal near the netherworld gate. Avoid the fire barriers and travel north across the bridge. You will then encounter an elf. After this, use your map as a guide and head towards the area marked as a yellow triangle. It is not too far away. The sanctuary is located in a cave which has a minion gate next to it (just in case you didn’t pick up any before).
Elven Sanctuary – The Possession Stone
Stuff to look out for in this section: Possession stone, Dryad
When you arrive at this point in the Overlord 2 walkthrough, you will see a brown minion portal and a possession stone (Netherworld shard). Examine it by targeting your minions towards it. A bunch of them will go inside the shard, one will be singled out for possession and the rest will dance around it. Next, press your X button on your Xbox 360 controller to use your magic to activate it. You are now in minion form!
While in this form, look for the exclamation point on the map. Not too far away from you is a Dryad that you cannot reach directly because she is protected by a magic barrier. Look at the area close by it and you will see a narrow pathway that you are now able to walk through. Go into this area and you will be able to sneak up on the Dryad and attack her with your minions. She will not die right away but will become weakened. When you notice this, you will now be able to target the plants that she is using to help her create a magical barrier. Take these out and her magic is destroyed. You can now kill her. The pathway will open up and you will be able to go into a new area.
Transform yourself back into the Overlord by pressing and holding the X button on your Xbox 360 controller for a couple seconds. You will be back at the possession stone. Call your minions back and go through the pathway that was previously blocked by the Dryad.
Continue this Overlord 2 walkthrough on page 2.
The Elven Sanctuary - Fairies, Red Minions and more Dryads

Continuing from page one of the Overlord II walkthrough, explore the area and you will run into some fairies that can put a love spell on your minions. If they target them, the minions will be in a love sick daze. Either avoid them or take them out with your Overlord. You will then run into a second Dryad, but you will be unable to kill her at this point since she is protected by magic flower plants that keep regenerating her. You will need the red minions. So avoid her and go down a pathway that is a bit slippery and takes you to a lower area. You will encounter some watery areas and some gnomes. Brown minions cannot swim so guide them across a fallen tree branch to get them across. Unfortunately, you will not be able to take them too far in this area temporarily. You will get to a spot where there is no pathway for the brown minions to cross without drowning. There is a brown minion gate nearby, so put them back into the portal and continue without them for now.
Continue your search for the red minions. Soon you will run into some who will join you. You will need them to help you find and obtain the red minion hive. You can target obstructions blocking your path (like thorny bushes and such) and direct the minions to set fire to them. Keep moving forward, you will run into some more fairies and will find a wooden elevator that will take you up into another area. Walk into it with you minions and it will take you up.
You are now back to the second Dryad you could not get past before. Use a guard marker (press the Y button on your Xbox 360 controller) in a position away from the magic flower plants that are protecting the Dryad. They will send fire balls and burn them up from a distance. (Reds are not strong fighters so don’t send them in too close).
Finding the Red Hive
Stuff to look out for in this section: Elven Harp, Red Minion Hive, Netherworld portal
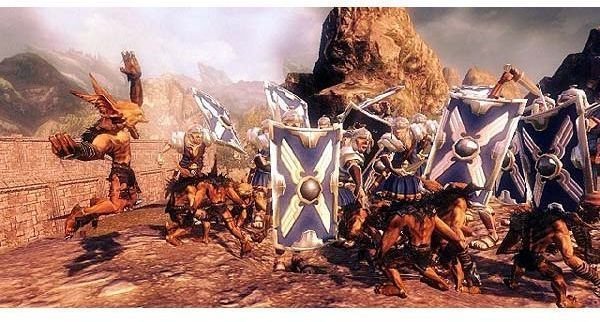
Just past the Dryads, you will run into some elves. Fortunately, there is now a brown minion gate available for you. Get a bunch of browns and take out the elves with them, keeping the reds from getting too close.
You will then find another wooden elevator that will lead you to another area. This seems to be an elven village of some sort. You will encounter more elves that will attack and elven peasants who may run away. Explore the area for treasure chests, health/mana potions and items for your minions. You will then see an Elven Harp which you will want to take. There is a Netherworld portal nearby but you will need to clear the pathway so your minions can carry the harp to it. Sweep your minions around and destroy any obstructing objects and collecting any gold you come across. Then target the elven harp and have your minions carry it to the netherworld gate.
After this you will continue exploring and will encounter another possession stone. You will again use it to transform yourself into a minion. Nearby the stone is a small pathway that leads down into an area with another wooden elevator. Walk town the path with your minions and take the elevator up. Get off of it and transform yourself back into the Overlord. Now you can walk back to the elevator and take it back down again.
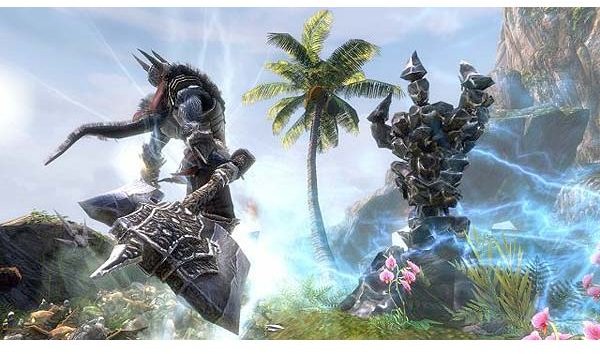
Explore this new area encountering elves and stuff until you see a couple more Dryads. Target them with your Xbox 360 controller and have your red minions weaken them. Then move around them and take out the flower plants that are giving the Dryad magic protection and creating a barrier. Then kill the Dryads. Now that the magic barrier is gone, new obstacles are there for you to get by. First destroy some thorny bushy with your fire minions. Then attack the pillared structure until a large crystal appears. Destroy it and you will see a magical stone you can pick up that will increase the overlord’s mana capacity. Have your minions pick it up and continue moving forward where you will see the red minion hive and a netherworld portal. Your path is blocked by another barrier that needs your red minions. Get past the obstruction then take the mana stone and the red minion hive through the portal.
This ends part 2 of the Overlord II walkthrough . Now that you have the Red hive, you can now go back to the Nordberg town and conquer it.
Sample contents.
This post is part of the series: Overlord II Walkthrough
The Overlord II walkthrough is a eight part series that will guide players through sections of the game. It will highlight important tasks, items and creatures you will encounter. Be aware, this guide is full of spoilers! Use it to help you get through difficult areas and find specific items.
- Overlord 2 Guide - A Tormented Childhood Beginning in Nordberg
- Guide to Overlord 2 - The Elven Sanctuary and Finding the Red Hive
- Overlord 2 : Guide to Nordberg Town and Beyond
- Overlord 2 Guide and Walkthrough: Part 4 - The Journey to Everlight
- Walkthrough Guide to The Everlight Jungle and Facility in Overlord 2
- Finding and Defeating the Everlight Temple: Part 6
- Completing The Everlight Town in Overlord 2: Part 7
- Part 8: Getting Past the Empire Heartland Port Entrance in Overlord 2.