In this part of the Castlevania Lords of Shadow walkthrough, find out details and spoilers to help you defeat the Black Knight golem and get past the fairy door in the Three Towers section of the game.
Castlevania – Lords of Shadow Walkthrough – The Black Knight
At this point in the game, you will have just completed the battle with the titan in the Sanctuary of Titans. If not, review part 5 of this Castlevania Lords of Shadow walkthrough .
After a brief dialog, Claudia and Gabriel decide to go and get some rest for the night. Some time later Gabriel wakes up to find Claudia dead! Gabriel doesn’t know how this happens but someone wants him to think that he is responsible. The golem black knight is quite upset at Gabriel and a battle begins.
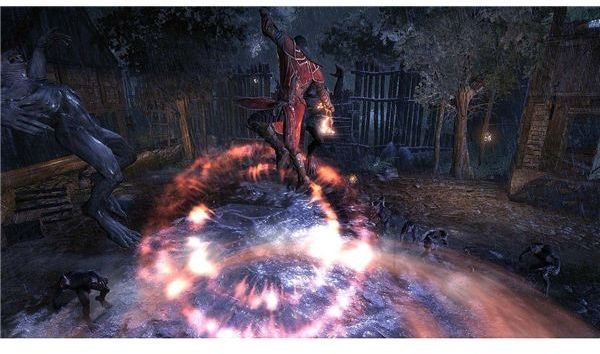
The black knight golem is a bit tough. His sweeping attacks do quite a bit of damage if you are hit. The knight also hits his sword on the ground which can also stun and damage. In the first phase of the battle, try to hit him with direct basic attacks and dodge to avoid taking damage. After the knight has taken some damage, he will begin producing tar like creatures that crawl on the ground to try and trap you. The tar does not damage you in any way, but if you do not get free quickly the knight will have a change to get some cheap shots on you.
At this point in the battle, a good attack to use is the guillotine. This is an advanced attack move that can be purchased in the game. Use it by pressing the X button to jump and then hold the square button. This move is very effective on the tar creatures, which will follow you around the battleground area. It is also useful on the black knight. As the knight takes damage, collect the neutral magic that drops off of him.
When the black knight is lower on life he will become stunned. Press the R2 button and the button that the game displays on screen. You will need to stun the knight twice. Repeat the above described action to completely finish this battle.
When the black knight is defeated, you will obtain the “black gauntlet” which is a useful item that can help you move large objects.
End of the chapter.
The Three Towers
When you arrive in the Three Tower section, you will see a large stone ahead of you. This will need to be moved by using the black gauntlet. Walk over to the large stone and press the L2 and then the square button. Pulling the stone causes a portion of the wall to break which allows you to jump over it.
On the other side, walk towards some stone steps where you will encounter some werewolves that you will need to fight. Deal with them and then use the neutral magic font that is located on the left side of this area. Collect magic for both the light and shadow magic. Climb over the wall behind the font to reach the area with the large stone. More werewolves to deal with! After this you will need to break this stone with the use of shadow magic. Activate the shadow magic by pressing the R3 button. Press the stone with the black gauntlet until it reaches the edge of a large gap.
At this point in the Castlevania Lords of Shadow walkthrough you should see a gripping point on the stone that you just pushed. Use it to jump across the gap. Walking forward, pick up a dark crystal shard and then jump across a small gap. Pick up the scroll from the corpse located there and walk to the right.
Carefully run and jump down to the platform below. Do this again with the next gap and jump up to a small ledge where Gabriel can hang onto. Climb your way across this area to a couple gripping points (R2) until you get to the top.
Castlevania Lords of Shadow Strategy Guide – The Fairies
Shortly after you escape the Three Towers section of the game, an animation appears. Shortly after this you will encounter a bunch of small werewolves. Fight them off. Some fairies will appear and help you complete this battle. Afterwards, you will receive the Fairy Container.
Go inside the doorway. Use the turnstile to open up the gate ahead that will lead you to another area. Inside here you will encounter a couple of werewolves to fight. Once they are defeated you will notice the door ahead. It can only be unlocked by obtaining three fairies.
To find the fairies, you will need to explore this area very carefully. From this area, go towards the path on the right. You will see a rope that only a Warg can climb. Go back the way you came and take the pathway to the left. In a small room you will encounter a Warg. Fight him until he is stunned. Take control over him by pressing the R2 button and then the square button when the white circle icon appears bold. Ride the Warg back to the rope area and climb up (X). Jump over a couple of gaps. Fight some more enemies. Strangle and dismount the Warg. Open the gate with the lever (R2 + the square button). At the next platform grab the gripping point to reach another area. Climb up until you reach a platform where a fairy stone is located. Collect the fairy from the stone.
Two more fairies are needed so you will need to continue exploring. At this point in the Castlevania Lords of Shadow strategy guide , move forward and you will see a neutral magic font. Use it. Climb down and jump down the cliff wall. You are now on the level where you used the Warg to climb up.
Exploring the area carefully, find the shadow and life gem. Nearby this is an area where you will see three magic runes on a wall. You will need to activate them in order to get into another area. Activate your light magic and press the rune on the left. Change to shadow magic and press the other two runes. Completing this task opens up a gripping point that can be accessed on the right side of this small room. Use the gripping point (R2) and swing across to another area. Walk around to find a loose lever on the ground. Place it in the slot against the wall in front of you. Fight off the werewolf that appears. Use the lever to open up an area to the left. Note: You will also use this lever to open up another area located to the right. Climb up some cliffs to reach a couple of gripping points. Once you reach the top you can obtain the second fairy that is located there.
Go back to the area with the lever. Pull it out and then walk to the right side where you will see a large gate. Place the lever in the door and open it. Grab the third fairy from this area and go back to towards the door where all the fairies will need to be placed.
The Fairy Door
As you head back to the entrance to the fairy door, you will encounter three vicious lycans. They attack as a group and can do a lot of damage if you are not careful. Carefully kill them off one by one with any fighting strategy that works for you. Once they are eliminated, you realize that the lever that opens the door to the fairy door is missing.
Look at the right side of the wall to see the lever glowing. Go over there. Press the R2 button and the button the game displays on screen. This will pull a portion of the wall apart so you can climb up and get inside. Once you are inside, press the R2 button to release the fairies into the door. You have reached the end of this level and this part of the Castlevania Lords of Shadow strategy guide.
*Screenshot images for this Castlevania Lords of Shadow walkthrough and guide were created by Sheila Robinson.
This post is part of the series: Castlevania Lords of Shadow - Walkthrough and Guide
Castlevania: Lords of Shadow is an action adventure game filled with multiple types of enemies, bosses, puzzles, magic and combat actions. This walkthrough guide will provide details and spoilers on different sections of the game.
- Castlevania - Lords of Shadow Walkthrough - The Beginning
- Castlevania - Lords of Shadow Walkthrough (Part 2)
- Castlevania Lords of Shadow Walkthrough (Part 3)
- Castlevania - Lords of Shadow Walkthrough (Part 4)
- Castlevania Lords of Shadow Walkthrough (Part 5)
- Castlevania Lords of Shadow Walkthrough - (Part 6)
- Castlevania Lords of Shadow Walkthrough (Part 7)
- Castlevania Lords of Shadow Walkthrough (Part 8)
- Castlevania Lords of Shadow Walkthrough (Part 9)
- Castlevania Lords of Shadow - The Castle Courtyard Walkthrough