We’re in a new place, but things aren’t exactly going well for us. We need to convince Redstone that we’re valuable, which means taking on a subway station full of mutants and setting off a whole lot of explosives in the process. If you need some help, just look inside.
Your First Steps in Subway Town
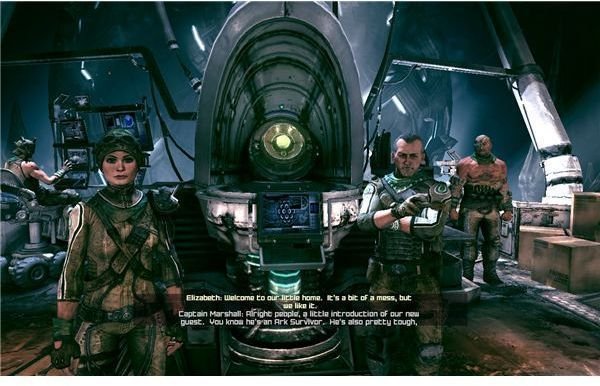
When you arrive, you’ll get to meet the little resistance movement. Talk to each of them after you regain control. In particular, talk to Lassard to get a new recipe. There’s also a collector card for the Authority Mutant lying next to the dead body in the medical wing.
When you’re ready, go down the tunnel and use the lift to reach the main station. Talk to Saul on your way out, and then move on up to talk to Redstone. He’s just up the steps and to the left. Go into the office to receive your first mission. We’ve got a lot of mutants to kill, it seems.
Agree to take it and go back down the steps. The directions he gives aren’t that good. The tunnel is near Fez’s Bar, but it’s to the left and under the stairs. Follow this tunnel to reach Foreman Joe and get the extra details. We don’t just need to kill a bunch of mutants, but it seems that we need to blow up a tunnel. If you have the money, you may want to go to Jane’s store and resupply. Make sure that you have a lot of buckshot. You’re going to need it. It’s also not a bad idea to get the schematics and equipment for a sentry bot, if you don’t have it already. It can come in very useful ahead.
When you’re ready to go, go to the garage and take your car out. You just have to drive and do a quick little turnaround to reach the nearby tunnel. Park the car and jump out, and then walk through the wrecked trains to reach the Blue Line Station.
Getting the TNT
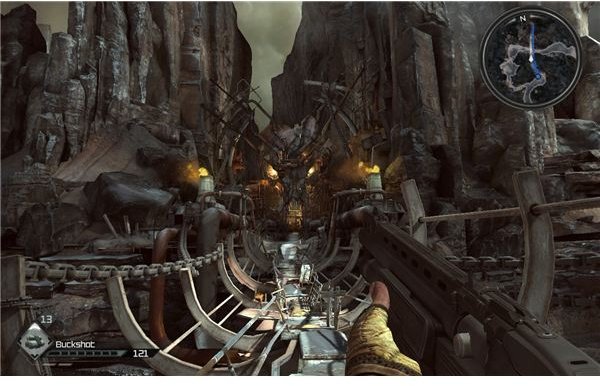
For starters, just move through the station. You’ll only run into mutants occasionally, and they’ll be by themselves for now. The bulk of the horde is trying to rush Subway Town, so they won’t care about you for a few minutes. As you walk through, you should see a big detonator. That’s going to be the end goal, but we’ve got a long way to walk before we reach it.
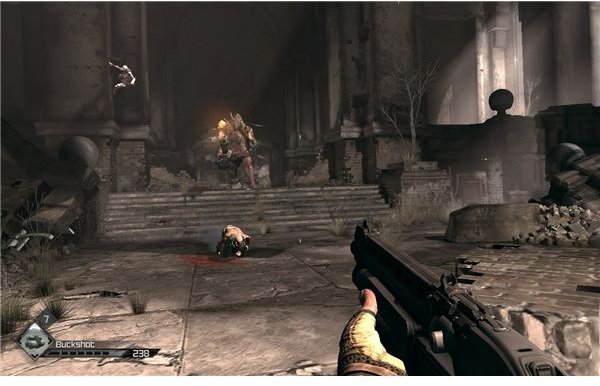
Walk forward and around, looting the bodies as you go, until you reach a big set of stairs. Ignore the mutants and walk up to the left to find a few dead guards next to a box full of TNT. Reload your weapon and grab the TNT, and then get ready to make a stand. The gate will crash down behind you, and you’ll get the attention of all of the mutants in the station.
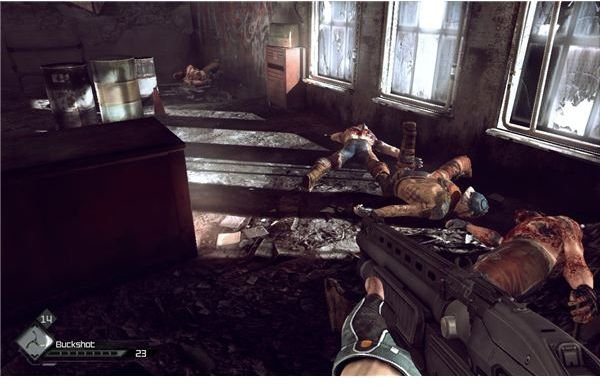
A shotgun will work alright. I actually had good luck using the assault rifle. Firing bursts from the hip is quite effective, although I mainly used it to burn off spare ammo. Most of the mutants will climb over the railing, which will give you a chance to blast them freely. If no one is attacking you, then aim over the edge and fire at the ones on the ground or the ones climbing up. After several waves, one will throw open the gate and charge in with a few others. Just turn and gun them down and take the path out.
Move down the steps and watch out for the mutants that still remain on the floor. Note that some of these mutants will be carrying lit dynamite, so be careful of standing around any bodies and watch your HUD for explosives warnings.. After you make it to the center, a mutant should kick open the door on the ticket booth. Kill him and take the new route into the booth. Loot the bodies and go out to the new section of hallway.
The Back Route
Again, there are a bunch of mutants, so just keep firing and moving. There are a few special annoyances though. Two scoop mutants will rain fire down on you. One is on the raised ramp and another is fairly hidden in the back left corner on a pile of wreckage. Give each of them a burst from your assault rifle to kill them, and then go up the ramp and around. You should reach a big central court.
I suggest that you get your shotgun out. The area will be absolutely flooded with mutants. Your only option is to keep moving. Don’t try to get into a corner, because they will just overrun you. Sprint around and keep your distance while you thin the herd.
After a large number have died, a large mutant will crash through the wall and start firing mortars at you. He’ll bring some normal mutants along too, so be ready to deal with them. Sprint from cover to cover to dodge the mortars, and work on killing the normal mutants that are with him.
Once the large mutant is alone, close the distance and start firing. Note that a shotgun blast to his exposed leg will stagger him and give you time to put buckshot or fatboys into his head. Do this trick, then retreat to cover. Rinse and repeat a few times and he should die.
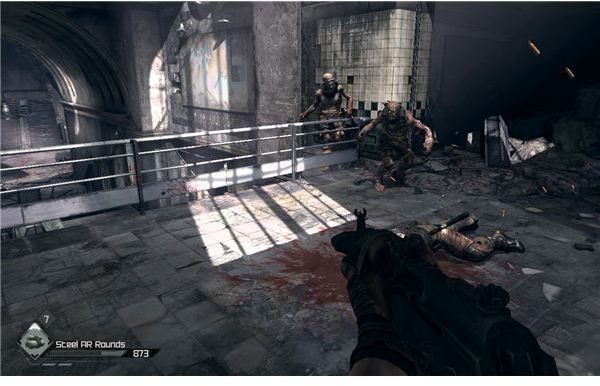
Go through the big hole in the wall to make your way to one very special hallway. It’s special because it will almost completely be flooded with mutants after you enter it. Get your back against the back wall and use the shotgun to fire into groups of them. Use controlled fire and you should be able to hold them off. After killing a dozen or so, you’ll be able to move into the main station where the mutants have their tunnel.
The Blue Line Station
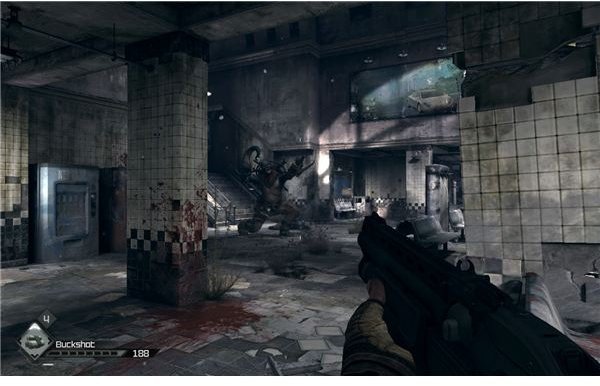
Kill a few more in the corner of the tunnel, and you should be able to plant the TNT. You need to plant it in four places in their turn. Just look for the wires if you can’t see the hologram markers.
Now, you need to get ready for what’s about to come. Save, and then walk to the detonator. If you have one, drop your sentry bot by the detonator. It’ll help a lot. When you push the plunger, the tunnel will seal…and you will really anger the remaining mutants.
Two krakens will crash through the walls, and a few normal mutants may come in, too. If you have a sentry bot, then move toward one of the kraken and start pouring heavy ammo into it. The machine gun with pulse ammo, or the assault rifle with feltrite ammo will work well. The sentry is incredibly powerful. It can take several of the basic hits from the kraken, and it will do a lot of damage with its little minigun. In my game, the sentry was able to kill one by itself, and took off about half of the health of the other.
If you don’t have a sentry bot, then things are going to be a lot harder. You need to stay very mobile, but be very careful about where you go. There’s a really nasty combo that can happen, in which one slimes you with its tentacle and obscures your sight, while the other can then charge at you for an easy kill. You need to focus on staying close to one and wear it down, while keeping things like the station benches between you and the other. This will keep you safe from the other, and let you take the first out fairly quickly.
Once one is down, the other should follow. A fairly large swarm of mutants will rush in to try and finish you off after this. Just get out your shotgun and get your back to the subway car. You can then fire at them and hold your ground fairly easily.
Once they’re dead, you can go through the newly opened subway car and make your way out. Report your success to the foreman, and then go to Redstone. It seems that he isn’t that impressed yet.
References
- All information from a “Hard” difficulty playthrough of Rage
- All screenshots from Rage
This post is part of the series: Rage Walkthrough - Parts 6-10
Our time in the wasteland is starting to get a little more violent. It seems that the resistance is quite interested in us. You’ll get a chance to do battle with the Authority, and then make your way to Subway Town to do a little more work before the grand finale.