We need to help Garrus get his revenge against Sidonis in this loyalty mission, Eye for an Eye. We need to find Fade on the Citadel, shoot our way through to Harkin, and then decide whether to save or condemn Sidonis to Garrus’ anger.
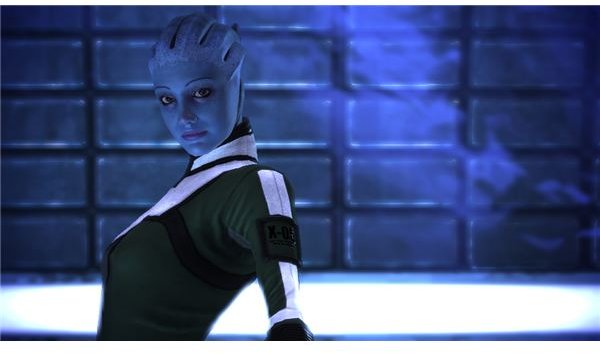
Introduction
You can find out about Fade through Captain Bailey. He’s supposedly working out of the lower district near the warehouses. Take the transit system down and look for Fade inside a side room. It seems unlikely that this volus is the great Fade, regardless he isn’t too happy about your request for information. The renegade interrupt kills both of his bodyguards and gets a quick confession. They’ll still be scared off if you don’t shoot though.
He’ll point you toward the factory district and we’ll have a bit of a fight on our hands. It seems like this mission was artificially delayed though. Except for having to kill two heavy mechs, it’s a complete cake walk of a mission that easier than Miranda’s or Jacob’s. I’d go ahead and bring Mordin so that you have incinerate available. You already have overload because of Garrus. Even if you already have it, it’s nice to have a second. Grunt can work too.
Take the transit system over to the factory and get ready for a fight.
Fade’s Factory
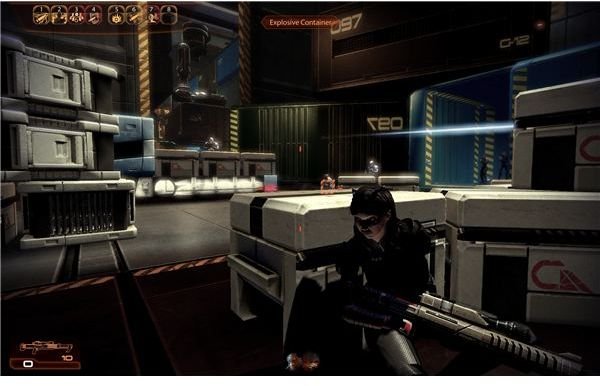
This is a pretty quick mission and it’s fairly easy. Advance and kill a few mechs. The area up ahead is full of mechs spaced out in pairs. If you move quickly you can probably find them while they’re still inside the containers. You can damage and even kill them while they’re still balled up. There are some Blue Suns mercenaries in here too. Just move carefully along the line of boxes and check your corners at each big container. A steady grind will let you take the area without much damage. Keep an eye out for safes and circuit boards that you can hack. None of them have that much in them individually, but they add up to a lot over the whole level.
The next spot is where things get a bit tougher. Once you leave the main warehouse, you’ll notice a big change in design. This is the spot where you’ll start facing some more elite Blue Suns. It’s not odd to see legionaires here, so stay alright and have a SMG ready to knock out shields and barriers. A few mechs will drop in close too, so gun them down quickly. Take up a spot on the pillar afterward and just hang tight until you don’t see any more movement at the end of the area. Carefully move up and enter the makeshift office. You can hack a few more things here and grab some minerals. There isn’t much interesting stuff here though, so move on quickly.
We’ve got one a bit of a challenge up ahead. Once you take out a few of the elites, you should get a warning about a heavy mech. A carrier will drop off the heavy mech just a little bit in front of you. You don’t have a lot of space to handle this. Don’t take cover in the big red container. It’s too close and the mech will just flank you and rip you apart. Hang back by the pillars and use your abilities to get through the shields and armor. Then just lay it on thick to bring it down.
Second Stage
Move on up and get into the office area. Loot the safe and check the area. You can also look out the shutters to get a view of the battle you’re about to enter. When you’re ready to go, move on out to the right and hack the terminal to boost your sniper rifle damage.
A bunch of Blue Suns mercenaries are waiting for you. The first waves are near the first set of crates and there should be a few mechs. Just take cover and blast right through them. Watch the right side. A lot of mercenaries are probably still dug in on the upper platforms. Climb up and over to scan the right side and take them out. There’s a PDA you can hack here too.
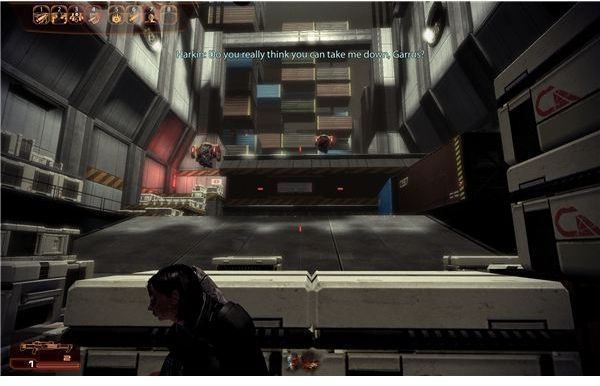
The next area is the final fight. Harkin will call up two heavy mechs to fight you. They are also at a really close range. Just hang back and focus on taking them out one at a time. Use overlord and incinerate if you have them. You will also have to watch their machine gun fire. When it stops, you need to pop up and take a few shots.
Once you manage to take out the first heavy mech, the second will die as long as you can stay alive.
Harkin will put up a lot of raised platforms. I assume this was supposed to be a puzzle, but it’s not. Just go to the left and climb the stairs that the crates make. Kill the two light mechs at the top to talk to Harkin.
Garrus will want to shoot out Harkin’s kneecap at the end of the conversation. Paragons need to use the interrupt to stop him. Renegades can let it happen.
Sidonis
Garrus’ loyalty mission all comes down to this. We have to make our decision. Does Sidonis deserve to die? It’s a fairly paragon vs. renegade situation.
Renegades can just let him take the shot. Sidonis will die and Garrus will be at peace.
Paragons can still get Garrus’ loyalty. They need to start by warning Sidonis of the setup. You then need to do the paragon interrupt to block Garrus’ second attempt. The rest is fairly standard. You just have to keep talking to him and get the full confession. Garrus will hear it and come to a certain degree of forgiveness. You can tell him to leave once Garrus gives him the go ahead. Sidonis will then walk away and turn himself into C-Sec for his crimes on Omega. Garrus will be at peace once it is over.
Either path will secure Garrus’ loyalty for the final mission.
This post is part of the series: Mass Effect 2 Walkthrough - Loyalty Missions - Part 2
While you gear up for your fight with the collectors you’ll need to get gain the loyalty of the rest of your squad if you want a happy ending in the battle. This part of the walkthrough covers the loyalty missions for Thane, Garrus, Samara, Mordin and Legion.
- Mass Effect 2 Walkthrough - Mordin’s Loyalty Mission
- Mass Effect 2 Walkthrough - Thane’s Loyalty Mission
- Mass Effect 2 Walkthrough - Garrus’ Loyalty Mission
- Mass Effect 2 Walkthrough - Samara’s Loyalty Mission
- Mass Effect 2 Walkthrough - Tali’s Loyalty Mission
- Mass Effect 2 Walkthrough - Legion’s Loyalty Mission