This section of the Half-Life 2 walkthrough covers all the zombie killing action as you move further into Ravenholm. This section of the guide covers the area after the first electric fence until you get to the Laundromat. If you can’t find your way out of Ravenholm, look inside for a little help.
Car Crushing
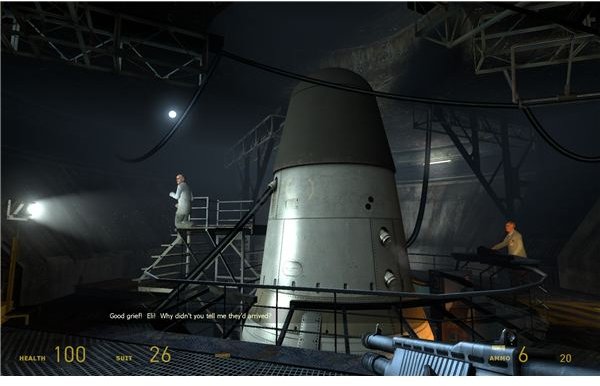
Just keep moving forward for now. Drop down to a plank bridge and go into the window at the end. There are four headcrabs and a zombie on the ground below. Thin them out with a few oxygen tanks before you drop down. Break the boards off of the exit and head into the street. Take up a position by the lever ahead. This lever drops a car onto the street. Use it to crush as many of the five or six coming toward you as you can. Pull the lever when they step into the existing blood pool. Pick off the rest with your gravity gun or even your submachine gun, since your ammo is probably maxed out anyway. The street ahead is a dead end. You need to pull the next lever and jump onto the car to avoid the horde of zombies behind it. Crouching should help you stay on top of the moving car. Jump onto the catwalk when it gets to the top.
You’ll see Grigori again and earn a bit of praise. Walk along the little catwalk until you get to a window. Climb in and go down the hallway and wait for the next area to load. You’ll be attacked by a fast headcrab. It shouldn’t be a problem. Punt it with the gravity gun or just shoot it. Go up the stairs and race toward the gunfire. Father Grigori is clearing off the ledge. Be careful though, since there is one zombie waiting in the room with you. Give Grigori a second or two to kill a few of the other things along the ledge. Shoot the zombie in the room with your pistol while you wait. You can start to use your guns for this period of time.
The Streets of Ravenholm
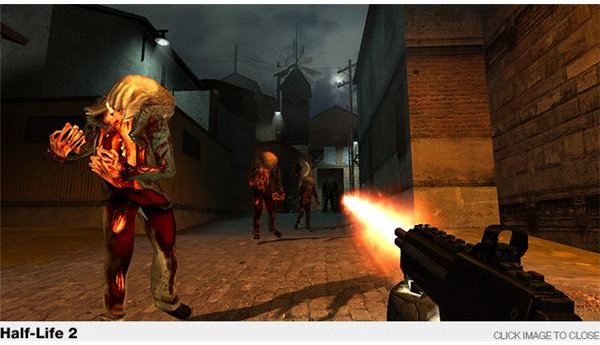
Step out onto the ledge and kill the black headcrab if Grigori missed it. Then look out into the street and start setting off explosive barrels to kill some of the headcrabs and zombies in the street. Once you’ve cleared the streets fairly well from the safety of ledge, jump across the street and drop off the ledge where it’s closest to the ground at the top.
Walk straight down the street and look for a ladder on the right. There’s a health pack in a grate at the top, but you’ll have to walk through fire to get it, so it isn’t really worth it. Find the ladder and get up to the steel beams. Walk along the beams and look for the opening to the attic on the left. There’s a stash here if you are willing to kill a few headcrabs. Then jump into a window on the right to get to Grigori’s lab. The zombies are all dead, don’t worry. Pick up some health and grab a saw blade or a meat hook. Go down the steps and wait for the zombies to crowd the hallway. Then start using the saws and hooks to kill them. It will take awhile for them to get you, so you should have plenty of time to grab more weapons up top. Go through the path once it’s clear and wait until you get out of the building. You should hear some howling and see hideous zombies running along the roofs. These are fast zombies. One usually jumps off and attacks you. Unload on it with your submachine gun.
The Laundromat
Look for the open door with all the washing machines. Go in and start killing the zombies spread throughout the building. There’s one behind the boxes on the first floor. There’s another in a boarded off room on the second floor. There are two more guarding a stash behind a green door. Just keep moving up the stairs and kill them as you see them. There aren’t any groups or special ambushes, so just keep going up. Only search the rooms if you need more health. Once you make it to the roof, you should see Gregori again. He’ll give you a weapon suitable for zombie killing.
This post is part of the series: Half-Life 2 Walkthrough - Chapter 6: We Don’t Go to Ravenholm
This part of the larger walkthrough will cover your stay in Ravenholm. You will be facing a lot of zombies and a lot of headcrabs. You also don’t have much ammo. If you are finding the situation to be difficult, then read this walkthrough to find out how to escape.
- Half-Life 2 Walkthrough - Chapter 6: We Don’t Go To Ravenholm - Priests and Zombies
- Half-Life 2 Walkthrough - Chapter 6: We Don’t Go to Ravenholm - Cars and Laundry
- Half-Life 2 Walkthrough - Chapter 6: We Don’t Go to Raveholm - The Elevator and Beyond
- Half-Life 2 Walkthrough - Chapter 6: We Don’t Go to Ravenholm - The Church and the Cemetery
- Half-Life 2 Walkthrough - Chapter 6: We Don’t Go to Ravenholm - The Mines
- Half-Life 2 Walkthrough - We Don’t Go to Ravenholm - Snipers on a Train