Your day in Ravenholm will certainly be stressful if you don’t get a good start. This walkthrough will cover all the fighting from the start of the level until you pass Father Grigori and climb over the electric fence.
Going to Ravenholm
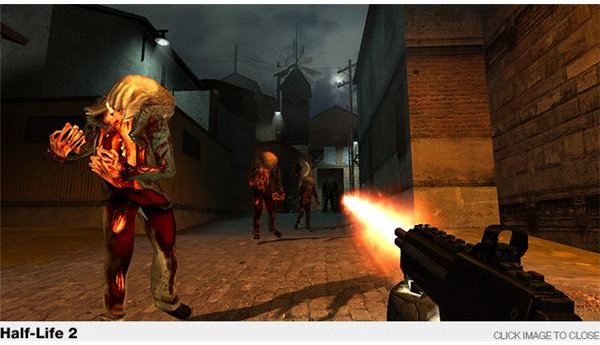
Go forward into the ominous courtyard after you step off of the ladder. A zombie is on the ground to the left side and he’ll stand up if you get to close. Remember that you need to shoot them in the head if you’re using a gun. Otherwise, the headcrab will pop off and attack you. Also never assume a zombie is dead already just because it’s on the ground. A number will lie in wait to ambush you. If you’re suspicious, shoot them once from a distance to trigger them.
Gravity Gun Fun
Go past the hanging body and break into the room with all the saws and oxygen tanks. These are going to be the tools of your trade in Ravenholm. Saw blades cut zombies in half for an instant kill and the oxygen tanks will set them on fire in a small explosion. Move the table and grab a saw blade with the gravity gun. Clear out the next room behind the table with all the equipment in the first room. Then grab a blade and walk outside while clearing out the zombies and headcrabs in your path. I’m going to assume that you’ll do your best to keep a saw blade with you at all times.
Go outside and walk down the alley. Crouch by the spinning blade and wait for the zombies to walk into the trap. Then move forward into the next room. Kill the headcrab and grab the health. Just leave the trap alone for now. Go outside and kill some more zombies with your saw blade or the various barrels lying around. You will thank me later for saving your ammo now. It will make the end of the level a piece of cake.
The Good Father
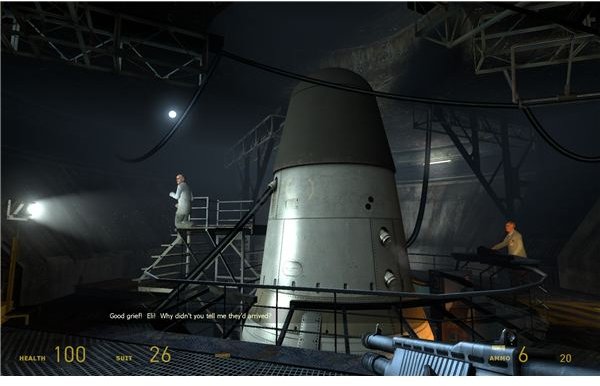
Go forward and listen to the screams of a whole bunch of zombies. It seems that you are not alone. You’ll see Father Grigori tending a zombie roast. Just wait for him to finish off the zombies, give a little speech, and then leave. You need to ultimately go to the top of the street, kill a fire, and then go over a fence. There’s a downed electrical line though and it will relight the fire and make the fence unclimbable. You need to kill the power first.
Go forward and and turn off the gas valve to kill the fire blocking the door straight ahead of you. Kill the five zombies in the room with the turbine and then use the gravity gun to clear out all the dressers blocking the staircase. Go up and kill the lone zombie waiting by the couch and then clear another doorway. Kill the zombie on the floor and turn to the room ahead with the sparking switch.
The Electric Fence
Kill the black headcrab in the room to get to the electrical switch. Pull it to kill the power to the fence. Backtrack outside, but be careful. A few more black headcrabs will usually spawn and two drop right on top of you as you step outside.
Go up the street but stop to kill the two zombies that break out of the house on the right side of the street. Just use a barrel if you lost track of the saw. Go inside for some health pickups and notice the zombie in the cage. Make sure that the gas is on and flip the ignition switch to fry him. There should also be a saw blade or two around here if you need another.
Go up the street and kill the fire by turning off the gas. Go down the alley and kill the three zombies by the fence. If you are hurt, you can just trigger the zombies and retreat to the street and reactivate the gas trap to fry them. Climb the ladder and get over the fence. Then climb the next series of ladders to get to the roof. Jump to the next roof across the street. Grigori will say hello again and remind you to be mindful of his traps.
This post is part of the series: Half-Life 2 Walkthrough - Chapter 6: We Don’t Go to Ravenholm
This part of the larger walkthrough will cover your stay in Ravenholm. You will be facing a lot of zombies and a lot of headcrabs. You also don’t have much ammo. If you are finding the situation to be difficult, then read this walkthrough to find out how to escape.
- Half-Life 2 Walkthrough - Chapter 6: We Don’t Go To Ravenholm - Priests and Zombies
- Half-Life 2 Walkthrough - Chapter 6: We Don’t Go to Ravenholm - Cars and Laundry
- Half-Life 2 Walkthrough - Chapter 6: We Don’t Go to Raveholm - The Elevator and Beyond
- Half-Life 2 Walkthrough - Chapter 6: We Don’t Go to Ravenholm - The Church and the Cemetery
- Half-Life 2 Walkthrough - Chapter 6: We Don’t Go to Ravenholm - The Mines
- Half-Life 2 Walkthrough - We Don’t Go to Ravenholm - Snipers on a Train