Holmes and Watson must go back to Sherringford Hall to continue their investigation. You still not get to find out what a silver earring has to do with any of this.
Start of the Second Day
Holmes and Watson sleep well that night. Neither one has troubled dreams like Watson will in The Awakened. The original dynamic duo will eat their breakfast and comment on the matters at hand. The conversation will end soon enough and you will have to find there is something to do. Holmes mentions that Lestrade has come with several documents about the case. Take the papers from the table and arrange them in your notebook.
Read the documents about the nature of the crime, the weapon, and the motive. Fans of Doyle will know that Holmes considers Lestrade competent, if not very imaginative. When you finish reading all the documents and making any helpful notes, you will head to Sherringford Hall.
Outside Sherringford Hall
You do not travel around as much in this game as much as you do in some of the other Sherlock Holmes titles. Return to the same building where the party was held and the murder took place. The first person you come across is Miss Lambert. Talk to her, although she does not have much more information for you.
Return to the Ballroom
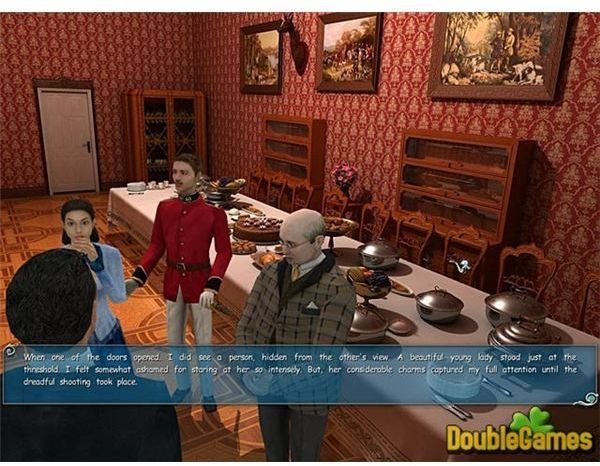
Mister Grimble awaits you in the ballroom. Talk to him. You learn that Lavinia’s relationship with her father was not always what it could be, it seems. Holmes exits the room. For some unknown reason, the camera remains in the room. Watson and Grimble remain. The conversation about polo that follows has nothing to do with the game.
The Cook and the Chicken
Carl the cook is busily re-killing an already dead chicken. He is also the only item of interest in this particular room. Talk to him and find out the two bottles of eighteen-year-old whiskey that have been stolen from the wine cellar. When you have exhausted all of the conversation options, walk into the smoking room..
The Smoking Room
The smoking room was a hot bed of clues in the first part of The Mystery of the Silver Earring, but that is not the case here. A pair of white gloves might be useful later. Pick them up. Exit the smoking room.
The Ladies’ Dressing Room
The dressing room, is once again, unoccupied. Holmes and Watson being the Victorian gentlemen that they are do not want to linger any longer than they have to. Click on Lavinia’s handbag on the purse. The handbag continues a letter from one Lt. Herrington. Put the letter in your notebook.
The Ballroom and Sir Bromsby’s Office
Lavinia is here. She will answer your questions now. You will find out that her father gave her clear instructions to wait outside the ballroom before being introduced. (One of the early conversations in the game states that Sir Bromsby had little concern for his daughter.) She also mentions something about the powder she used while waiting for her introduction. Perhaps the powder is the same as the rice powder samples you found earlier?
The conversation ends and the game immediately sends you to the office of the late Sir Bromsby. Lestrade will set off a trap set up by Fowler. The booby trap lightens the mood a bit, and starts an interesting conversation.
Look at the picture on Sir Bromsby’s desk. One of the pictures is of his daughter, and the other shows Bromsby with Grimble. A third hand rests on Bromsby’s shoulder. Take out your magnifying glass and look at the third hand. It wears a masonic ring. There is a letter near the picture of Lavinia. Pick the letter up and place it in your notebook. The letter contains information about Medieval French artwork.
Rifle through the desk drawers. Holmes is trying to solve a murder, so this invasion of privacy is allowed. Someone burnt many of the papers in his drawer. Take the unburnt papers and place them in your notebook.
Look at the picture of Sir Bromsby staring over an abyss. Click on the picture and find out there is something behind it. Get the items from behind the picture. Lestrade interrupts and tells you that Fowlett retreated to his home at Flatham Station.
Flatham Station
A member of the local constabulary awaits you when you reach Flatham Station. The officer tells Holmes that Fowlett left town yesterday. Graham, Flatham’s neighbor, has the key and he will give it to the great detective and his companion. Get the key from Graham and head to Fowlett’s house.
Fowlett’s Living Room
The living room needs a light source, or you will not be able to find anything. The ornate dragon near the entrance looks interesting. Click on it and get a box of matches. Use the box on a nearby lamp.
Find a shoe and a footprint on the floor. Take out your measuring tape and find out that the footprint was made by a size seven shoe. The shoe itself is size six, which suggests something weird is going on. Ignore the curious looking statue in this room for now.
Take a good look at the paintings here. Each one is an example of Midieval French Art with a hidden subject. You must find a hidden object in each painting.
The hidden objects are
A deer
A Bear
A Crab
A Waterfall
Pick up the wooden toy and head over to the bookshelf. Get the copy of Aesop’s Fables. Read the story about the Peasant and the Snake. A secret passage will open that leads into the kitchen.
Fowlett’s Kitchen
Examine the ashtray in the kitchen. Take the white flaky powder from the ashtray. You will examine it later. The gin bottle with the blood near it is interesting. The gin bottle was not the stolen whiskey bottle that Holmes discovered was missing on the first day. Exit the room via the door near the bookcase.
The Hallway
You encounter a dark room . Select the box of matches from your inventory and use them on the lamp. Check the doors. One of them is locked. There are no clues in the hallway. Open the door that isn’t closed. Holmes and Watson will walk into a workshop and bedroom. Fowlett, as noted earlier, has a fondness for bizarre security devices.
The Living Room
The statue turns out to be a slot-machine. Put the token in the slot. Three aces come down on the first deal. Click on the fourth ace and place it into the fourth slot. You have to pull the lever two more times. Place the four of diamonds into the fourth slot the second time. Pull the lever for the third and final time. Place the four of clubs in the final slot. The automaton opens a drawer. Take out the verse about Noah’s Ark. Read the verses and head back to the bedroom. You’ll need to solve the final puzzle.
Fowlett’s Workshop and Bedroom
Go over to the Noah’s Ark statue. Click on one of the animals to find out that they can move onto the ark on their own. This cute little feature also introduces your next puzzle. Read the poem and figure out the order that animals have to go into the ark.
The first four animals to go on the ark are:
1. Crab
2. Deer
3.Bear
4. Eagle
The order of the remaining animals does not matter. Place the remaining animals in the ark. Completing this puzzle causes the door to a safe to open. Holmes notices that the door is broken. Take out the papers and place them carefully in your notebook. The notes will give you some clues about the relationships of Sir Bromsby to some other important people in his life and just who else may have had something against him.
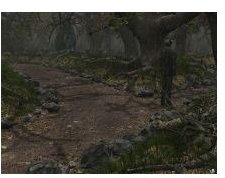
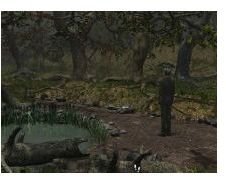
Open the other door in the room and go down the stairs. This takes you to the lawn. Walk around Fowletts house. You’ll find another footprint made by a size 10 pair of shoes. You will not find any more physical clues, but if you walk around far enough, Watson will join you with two conflicting pieces of information. One piece says that the Flatham station master saw him leave the night before, the second piece says they found Horace Fowlett dead in his basement.
The Third Quiz
The second day is almost at an end. All days end with a series of questions which you, as Watson must provide the answer to. Sadly, these quizzes are much longer than they are
The answers and justifications are below:
1. Yes – Conversation with Graham
2. Yes – Lestrade’s Development of the Crime
3. No – Third Conversation with Hermann Grimble
4. Yes – Bromsby’s letter from 12 November 1896
5. Yes – Observations about Fowlett’s Bedroom
6. Yes – the screwdriver found in the window and the size 10 footprints found in the garden.
Holmes and Watson return to Baker Street to prepare for the next day.
Resources
Gameboomers.com
Sherlock Holmes and the Mystery of the Silver Earring – Screenshots
This post is part of the series: Sherlock Holmes and the Mystery of the Silver Earring Walkthough
Help the world’s greatest detective solve the murder of Lord Bromsby and locate 4 silver earrings that serve as keys to the most important clues.
- Sherlock Holmes and the Mystery of the Silver Earring Walkthrough – Part 1 of 5 – Day One
- Sherlock Holmes and the Mystery of the Silver Earring Walkthrough – Part 2 of 5 – Fowlett’s House
- Sherlock Holmes the Mystery of the Silver Earring Walkthrough – Part 3 of 5 – The Fairfax Theater
- Sherlock Holmes and the Mystery of the Silver Earring – Part 4 of 5 – Fairfax Theater and Hunter’s Greenhouse
- Sherlock Holmes and the Mystery of the Silver Earring Walkthrough – Part 5 of 5 – The Aston Theater