It’s time to help out another town. Mayor Clayton and Sheriff Black both have a few tasks for us to help out the region. Sheriff Black’s task means blowing up a massive bunker with remote control bombs, and getting a new vehicle with a little more power. I think we’ll start with him.
The Cuprino
I suggest that you go ahead and get the Cuprino before you do much work in Wellspring. You’ll want something with a little firepower if you plan to stray far from town. The buggy isn’t bad, but you’ll need a little more armor to last for long. You can get the starter quest by talking to the Sheriff, who will insist that you trade up before he’ll give you more work.
Walk over to Jackie Weeks at the racetrack to inquire about the new sponsored race, the Dusty 8. The prize is a free Cuprino, so you’ll definitely want to participate. Before you can join up in the race, you’ll need to find a sponsor. We’ve got a road trip ahead of us.
Note that it’s a good idea to pick up a few jobs from the job board if you want to cut down on travel. We’ll be going back toward a fairly central area to meet with JK, so getting the Missing Person and Stolen Merchandise quests is a good idea (if you haven’t already taken them).
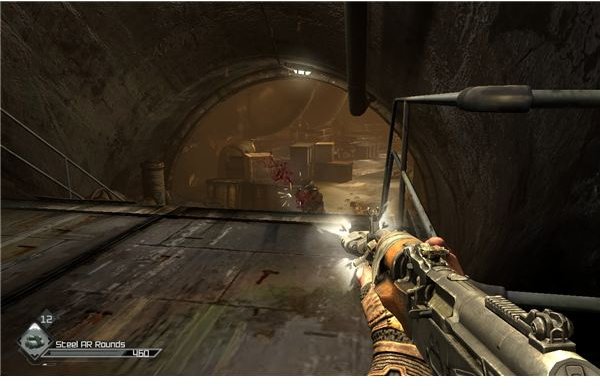
I strongly suggest that you stock up on fatboys and buckshot before you go. You’ll really want to be well armed and ready to fight some mutants. Drive out to the area under the highway to find the Bash TV studio. The entrance is fairly hard to miss.
I suggest that you make a real save game outside. The area is fairly difficult, and people have reported some bugs with it.
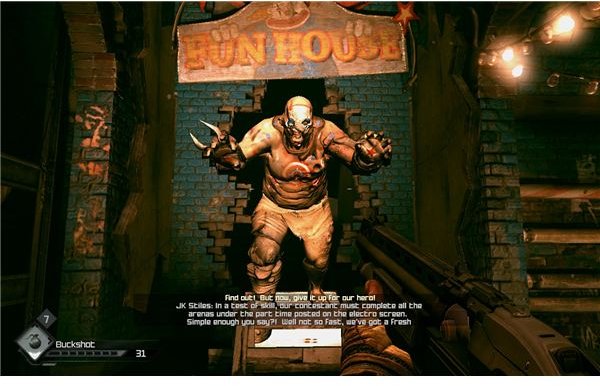
Walk into the twisted funhouse and approach JK Stiles. He’ll swivel around in his chair and quickly offer you a sponsorship deal if you’ll fill the empty slot in his segment for the day. This is why I told you to bring a lot of ammo, if you couldn’t tell.
Bash TV - Stage 1
This is a five stage affair, and you’ll be fighting mutants for all of them. As you go through, look for the arrows to find your way through the funhouse, and make sure that you stand on the big red skull on the floor to trigger the events.
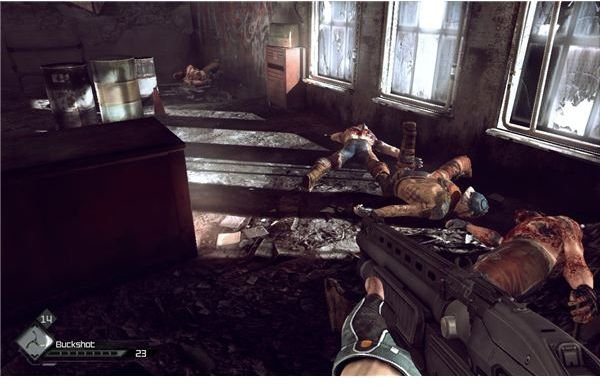
The startup is pretty standard. Mutants will enter the arena from the far side, and you’ll need to kill them. The shotgun is great for this. Just let them get close and blast them in the neck and head. One well placed shot will put them down. Also note that you will be rewarded for accuracy, so a gun like the shotgun can help you earn a lot more money in each round. The assault rifle will be your worst nightmare, and it will probably cost you at least $50 a round, unless you have a lot better fire control than me.
After a few fairly standard attacks from the mutants, you’ll see a bunch of pipes drop down. Mutants will start to quickly shoot out of the pipes. I therefore suggest that you follow the highly advanced tactic of running around wildly while firing a shotgun or fatboy equipped pistol. If you can run in a circle around the room and look over your shoulder, or just strafe a lot, you should actually be able to stay one step ahead of their attacks for the most part.
A few pillars will also rise out of the floor, with scoop mutants in each of the four. They’ll rain fire down on you, so quickly run from pillar to pillar with the shotgun to kill them all. A few more normal mutants will come out from under the pillars. Just watch for them and try to shoot them as they climb out.
Bash TV - Stage 2 and 3
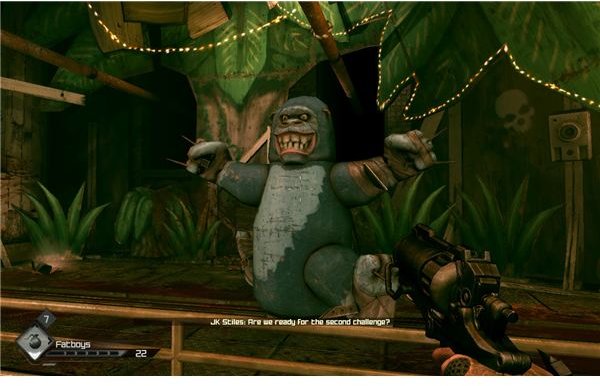
The second stage is basically the same, and note that you should have a chance to loot some piles of ammo before you enter. The one big difference is that now a giant gorilla with spinning knife hands runs on a track around the edges. This means that your movements are fairly confined, but the gorilla statue will also shred a fair number of the mutants for you (and steal your $3 fee).

Just move in tight circles and stay on the far side of the room from the statue. You’ll be fairly fine if you keep your shotgun out.
We’ll hit the bonus round early. It’s exactly what he says it is. If you hit all the money bars, you get extra money and a little peace. A skull summons up a fairly large group of mutants at once (I believe I counted six). Just shoot the target below the wheel to stop it from spinning, and decide how much you want to risk the mutant attack to get a chance at the big money.
Bash TV - Stage 4
The fourth round will take you to shipwreck cove, which introduces floor spikes. On the bright side, they’ll kill some mutants for you, but they’ll also do just about enough damage to kill you on Hard difficulty. Make sure that you keep bandages tied to “Q” so that you don’t die if you run into some.
As a rule, you need to watch for the red light. After the light settles on a pad, it will shoot spikes up through the floor. Make sure that you keep it in the corner of your eye at all times. If you can’t see it, then you may be standing on it.
Stay mobile as much as possible, too. This will keep you fairly safe from the mutant waves, and it will let you quickly strafe away from the spike traps. Just rinse and repeat what you’ve done before, and you’ll survive.
The Kraken
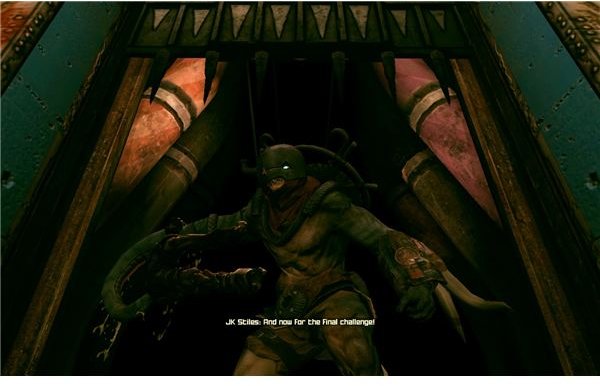
The final round is the real challenge. We need to face the Kraken. This is a very nasty mutant. It’s big and can charge like a bull for tremendous damage. It can also whip its tentacle around to do what is effectively a long range melee attack. The key to the fight is strafing. Strafe the charges and hang around at about medium range at all other times. Don’t be cheap with the ammo either. Killburst or fatboy rounds will do wonders. Pumping buckshot into his throat and face also works quite well, as you may expect. He is probably the one mutant that you can reliably use the machine gun or assault rifle on too. You have a lot of options for doing damage, just pick something with good armor penetration (or aim around the armor) and dodge his charges. You’ll be able to do a fair amount of damage and you should have very little trouble killing him in less than a minute.
After he’s dead, just walk back to the initial pad to be elevated back up to JK Stiles. He’ll pay you and open up the Bash TV side missions, and give you the sponsorship papers that you need.
While you’re here, I suggest that you run the course again. He’s says that it’s harder, but I actually thought that it was much easier. You don’t have to fight the Kraken for the second run and there aren’t that many more mutants. It’s up to you, of course.
The Race
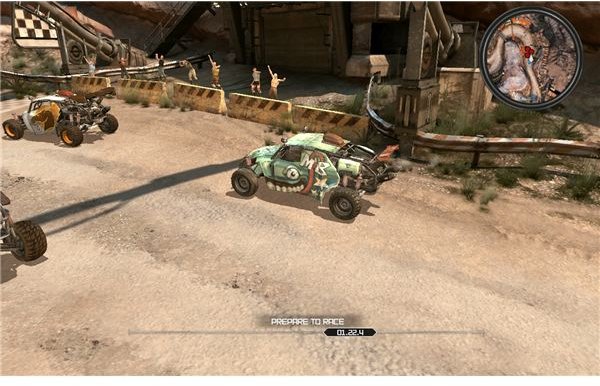
The race is actually pretty easy. As it notes in the tooltip before the race, you have a fairly ridiculous special attack. Hitting “Q” will send out a hologram billboard of JK Stiles, which will follow the main path of the course for a few seconds and automatically destroy any car that it hits. You have six of these. You should know what to do.
Don’t waste them at the beginning. Focus on using boosts to edge out ahead of the other drivers. After about the halfway point of the second race, you should be alright to start using the special weapon to clear the path of any competitors that manage to slip ahead. Save at least one or two up for the last lap though. Being able to take out all the cars right before they cross the finish line is obviously useful.
Once you win, you’ll get your Cuprino. It’s probably worth doing a few races just so that you can get a little more armor and gear for it. The medium armor upgrade is a very good idea, considering the combat we’ll be seeing soon.
Now that you have the car, you can go back to Sheriff Black and report your success. He’ll hand over the resupply package.
Supply the Outpost
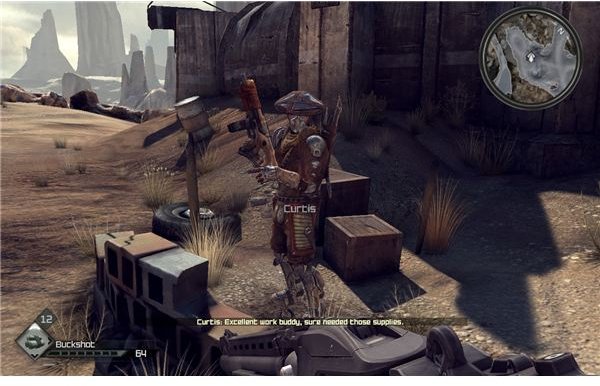
This is actually a really simple mission. Just go out in the Cuprino and drive along the road. If you’ve done Stanley’s deliveries, then you have already run this once before with more stops and under a timer. Just move forward carefully. Note that you have miniguns and rockets now, so you can pretty much just trash any bandit car that stumbles into your path.
Punch through the line and get onto the highway to find the guard post. You can just swing in, pull the handbrake and hop out to talk to the guard and turn in the goods.
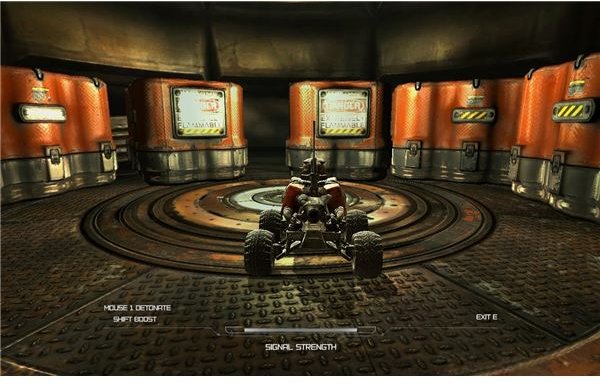
Destroy the Bomb Caches - The Bunker
This is a fairly long mission, but it’s a very rewarding one. You can pick this up from Sheriff Black after you supply the watch tower. It seems that we have another bandit hideout to attack, and we get to do this one with plenty of explosives.
Note: There is a ton of stuff to loot in the base. I know that I walked out with $120 in small objects and tools alone. You will also find a lot of equipment and ingredients lying around, and plenty of RC bombs lying around the facility. They’re worth $65 a piece, so collect as many as you can.
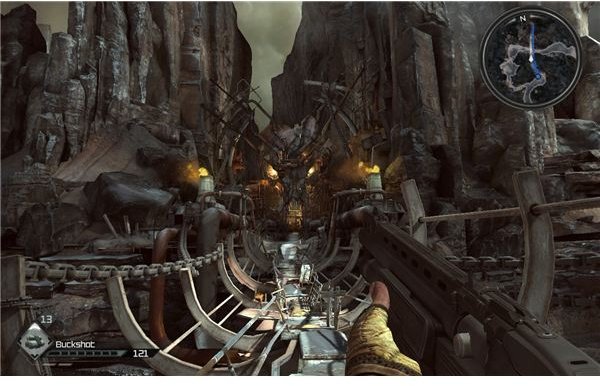
Take the long drive out to the Shrouded’s Bandits bunker. You’ll need to blow up (or just ignore the damage) of one of their RC car bombs, and take out a few of their buggies that will be guarding the entrance. Once the path is clear, just waltz right inside and take the lift down into the first level of their base.
Bomb Cache #1
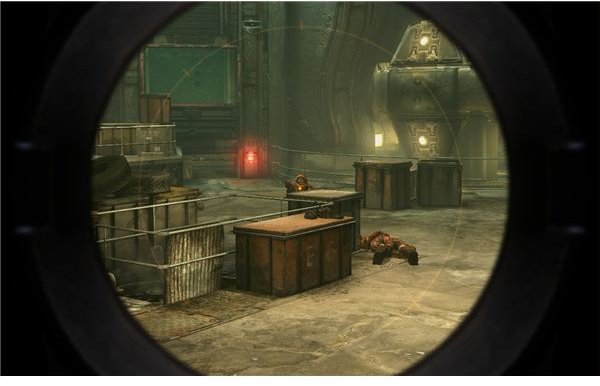
Start out the engagement ahead by shooting the RC car closest to you while it’s next to a bandit. This will solve a few problems at once for us, but the first section of bandits will be alerted to your unwelcome entrance. Just hang back and watch the entrance for a moment. They should send another two RC cars at you, so blow both of them up before moving in aggressively. Use one of the tables for cover and start picking off the bandits that respond.
Fatboy rounds will do wonders here, although the machine gun is a decent option too. You’ll find a fair bit of ammo for it around the base.
Once you’ve killed the first responders, you should have a little peace. Before you do anything, walk over toward that little control room and look on the platform slightly below it. You should be able to see a collector card for the RC Bomb Car, so pick it up if you want to add some variety to your deck. After that, you need to drop an RC bomb on the floor and steer it through the little hole in the wall. You can then follow the path around the big grinding gear to get into the secured explosives room. Set off the bomb to destroy the cache and open the next path.
Bomb Cache #2
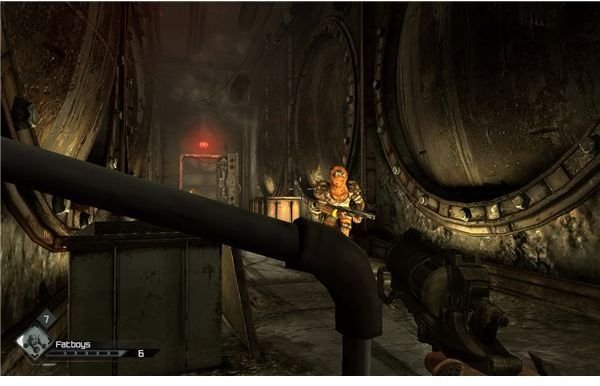
A few bandits will come up to investigate the noise. Just pick them off with something that has a bit of range, then move forward and use the lift to get down into the heart of the bunker.
There’s one guard up ahead. I suggest that you crouch and use a wingstick to quietly kill him. It’s nice to save the element of surprise for the next area. If you want, you can shoot one of the bombs that they’re working on to start things off with a bang. After that, you should be able to just repeat your tricks from the first room. Pull out an assault rifle, pistol with fatboys or the machine gun and use your range to pick the bandits off. A few more will come in from the elevator and then from the left, so don’t let your guard down. Once the reinforcements are dead, move in and loot everything from the room.
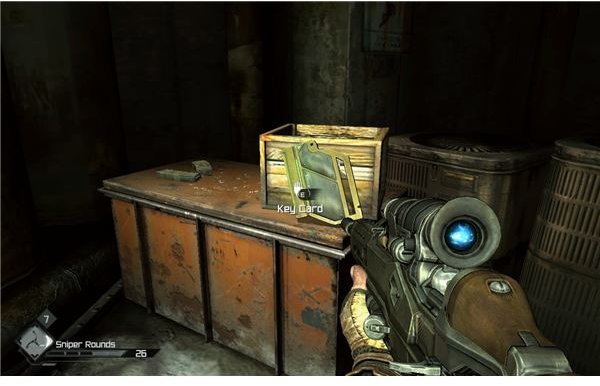
There’s a collector card for the Shrouded AR on one of the shelves, by some wooden crates. When you’re done looting, move down to the left. There’s a lock you can grind here. Tear it down for an incredible find. You’ll be able to get a lot of ammo, and even grab an Authority Machine Gun. If you already have one, then you will instantly sell it and get $500.
Stick to the path and crouch when you hear the bandits talking. If you’re quick, then you can actually take out all three of the guards in the upper control room with wingsticks. Just work from left to right. One of the guards from the bottom floor will probably see a body and investigate though, so don’t expect complete peace.
Take out anyone that responds, loot the upper area and work your way down the steps. Clear the narrow hallway and watch for a supply closet off to the side. You need to go inside and grab the keycard. Clear out any stragglers that are left below. If you want the collector card for the Shrouded Heavy, just go up the wooden ramp back to the control area and look inside the big pipes by the wall.
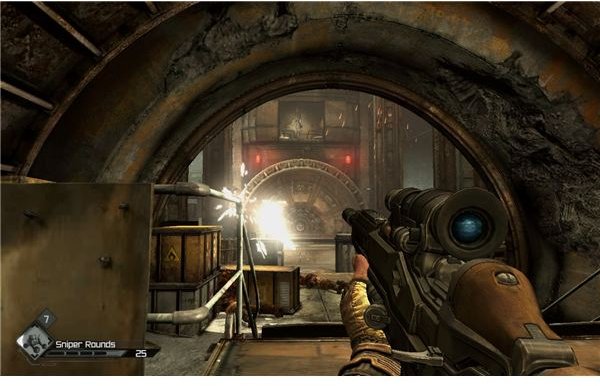
Now that you have the keycard, you can use it to open the locked door with the blue keycard scanner. This will grant you access to their workshop area. Move down the line and stop when you get a line of sight on the first guard. You should be able to shoot the RC car by his feet to blow him up and take their sole RC car bomb out of the fight.
After that, you should actually be fairly set. Just repeat your tactics to aggressively move forward and seize the workshop from the remaining bandits. Once they’re dead, take your time to loot the entire area. You should wind up with a few extra RC car bombs and the ingredients to make a few other things.
When you’re ready, look under the stairs. There’s a little hole in the wall that your car can go through, so drop it and run it right through the secure area and into the barrels to set off one very big explosion.
The Atrium
This one will really get their attention, so get ready for things to get a bit harder. The hole in the wall just takes you back to the control room, except a new wave of bandits has moved in to try and cut you off. Switch to the shotgun and aggressively push forward in the narrow halls. Once you make it back to the upper level, you should see that the bandits have kindly opened up one of the formerly sealed doors to send in three more men. Switch to the assault rifle and spray the long hall to give yourself clear access to the base. You’ll approach the Atrium ahead. Don’t round the corner just yet though. There’s a machine gunner above the big vault door. Take out the crossbow or sniper rifle, then lean out and shoot him in the head while he stops to reload.
The sniper rifle or crossbow will actually be fairly nice for clearing the area from this distance, you do need to be ready for a bit of a change in pace though. Once you clear the Atrium, the Shrouded will freak out and call in “him.” This is a heavily armored bandit with a very powerful machine gun.
I strongly suggest that you make a permanent save now, since it’s only going to get harder.
I suggest that you start off by throwing a halfway cooked grenade at the vault door as it opens. This should blow up the two normal bandits that are protecting the heavy, and do enough damage to stagger the heavy right off the bat.
After that, get ready to exchange fire with the heavy gunner. When he fires, crouch behind cover and wait for him to have to reload. A full volley will usually be enough to kill you, so don’t get cocky. I suggest that you use something like the sniper rifle and shoot him repeatedly in the face and neck. Make sure that you’re drawing blood, and not just pinging the armor. If you have feltrite tipped rounds or any special pistol rounds, then those will also work well.
If he manages to close the distance, remember that you can always sprint back a bit and take cover by the doorway. He should die after you put a few magazines bursts into him. Loot the bodies and push forward through the now open vault, and make a save once you go inside.
Bomb Cache #3
There will be a number of bandits along with a heavy gunner in here too. I suggest that you chuck out a few grenades to clear the floor, and switch to a shotgun. The quarters are tight enough that it will be deadly. Don’t push forward from your starting spot, just engage the ones that try to rush you and try to clear the room before the heavy makes it to you. Feeding a bunch of buckshot into the vulnerable spot by his neck seems to be effective. It can stagger him, and it seems to do a lot of damage. Just be ready to run away and get to cover when you have to reload. Two sets of shells should do it. Obviously something like fatboys or feltrite tipped AR round will work well too. It’s up to you.
Advance slightly and looked for the gap in the wall to the right. There’s a red light above it. Run your RC car through it to take out the third bomb cache and open up your path to safety.
Escape from the Bunker

Run away and just focus on sprinting to the lift. Flip the switch and pull out your assault rifle, and get ready for a long ride to the top. Crouch behind the boxes and just keep watching the stairs. A number of the bandits will actually be killed by explosions as you rise, but a few will find safe spots and fire at you. Just return fire and keep them suppressed as you escape the base.
At the top, you’ll probably find a few stragglers left. At this range, the shotgun will let you clear them out and walk to the exit. You can turn the quest in to Sheriff Black for a good bit of money, and sell your spoils for a lot more.
Note that this should put the “A Proposition” job on the job board in Wellspring. This will let you go back for another shot at the ruins of the bunker to get your hands on an upgraded RC car bomb.
References
- All screenshots from Rage
- All information from a “Hard” difficulty playthrough of Rage
This post is part of the series: Rage Walkthrough - Parts 1-5
It wouldn’t be much of a game if everything went according to plan. Our first steps out of the ark will lead us right into battle with the local bandit clans. To earn your buggy and secure a safe place in Wellspring, you’ll have a lot of work to do. Don’t worry, we’ll cover it all.