Your exit from the Ark won’t go as expected. No doves or oil branches, just a lot of bandits that would like to kill you for fun. If you’re going to make it through the first few missions, you’ll need to get used to your weapons and learn a fair bit about the Ghost and Wasted Hideouts.
A Rude Awakening
After the long intro ends, you’ll wake up in the remains of your ruined ark cell. Step out, carry out the quick tutorial instructions, and set your movement controls. When you’re ready, hit the panel (by using “E”) to start breaking the seal. After a few alarms and warnings, the doors will unlock. You can then use them to take your first steps into the outside world.
Once you regain control after the bandit attack, walk over to the buggy and hop in. For now, just listen to Dan Hagar tell you the bare bones of the situation. He’ll eventually swing around to the settlement and park in the garage by the cafe. Step out and follow him inside. Dan will talk for a moment and then eventually ask that you go back out and kill all of those bandits. Considering the fact that this is an FPS, I suggest that you accept the quest.
Grab the pistol and ammo off the counter and then walk out the main door. If you want, talk to his daughter, Loosum. She’s over on a catwalk to the left. She’s easy enough to spot, since she’ll be toying around with a wingstick. If you want, go ahead and pass the test now. Just get your aim over the targets and hit “Q” to fire. There are about 25 points total, and you just need 10 to pass, so it shouldn’t be too hard.
Quell the Bandit Threat

When you’re ready, jump onto the ATV in the garage and drive back out to the ghost hideout. It’s a fairly straightforward and boring drive. If you can manage not to hit any rocks, then you’ll be fine. Drive up to the pylons and then hop off. Walk across the suspended rope bridge to make it inside the ghost hideout.
Once the screen loads, turn and look around. You should go ahead and loot the first body. Keep an eye out for anything glowing too. There’s nothing spectacular inside the ghost hideout (aside from pistol ammo), but all these bits of scrap can be sold to the junk dealer back at the settlement. Since you’ll probably want to start saving up $275 for the assault rifle, getting a few things to sell isn’t a bad idea. Also, note that you can loot vending machines for a few dollars by looting the panel.
Turn to the right and keep an eye out. You should run into your first real enemy. It’s just a melee rusher in the open area with support from a gunner on a zeppelin. Step back into cover, aim your pistol at the rusher’s body, and fire a few rounds into him. Killing rushers is really more about stopping power. You can try for headshots, but it’s better and faster to waste a few rounds and shoot them in the chest and neck. Watch for them to drop their weapon or for their body to go limp. These bandits can take a few shots to vital areas and not die right away, so be careful and make sure that they’re really dead. Don’t worry about the guy on the blimp; he’ll continue flying away. It doesn’t matter if you kill him or not.
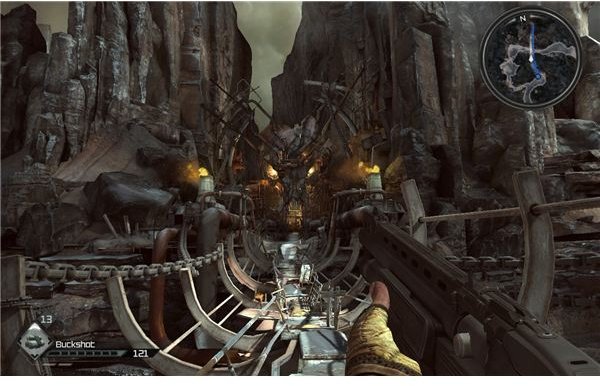
Keep moving and watch out for the occasional rusher. They should be by themselves for now, so don’t worry too much. Cross the open field, explore the scaffold to the right for a collector card, and when you’re ready, walk down toward the giant statue in the left hall. There’s one more rusher, so kill him. As you approach the statue, you’ll be caught in a snare trap. The bandits will then take you back a bit into your base, which is mighty nice of them. That’ll save us a bit of time.
Escaping the Ghost Hideout
When you come to, you’ll need to pass the defibrillator game. Just hit “E” once the two nodes charge up and flash and you should get fairly close to catching them at the center (unless your reflexes are very good, in which case, wait for them to start moving).
This should take out the bandit leader and let you recover a bit. Walk out the main door and start heading down the hallway. Go ahead and drop down into a crouch when you get the reminder. If you go into the right room, you’ll be able to sneak up on a lone ghost inside. If you have wingsticks, use them. Otherwise, just shoot him.
Swing around the corner and get ready to engage a group of bandits outside. These guys all have pistols, so things are about to get interesting.
Crouch behind one of the raised metal walls and fire at the bandits positioned around the area ahead of you. Just watch for their shots and return fire. If you stick behind the metal, you should be fine, since they aren’t particularly good shots.
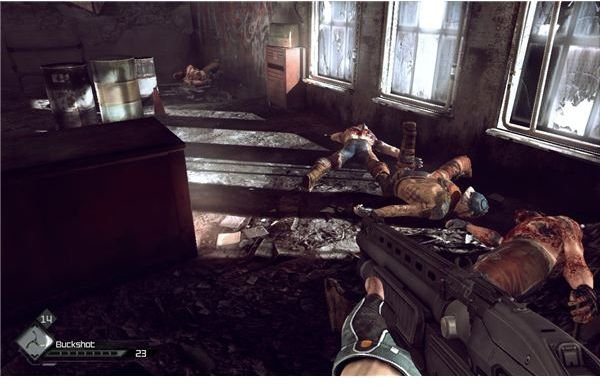
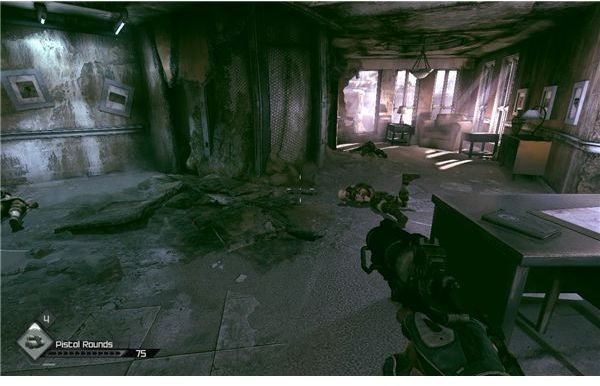
Once you’ve picked them off, move forward to the next office. When you get inside, watch out for a rusher and two pistol users that will take cover behind the desks. Fire from the hip to take out the rusher as quickly as possible, and then get behind a desk or vending machine to kill the others. Take out the last rusher and push out to the center. Use a wingstick on the distracted guard, grab the grenades next to his body, and then walk out to the next balcony.
Take the chance as you walk by to watch for men in the courtyard below. They can’t really shoot you that well from down there, but you can position yourself so that you can get a few good shots. If you can, pick a few of them off to make the next section easier.
Advance through the building and move down a level. There will be a couple of HE grenades lying on a table if you want them. You won’t really need them to get out, but it’s good to have extras.
Shoot the two guys lying in wait for you by the exit, and then move out into the main courtyard. Hopefully, you’ve cleaned it up a bit from above. Use the doorway for cover and shoot your way out. If you didn’t get a chance, then a grenade will really open things up. Move up to a fallen pillar and then punch through to the catwalk. Move up to zipline and jump on it to wind up back at the start of the level.
Just walk out the main door and jump back onto your ATV. You’ve killed enough ghosts for now, so just head back to the town and report your success to Dan.
While you’re here, grab Dan’s collector card off the end table next to the wounded man.
Medical Supplies
Dan will have another quest waiting for you. For this one, he’ll direct you to the nearby Outrigger settlement so that you can get some medical supplies to heal the settlers wounded in the last raid. This is actually a peaceful mission, and we definitely want to pick up our own buggy, so accept it right away.
If you want, you can explore the area a bit. The only new point of interest is the junk dealer Halek’s shop. It’s located at the bottom of the slope in the center of camp. You can sell the junk that you picked up in the ghost hideout, and buy a few things. If you have the money, it’s not a bad idea to buy the assault rifle (although you probably will be a little short). Definitely make sure that you buy the scope and another set of wingsticks. The scope will be fairly important and wingsticks are nice to have around.
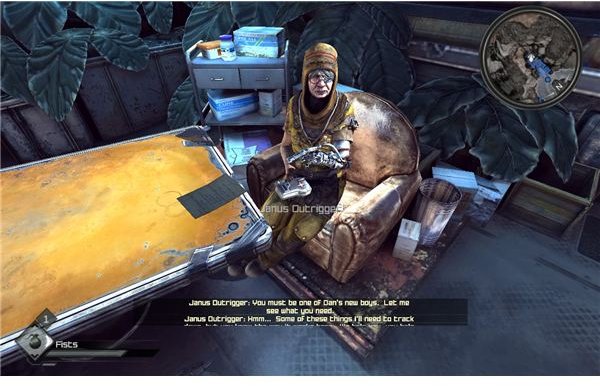
Take the short drive over and park outside the Outrigger base. It should be an uneventful trip. Walk past the guard and up the steps until you find Rikter. He’ll block your path for a moment while he talks to you, and then he’ll send you further along the catwalk to talk to Janus. You can grab her collector card off the couch next to her.
Hand your list over to her, and she’ll start gathering the supplies. Nothing is free though, so we need to help them find a lost settler, Juno. Agree to the quest, and start walking out. As you leave, Riktor should stop you and give you a second stage to the quest. Regardless of what happened to Juno, the radio tower isn’t working. You need to get it set up again. The payment is a combat shotgun, so this should be a no-brainer. Take the quest and walk back to your ATV.
Where’s Juno
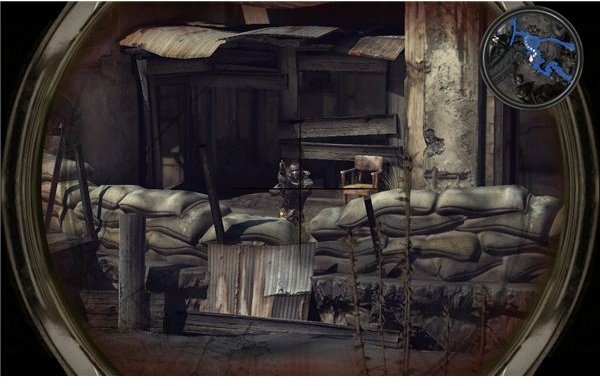
Drive over to the radio tower to start the mission. Note that you just need to look for the small trench carved up to the tower. Jump off and walk forward until you can reach the first building. There’ s a bit of a problem though, since all of the bandits that are here will be carrying assault rifles. Combat may be a little difficult. Crouch as you approach the first building, and then peek inside. If you can, whip a wingstick into the back of one of the guards. You can then back out a bit and wait for his partner to panic. Swing back inside and come in firing to take him out.
Move forward and outside, and engage the two guards that are across from you. This is why I suggested that you get the scope. If you have it, you can easily aim at the men across the canyon from behind the cover of the walls. If you’re well hidden enough, you can just fire at their heads. If you’re taking too much damage, aim at their chest and let the recoil carry your shots up to their heads. At least one should be wearing a helmet, so don’t assume that headshots will drop them in one hit.
Move down into the little ravine and watch for a final guard down below. He may be facing away from you, so I suggest just using a wingstick to kill him. If he’s isn’t facing away, then be careful. He’s got a shotgun, which will just about kill you at this range. If you want, you might want to look below the first shack that you walked through. The basement/tunnel area has a collector card for the turret. It’s not a bad idea to grab it now.
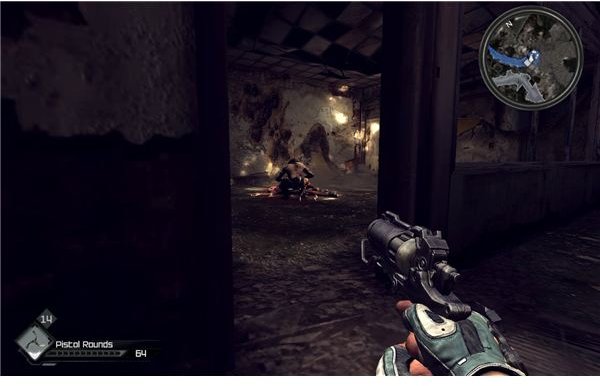
Don’t bother with the long side route (that’s for the next quest); just follow the waypoints up to the radio tower. Once you step inside, you should hear some growling. Crouch and round the corner to find a mutant eating Juno. Toss a wingstick into his back, and then inspect the body to confirm Juno’s death.
Walk forward and into the back area of the station. There’s a collector card for Rikter off to the side on a table. Take it if you want, and then follow the path to reach a ladder that will take you up to the radio tower’s controls. Just climb up, flip the marked switch to automatically calibrate it, and ride the nearby zipline out of the station. Run back down to the road, grab your ATV and drive it the very short distance back to the settlement.
When you walk back up the ramp to Rikter, Ramos should stop you. He’ll give you the quest, Mutant Alert. Go ahead and take it now.
Move up to Rikter to confirm that you completed the mission. He’ll hand over a combat shotgun with a bunch of buckshot, so take a moment to look at your new weapon before walking up to Janus. Report Juno’s death to her to get the recipe for bandages. Go ahead and make one (she’ll give you the ingredients), then walk back out of the base.
Mutant Alert
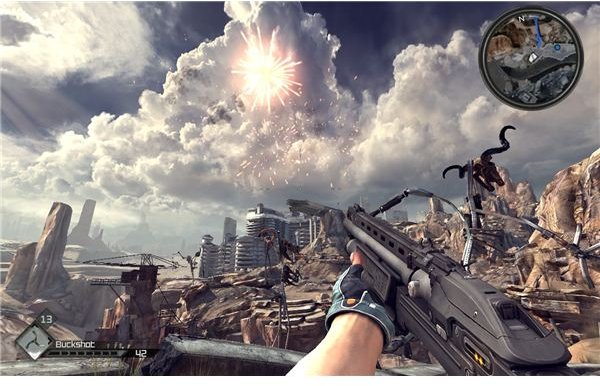
Just take a short drive back to Hagar Territory to deliver the medical supplies, but don’t stop at the settlement first. Go ahead and drive past it back into Ghost Territory. If you go back to the old hideout, you should see a fireworks launcher by the bridge. Pull out your shotgun, and then use the launcher to send out the fireworks. This signal will cause three mutants to spawn and rush you from the direction of the pylons (where you probably parked your ATV).
One shot from the combat shotgun will take each mutant out, so just aim for center mass and walk back to your ATV. Don’t worry about turning this in right away, we’ll go back to the settlement soon enough. Turn in the medical supplies to get one step closer to having your own buggy.
Talk to DR and he’ll explain that your buggy isn’t exactly in working condition. We need to go out to the Outrigger Settlement again.
Before you go, I would suggest that you go ahead and buy the assault rifle from Halek. If you don’t have enough money yet, just turn in the Mutant Alert quest and come back.
When you arrive at the Outrigger Settlement, you’ll find out that getting the parts won’t be so easy. It seems like we have another bandit hideout to raid. This one will be a big step up in difficulty, so get your gear together. In the next installment in this series, we’ll be taking on the Wasted on their home turf.
References
- Information based on “Hard” difficulty playthrough of Rage.
- Screenshots from Rage
This post is part of the series: Rage Walkthrough - Parts 1-5
It wouldn’t be much of a game if everything went according to plan. Our first steps out of the ark will lead us right into battle with the local bandit clans. To earn your buggy and secure a safe place in Wellspring, you’ll have a lot of work to do. Don’t worry, we’ll cover it all.