Having completed half of this brilliant horror game, you can still stumble upon a confusing puzzle or difficult situation, and this walkthrough is here for just such moments. Continuing our series on Dead Space, don’t get frustrated, just keep reading and playing the game!
Exit the tram. Listen to the message, open a box in the right corner and a panel in the waiting room. Proceed through the doorway. The small room you reach has a box to the right and a Power Node to the left, behind a corner. Enter the door to RIG Room. The compartment to your left has two more boxes and an Upgrade Bench. The right compartment contains some panels, ammo, Small Med Pack and a store. After your business there is completed, walk straight up to the elevator (a Save Station to your right) and use it to get to Deck B: Processing.
Exit the elevator. Walk forward, grab the audio log and turn left. Open the boxes and proceed further. At the end of the corridor, turn left, open a panel, then reach another Save Station and proceed down. Enter the Mineral Processing Area. Turn right and walk on. A text
log, store and two boxes await you. Continue the path and enter a hole in the wall to your left.
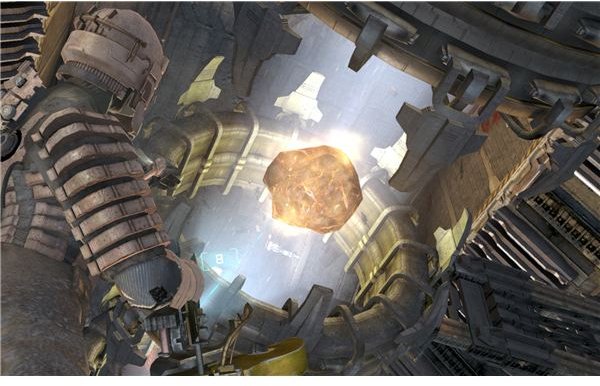
You’ll find yourself in another zero gravity area. Jump around the room, grab the meteors with kinesis and launch them into the large beam (see picture). Once you get rid of all four asteroids, get to the small platform to the left from the entrance and use the console to turn gravity on. The room behind you can be opened with a Power Node and contains ammo, a Medium Med Pack and a box.
Now walk around the room until you reach the opposite side. Watch for any crates that have fallen to the ground once you turned the gravity on. Enter the door to Mineral Processing Control. Open the crates, grab the ammo and the Mining Access Key. Proceed through the door and grab a Power Node. Continue onwards, enter the door (wait for power to restore), then another door to your left. Now you are in a falmiliar area. Reach the huge elevator and use it to get to Deck D: Maintenance.
Exit the elevator. Take the Medium Med Pack to your left and walk down into fleshy area. Grab the Gold Semiconductor, audio log, and Stasis Pack, as well as some ammo and a crate. Enter the Equipment Maintenance Bay. A Save Station is right to the entrance. Now proceed forward and pull the platform towards you using kinesis. Enter the platform and use it to get to the other side. Listen to Nicole, then step off the platform, loot the room and proceed through the door.
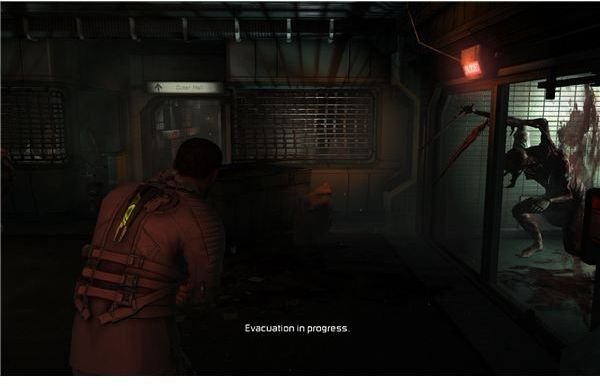
Protect Nicole from monsters while she tries to open the door for you, then enter the door. Take everything including the SOS Beacon, Level 4 Suit Schematic and a Power Node. Now go back, use the platform to get across the chasm, and proceed to Deck C: Mining with the help of the elevator.
Turn to your left and walk forward to reach an area with store, Save Station, and some boxes as well as an Upgrade Bench, ammo and an audio log. Now pull out the battery feeding the cargo lift in this room and carry it to through the windy area to the opposite side. Insert it in the slot, then use the cargo lift you just powered up.
Continue walking through the corridor. On your way you’ll find a Stasis Recharge, more panels, a text log and a Gold Semiconductor. Now enter any of the round doors.

You are in another zero gravity area. Destroy the two tethers holding the asteroid; one is at the bottom and another one at the top of the room. Wait for the two holding rings to stop moving, then jump on the asteroid and run to outside. You are in vacuum now, so be quick. There are two more tethers, each at the other side of the asteroid. Destroy them, then jump back on the asteroid and plant the SOS Beacon. Now run back inside and jump down to the floor. Now exit the room.
Use the cargo lift and go up. Grab the battery, wait for the flames to stop and continue walking until you reach the opposite side. Use the battery to restore the power to the cargo lift there. You can use the store and the Save Station here. Now utilize the cargo lift to go up. Enter the corridor and walk forward. Enter the door to Mining Control. There are a couple of crates and a Power Node here. Now use the console to release the asteroid into the space. Listen to the message, then, after the door has reopened, proceed all the way back to the huge elevator and use it to go to Deck A. Continue moving back until you reach the tram station, then use the tram to complete the chapter.
This post is part of the series: Dead Space Walkthrough Part 2
A series of walkthroughs, one for each mission from 6 to 9, of Dead Space, that help you getting through the difficult moments without spoiling the fun!