This is our first real mission toward finding the Atlantis of the Sea. For now, we have to find a way inside the old Château. There are a few puzzles, a cave and a whole bunch of thugs in our path to the truth. Do you need help getting past them?
A Long Walk
For the most part, you’ll have a fairly peaceful start. Just walk through the forest and keep an eye out for a stream. When you reach a running stream, follow the current until the very end of the river. There’s a treasure in the little cave.
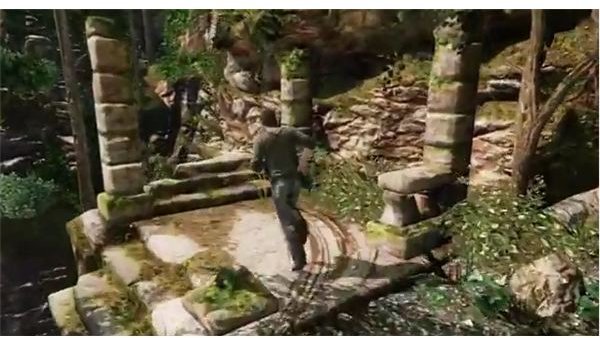
Follow the path by the river until you get to a big statue. Again, there’s a piece of treasure nearby. Walk onto the hill behind the statue. There’s a glimmering piece of treasure that you should be able to spot. Once you have it, look at the ground near the statue. If you climb up onto the pillars, you should be able to see some drag marks in the ground that show the way to a narrow ledge. You can walk along it to wind up in a narrow cave and jump over the gap to reach a new platform. Jumping the next gap will put you within sight of the castle.
Walk past the rusted car and the decorations until you wind up at the front doors. They’re locked, so it’s time to explore a little. Start out by climbing the glowing gutter and using the loose stones to move to the left. Once you’re on this rooftop, you can use the little ramp to leap over to the next gutter across from you. Move to the left along this wall until you reach the tower with the hole in it.
If you’re collecting treasure, don’t go into the first hole in the wall. Keep climbing and you’ll be able to reach a higher floor in the tower with some treasure resting on the floor. Climb back down to go through the right way, and you’ll wind up inside the castle itself. If you walk forward, Sully will find a window that’s simply locked from the inside. Shoot the lock off of it to let him in.
The Castle Entrance
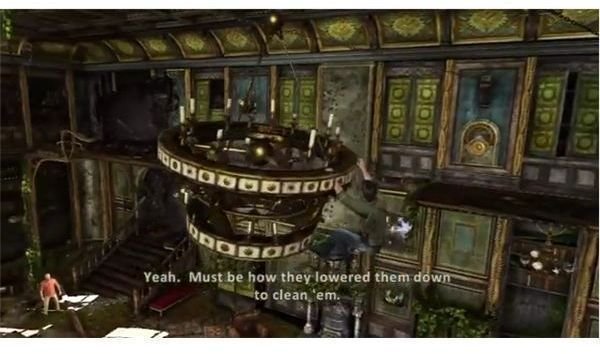
You can find a door to the next area, but it’s blocked by a big beam. Walk back a bit and Sully should spot a bookcase. Help him lift it up, and you’ll be able to use it as a stepping stone to reach the upper floor. Walk over to the chandelier, and jump onto it to reach the little bit of balcony with a mechanism on the wall. If you turn the mechanism, you’ll raise up the second chandelier, which will let you jump from the first to the second to make your way over to the top of the big beam. Push the beam aside to let Sully open the door, then just drop down and go through it.
Follow Sully into the next big room and jump over a few walls to reach a big open area with a few staircases. Before you drop down into the next area, look at the end of the hallway directly across from the open window. There’s a piece of treasure lying at the end. Pick it up, then jump out the window. Get through more of the broken wood and rubble until you reach the puzzle room.
While Sully looks at the fireplace, you can duck into the connected room to get another treasure. There’s a treasure stuck on top of one of the curtains in the room. Look for the glimmer, then shoot it a few times to knock it down.
Once you’re ready to move on, go inside and turn one of the statues. Drake should note that there’s a drawing that can help. The puzzle itself isn’t that difficult once you understand the heart of it. There are four statues. Do not touch the one with a sword. That one is already facing the right way. Turn the axe statue to face the shield statue, and the shield to face the axe. Make the morning star face the shield, and the fireplace will turn a bit. Help Sully open the secret entrance to advance.
The Battleground
Drake will fall through the floor, and wind up in a cave below. Before you move ahead, look behind a few stalagmites that are off in a corner. There’s a treasure that you can pick up sitting behind a little grouping of them. After that, it’s a fairly straight walk forward though. Just move up and jump into the water ahead, then dive under the rock to wind up in a narrow tunnel. If you keep moving forward, you’ll wind up in a large circular chamber, with some ledges that you can climb up to reach the old stone well.
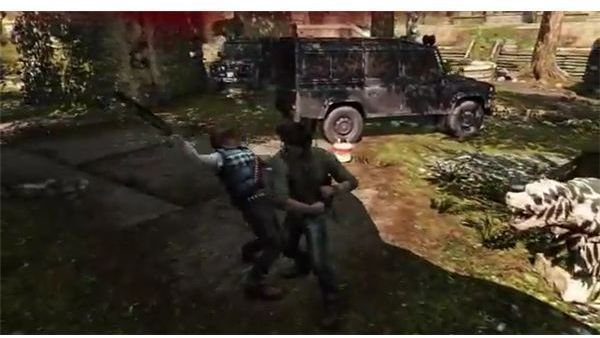
Things are going to get a little tricky though. Marlowe’s boys are here, and it’s time for a gunfight. Start things off by doing a stealth takedown on the thug sitting by the well. You can then hop out and grab his gun, and take up a good position behind the well. From here, you can pick off a few of the mercenaries in the yard, and then watch both sides for flankers. If anyone tries to get around you, either hop out of cover and use melee attacks, or use blindfire to shoot in their general direction quickly. At close range, you’ll be accurate.
Once the first wave is taken care of, move forward to hit the stragglers and find a few more gunmen up in a window. Get by a wall and pick them off so that you can climb up and go through the newly opened windows. They apparently left behind a nice cache of grenades, so pick a few up and go through the grenade tutorials to take out the next two groups and reach the main courtyard. After taking out the first group, you’ll be able to drop down and reach a nice weapons cache. Stock up on ammo, and look for a piece of treasure in the corner before you move on to the second tutorial.
Sully’s just ahead trying to hold off the mercenaries. You can start things off by going up the ramp to the left and reaching a new grenade stash. Go ahead and toss a few out to kill a couple of the thugs, then start shooting with your pistol. Don’t get too invested in this spot though. Two men will kick in the locked door below and charge up the steps. If you’re quick you can melee them both while they’re on the stairs, which should result in a weird high kick attack that will take them down instantly.
Go out the gate and see if you can join up with Sully to the left. There are a lot of thugs spread out around the area. Thankfully, they drop a lot of ammo and there should be a Mag 5 revolver in the corner. This will kill anyone with a single hit, so it’s a good weapon to have. It’s not vital to surviving though. Just staying by a stone arch and trading fire with the gunmen should be enough.
After a second wave hits, you’ll be able to go up a few sets of steps and find a door that you and Sully can knock down.
The Path to the Tomb
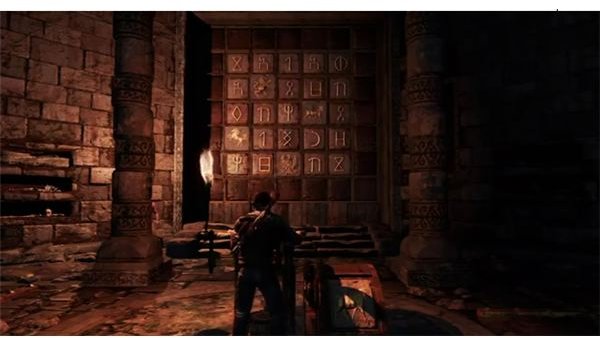
Go through, but don’t just drop right down. You should be able to climb up a level and grab another piece of treasure. Once you have it, go down to the area with all the marked tiles.
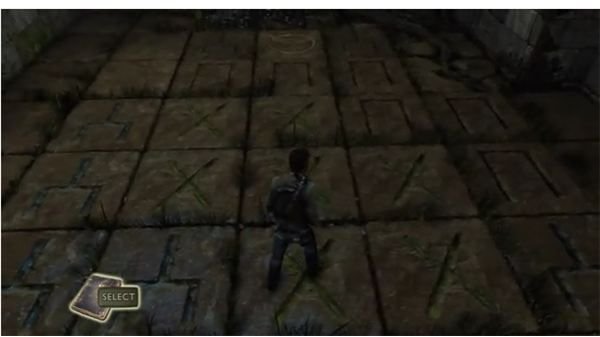
After Sully finishes talking, you can open up your journal to get your hint. The heart of it is actually pretty simple. You need to walk on the appropriate number of symbols to get from the rising sun to the setting sun. There’s no penalty for failing, you just have to do it again.
Specifically, you need to go up, left, up and right to make a little square and step on four of the first symbol. Then, make a little left hook across the Xs, and walk an “L” on the new symbols, then just hit the last two Xs and symbols leading to the sunset symbol to open up another secret door.
If you go through it, you should find John Dee’s secret lab. While you wait for Sully to get a little light into the room, you can look up at the ceiling. There should be a treasure stuck at roughly the center of the ceiling. A single shot will knock it down. To wrap up the chapter, you can just talk to Sully, decipher the message and then examine the Altar a few times to push it aside and enter the hidden area.
References
- All screenshots and information from Uncharted 3: Drake’s Deception
This post is part of the series: Uncharted 3: Drake’s Deception Walkthrough
We’ve got a long adventure ahead of us. We’re going to have to make our way out of a deal, go through a long flashback, follow the trail of a long lost conspiracy through London, France and Syria, then spend some time with a few pirates.