We’re now moving on to the vice desk to try and get to the bottom of the new supply of army surplus morphine. This means cracking open several illegal businesses, tracking down the lost supply and taking out the distributors to stop the deaths.
The Crime Scene
Drive to the scene, and then talk to the officer waiting by the stairs. Go up and around to their apartment to find Carruthers and get the update.
Examine the body in the chair, and then look at the table. Open the note to get the “strange doodle” and then read over the sheet music. Look at the cup too. Turn it around to get the name of the restaurant they went too, The Black Caesar. Turn it over to note the tape on the bottom. There’s another cup with the same evidence in the bedroom that you should note too.
Examine the body on the floor in the side room. Turn his right arm to note the needle marks. Look in his pocket to find his driver’s license too. Note his name and address, and the radio station note in the other side.
Tyrone Lamont’s wallet is on the floor. Note his ID and the numbers slip in the other side.
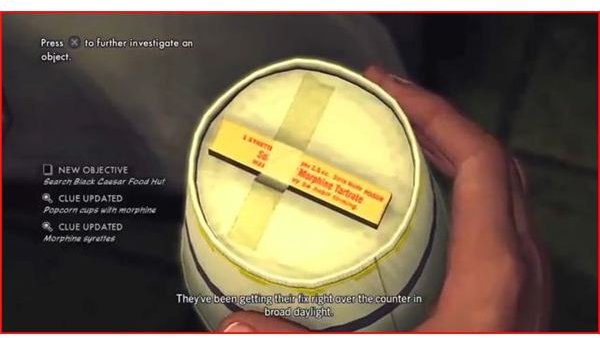
You can examine the syrettes on the floor by the kitchen. Walk into the kitchen and check the empty cup to see that it’s not so empty. Turn it around, and the investigate it further to note the morphine under it. We’ve got a good lead now.
The Black Caesar
Drive over a block to find Black Caesar’s Food Hut. You’ll wind up in a quick chase, but it shouldn’t be anything new. Just stay close and gain ground on the drain pipe, then stick close until he stops to ambush you. Just take him out in the fistfight to end it. He’s fairly tough, so focus on dodging and just getting in a few quick jabs. You’ll regain control back at the food hut once you’ve arrested him.
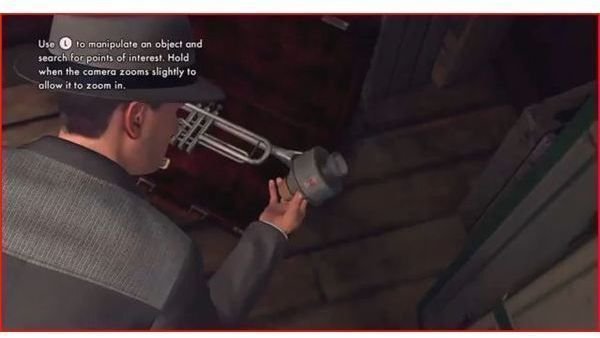
Investigate the box by the popcorn to find his stash of morphine syrettes. Then check the suitcase in the other corner for a ticket to the Blue Moon club. Flip the ticket over to get a lead on Jermaine Jones. Also look inside the piece of the horn to spot some numbers tickets inside. Open it up to note the number’s racket at Ottie’s.
When you’re done, talk to Fleetwood Morgan outside. He’s lying about his role in the morphine distribution. Point out the box of morphine that you found to make him crack. For now, just doubt his story about the numbers slip. That’s actually it for now. Once the patrol car takes him away, walk over to the telephone booth and put out a trace on Jermaine Jones. It’s probably a good idea to pay him a visit.
Jones’ Booking Agency
Walk up and move on into the marked office in the building. Go back into the main room and talk to Jermaine, then investigate the office.
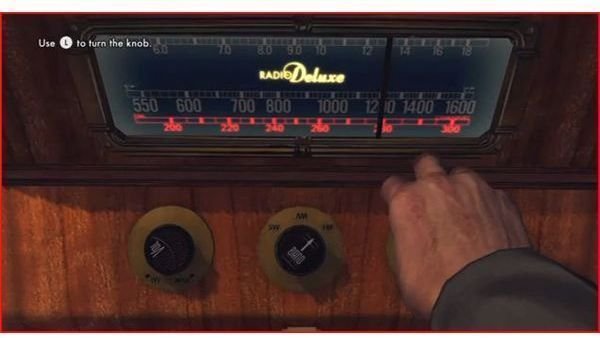
Well, “JJ always listens to 275FM,” so set it to 275 FM, and then turn it on. Leave the interface and you’ll find his stash.
Win the easy fistfight, then go back and search the stash. Note the clean stack of fifties, the morphine syrette, the numbers slip, the drugs and then look at the label for Ramez Removals on the top of the lid. Also look at the radio to note another slip from Ramez Removals.
Go ahead and talk to Jermain Jones now. He’ll be lying about just about everything. Doubt his stories about the army surplus morphine, his relationship with Ramez Removals and call him out for not claiming to know Ottie. Use Morgan’s testimony as your evidence.
When you leave, use the gamewell by the car to get an update on Ramez Removals. We’ll be going there in a little bit.
Ottie’s Numbers Game
Drive over to the office, and then go in the back and swing up to the gambling den.
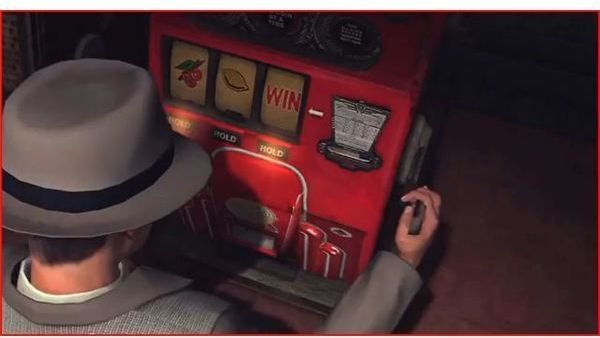
Go to the slot machine and get it to line up with the strange doodle that you found earlier. Pull the handle, and then hit the hold buttons to lock the symbols in in the right order. It shouldn’t take long to get all three.
Look in the new stash, and look at the morphine, the numbers slips and another Ramez Removals tag. You’ll need to chase Merlon down at this point. Just keep close and you’ll eventually get within tackling range. You should be getting good at this by now. You’ll bring him back to the den automatically. When you regain control, look at the walking cane and open it up to find the IOU slip for Ramez.
It’s time to interview Merlon Ottie. Call him out on his lie for the army surplus morphine. Use Jermain’s testimony about Finklestein to seal the deal. He’s actually telling the truth about the IOU slip. There’s nothing else there.
Well, it looks like it’s time to finally get to Ramez Removals.
Ramez Removals
It looks like we struck a nerve this time. They’ll try to escape in that big van, so we need to shut them down. It’s a fairly standard chase, except they’ll start tossing junk out the back at you. Try to get close inbetween throws so that Roy can get a shot at the thug. Avoid the wrecked cop cars and then swing up to the left side to let Roy take out his tires. You should get a good chance after the thug dies.
Once the chase ends, you’ll take them back to the warehouse and get a chance to search it.
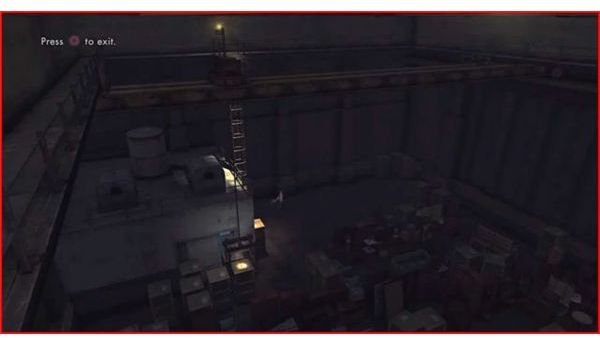
Follow the puddle of water through the furniture to find a ladder leading to a catwalk. Follow it to the cargo crane, and then use the crane to lift up the crate blocking the entrance to the freezer. Drop back down the ladder and go into the freezer.
Examine the block of ice at the entrance, and then notice that your gun is drawn. Aim it at the block of ice and fire until it shatters. Examine the stack of morphine to confirm that this is where they’re hiding a good bit of the supply.
Work your way back out to the entrance, and look for the lit up table. There’s a newspaper sitting on it, if you want to get the other side of the drug war.
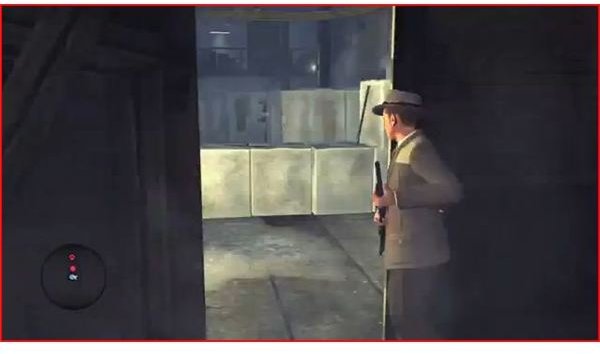
Look at the ledger and note the repeat deliveries from the Polar Bear Ice Company. At this point, Ramez will make a run for it, so chase him into the warehouse. Watch the minimap and don’t just run up to him. He has a shotgun. Only charge him if you can shoot him before he gets off two shots. Watch your corners and the minimap and you should be fine.Take him out to finish things up at this warehouse.
We’re not done yet though.
Polar Bear Ice Company
Go inside to start a fairly big firefight. Don’t just blindly chase Lenny, he has guards waiting for you. Pop the first one as you go through the door, and watch the left side as you go past the counter. A guard will pop up with a shotgun. Take him out as you move past, and then grab his gun, if you want to make this much much easier. Move forward and keep watching corners. Use the cover to keep an eye out and pick them off.
Once you make it into the warehouse, just use the ice blocks for cover and keep advancing. Lenny has nowhere to go, so just move forward slowly until you make it up the steps. When the cutscene ends, help Roy gun him down. Then just walk past him to the big marked crate. Open it up and then confirm that this is morphine to wrap up the case.
References
All screeshots from L.A. Noire
Due to the branching nature of the game, your experiences may differ. Feel free to post any deviations that you find in the comments below.
This post is part of the series: L.A. Noire Walkthrough - Part 3
We’ve taken a bit of a turn in our career. We’re moving on to the vice desk and the arson desk as the story advances. If you need any help tracking down the army surplus morphine, or unraveling the great arson conspiracy, look here.