We need to do a bit of an undercover operation. If you want to figure out what happened to the hacker at the shipping facility, you’ll need to find a way to get into the morgue and retrieve his neural hub. If you need help getting in, either through charm or stealth, look here.
A Day at the Office
When you land, you’ll get a chance to talk to Faridah for a bit. Once that’s done, follow the marker to Pritchard’s office to drop off the Typhoon for inspection. After that, go to the nearby staff elevator to talk to David and get your new mission. He needs you to grab the neural hub of the hacker from the police station’s morgue, which we’ll get to in a minute.
Walk out of his office and talk to Athene to get an update on the Taggart situation. You can also grab a newspaper off of her desk. Go to the elevator across from Athene to reach the main office area. There are some side quests that you can do inside, but for now, if you just care about the main mission, you can head out the front doors.
A Quick Pickup
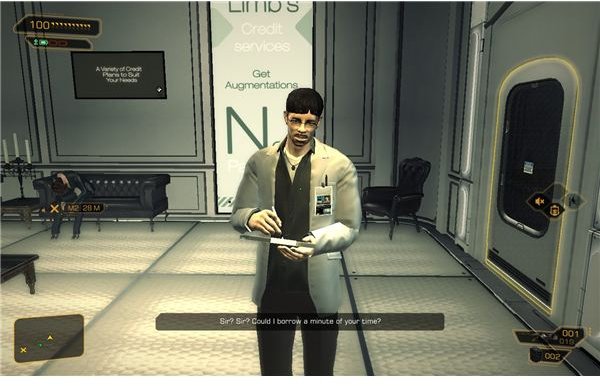
Your first stop should really be the LIMB clinic. Just walk up to the doors to trigger a cutscene and talk to the doctor. She’ll note the surprising success of your augmentations, and hand over a 5,000 credit from Sariff. This should net you one Praxis Kit. You might have enough money for a second. Buy what you want, and then head out.
If you need more supplies, or want to sell any of the guns that you scavenged, you can go to the gas station near the clinic to sell to Grayson. He has a few guns on hand. If you didn’t get a tranquilizer gun before, now is a good time to pick one up. Note that you shouldn’t buy the shotgun. It’s a waste. You’ll get a shotgun if you do the Lesser Evil quest for Carrela, and you can get one in the police station quite easily.
Planning Your Entrance
There are a few ways to get in.
The big decision you’ll have to make is what level of challenge you want to have. There’s an easy way and two needlessly difficult ways (at least two).
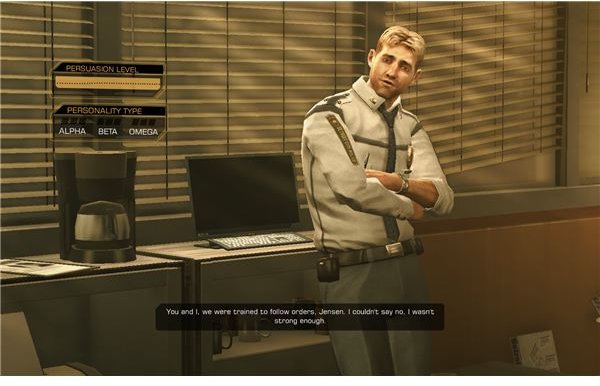
Charm: The easy way, is to just walk right in the front door. Save and then talk to Haas at the front desk. It seems that he was with you for the infamous Mexicantown shooting, so you go back a fair bit. Your goal is to sweet talk him into letting you have access to the restricted area.
There appear to be a few ways to do this. I managed it with nothing but absolve. If your combination doesn’t work, just revert to the old save and try again. Heavy absolution works quite well though, so stick to it if you can. He should agree to give you temporary permission, which will at least keep the officers from shooting you on sight, which is nice. Even if you just plan to aggressively snoop, you’re at a big advantage if they’re friendly to you.
Sneak In: If you don’t care about this advantage, there are a few back routes into the station. If you get to the rear alley, you can either get in through the sewer or the fire escape. To get here, you either have to have augmented legs and leap over the fence by using the dumpster or go through the side alley. The alley’s on the map, but it is also electrified at the moment.
If have a skin augmentation that gives you a defense against electricity, then you can just wade through it.
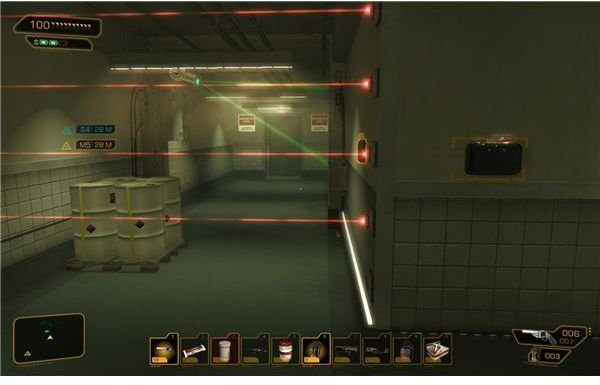
Otherwise, grab the box inside and drop it into the water, then walk back out and leap over the barricade by the punks. You can grab another large crate here. With these two crates, you can make a little bridge and slowly make your way down the hall. Leap onto the dry spot around the corner, and then flip the breaker to make it safe. You should also be able to go down the manhole across the street from the police station to reach it, but you’ll need to watch out for some armed thugs in the tunnels.
Once you’re in the back alley, you can either go down the manhole (or stay in the sewer) and then stick to the left side to climb up and find the back entrance to the morgue with a level 3 lock. If you can kill the laser field with a level 2 hack, then you can easily slip in, stun the single guard watching the entrance, dodge the camera’s view and enter the morgue.
The other entrance to the police station is the fire escape, which takes you up to a vent at the top.
A Date at the Morgue
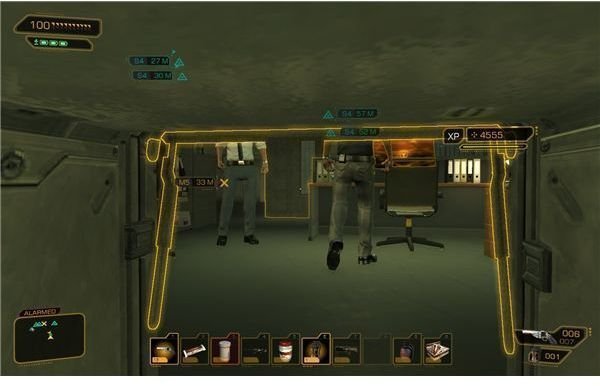
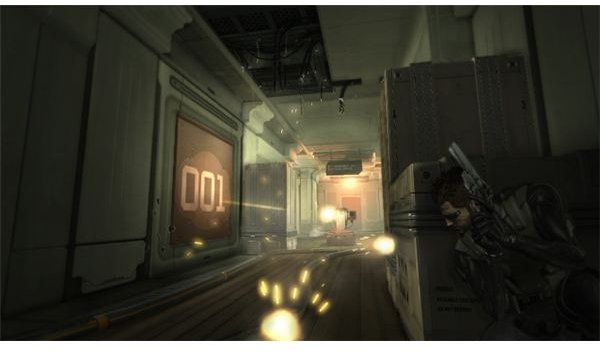
As you may expect, the police station is full of police officers. A shootout will not end favorably. You’ll need to stick to stealth if you want to survive. Even if the police officers are putting up with you, they will open fire if they see you hacking anything. Trespassing doesn’t appear to bother them, but if they see you in the middle of hacking something they will give you a warning and then open fire.
Even if they are friendly to you, you can use a stun gun or tranquilizer gun to quietly take them out. Just make sure that no one sees you take the shot and don’t leave them in view of a camera or anyone else.
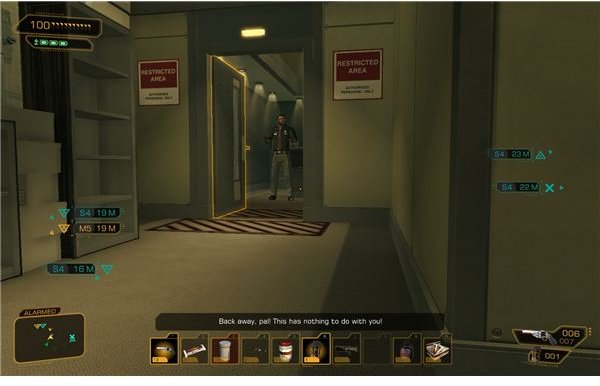
The actual mission here is incredibly simple. If they’re friendly, there effectively isn’t a mission. You can get to the morgue by the back entrance through the sewers, by a vent that leads into the doctor’s office (it’s next to the stairs and by the camera) and you can just get into through the main doors (with a detour through a storage area). There are several signs up pointing to the morgue. The elevator, stairs and vent by the atrium will all take you where you need to go.
The doctor will actually just assume that you’re from Homeland Security, and he’ll give you the full report no questions asked and even let you poke around in his office. Just examine the hacker’s body and grab the chip. If they’re friendly to you, then you can just walk on out the door.
Raiding the Police Station
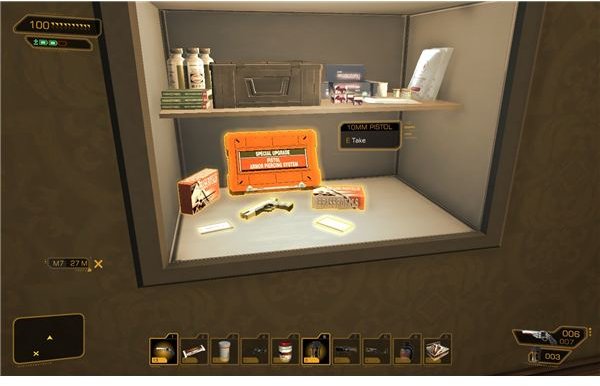
There are a few things of note inside, at least ones that are easy enough to get without clearing out half of the station in a ridiculous manner. There’s an armory to raid, including an interesting, if unimpressive PEPS gun inside with a few charges. It’s basically just an overcharged stun gun. You can get the password for this from the office that’s on the first floor, just past the lobby and to the back.
The guard inside the armory won’t let you in, even if they’re tolerating you. Thankfully, there’s a vent that you can use in the main hallway to slip in behind him and tranquillize him.
Use the computer, and then open the door to loot a whole bunch of gear.
There are a few other offices too. You can get a shotgun off of a desk, floor guards tend to have codes for all the doors on them and there’s a few little things here and there. You don’t have to get it all just yet though.
Walking Home
When you’re ready, walk back to the Chiron building and take the elevator up to your apartment. Then just go inside and walk over to your computer. Use it to trigger a cutscene and a new objective. We need to raid a bit of gangster territory to help Pritchard out.
Before you do that, you may want to explore the apartment a bit. There’s a bottle of painkillers under the table with all of the clock parts, there’s a gun next to the desk and some credits lying around the apartment. The big thing is the “hidey hole.” Athene sent you a message with the code for it.
Walk back out and look at the panel right next to the entrance to your kitchen. If you punch in the code, you can raise the television to reveal the secret stash, which has a lot of ammo and a weapon mod. Grab what you want and then go.
References
- All screenshots and information from Deus Ex: Human Revolution
This post is part of the series: Deus Ex: Human Revolution Walkthrough - Part 1
Things get off to a rough start in Deus Ex: Human Revolution. We’ll need to clear the Sariff labs out, raid the Milwaukee Factory and then carry out a few missions in Detroit to get to the bottom of it. If you need help with the side quests or main mission, these guides will help.