Borderlands is an action RPG with elements of both role playing games and first person shooters. This article will help lead a person through the basics of the path to the first of the vault keys and through a number of the basic boss battles of Borderlands.
Borderlands Walkthrough: To The First Vault Key
Borderlands is one of the most unique shooter in years. It feels and plays differently than many of the games people are used to with an odd look, a quest and leveling structure different from the typical first person shooter. This gives considerably more decisions to the players of Borderlands . This Borderlands walkthrough will help a person get started on the world of Pandora until they reach the first of the Vault keys and defeat three of the easier, but still interesting bosses, gaining access to the class skills and finding the first of the huge variety of weapons.
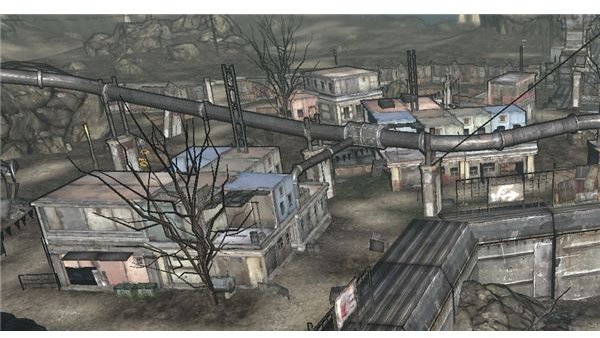
Borderlands Walkthrough: Fyrestone
You will begin just outside of the town of Fyrestone. A Claptrap will appear and begin to lead you into the town. At this time Bandits will attack. For this first mission you simply need to kill the bandits and follow the Claptrap. Shooting any human in the head will give critical hits and extra damage.
Once inside Fyrestone you will begin to get quests from Dr. Zed the blood splattered doctor of Fyrestone. After a couple of
easy quests you will be sent to T. K. Baha who will have more quests for you. At this point in the game all of the quests can be beaten pretty easily by following the diamond that appears on the direction marker on the bottom of the screen as these quests primarily exist as tutorial levels, though generally far better done and more challenging than those in most games.
These quests will give you a basic shield, grenades and get you to about level 4. If you are not at least level four by the time you reach the quest Nine- Toes: Take Him Down you may want to consider a bit more exploring as you will need to be at least level 5 when you reach him.
Borderlands Walkthrough: Skag Gully
Getting to Skag Gully is the first real challenge in the game. In order to reach this area you will need the Nine-Toes: Take him Down quest. You will then discover a explosives plunger by following the diamond marker on your HUD once you have accepted the correct quest.
Once in Skag Gully the first trick is that you can no longer follow the diamond directly as you will need to go around things. Going under the stone arch and turn right. Follow the path along the right wall and, after fighting a few skags, you will find another stone arch. Continuing to follow the path to the right you will find a cross with a tire on it. This will give you at least one new weapon you will probably want to use and often two. Since you are going into one of your first real fights you will want to ensure to put on your best equipment.
From there you will go up the hill and you should see a tunnel underneath what looks like a water tower. Just inside you will find two vending machines. Follow the path and at the end you will find Nine-Toes and a fight that can be a bit tricky the first time you play Borderlands.
Fighting Nine-Toes
Nine Toes alone isn’t all that difficult. What makes him difficult is that he has two skag pets, Pinky and Digit. In order to fight them you will almost certainly need to be level 5 because this unlocks your special class ability.

There is not much room to hide or maneuver in Nine-Toes area so the best thing to do is kill quickly. If you can do enough damage to kill him you can ignore the Skags until after he is dead. In most cases, you will want to focus on one of the skags because even if you are killed they will not respawn so it makes nine-toes easier to survive if you are killed before he is. He will also drop a good weapon for this level so make certain to get it before you leave. There is also a chest with more weapons in this area which is worth checking once he is dead.
Borderlands Walkthrough: Fyrestone Bounty Board
Once Nine-Toes is dead you will return to Fyrestone and be directed to the bounty board. This is where most of the quests in the game are found and almost all of the side quests. At this point there will be two quest lines you can begin. One sends you to the Catch-A-Ride where you will be able to get vehicles later. The other sends you back to T. K. Baha.
Unless you are level 10 you will want to go to T. K. Baha first. He has a couple of missions which send you back into Skag Valley to collect things and fight Scar. These are optional quests, but can help you level up quickly and you will want to head into Skag Valley until you are about level 10. If you are going into Skag Valley again you will also find a number of tape recorder which are also an optional quest and can be done largely at the same time as the other two.
Borderlands Walkthrough: Fighting Bone Head
By this point in the game you will have noticed the bandits which appear just outside of Fyrestone. They are next to a narrow path which leads to Bone Head. Bone Head is level 11 and most of his gang is level 10. That means that while you can reach him about level 6 or 7 you will die quickly if you do.
At level ten Bone Head becomes a reasonably straight forward fight. As you enter into the area you will notice a raised walkway. You will most likely want to use that as it can give you cover. Focus on taking out his gang and once there are less people Bone Head can be attacked.
The major difficulty is his shield. If you don’t focus it will regenerate before you can really do any damage. If you have only him to focus on then you should be able to keep the shield down easily enough and once it is down any of the special abilities will help considerably. Once defeated he will drop the Bone Shredded a weapon that is likely better than what you have.
With Bone Head dead you will be able to begin to move onto Sledge and your first vault piece.
Borderlands Walkthrough: Getting to Sledge
Once you have beaten Bone Head you are going to be able to use vehicles. This will let you leave the immediate area of Fyrestone and open up some new areas. The first of these missions are pretty straight forward with the most unique being jumping over a dry river bed. If there are side quests at this point that sound interesting it is a good time to do them because you will likely want to gain a couple of levels. The arena is one of the fastest ways to level once you find it allowing you three quests as well as a fair amount of experience from Skags.
The quests that lead you to Sledge: The Battle for the Badlands are Sledge: Meet Shep, Sledge: The Mine Key, and Sledge: To the Safe House. These are all straight forward missions which require a fair amount of fighting and get you the key to Headstone Mine where you will find Sledge.
The Headstone Mine area is a long running battle. If you kill the soldiers here they will not return until you quit and restart the game and fighting through is reasonably direct. The main obstacle will be a mounted gun. Once you reach this you will want to stay in cover or blow up the gun. Either way once this is done the remainder of this section is a straight forward fight. Simply continue to follow the diamond and kill things when necessary. This should get you to Sledge easily enough.
Borderlands Walkthrough: Fighting Sledge
Sledge is the first Vault Key boss and a major step up in difficulty from the others. About level 18 you will want to be at least t

hat level to fight him. Sledge uses two weapons, a shotgun and Sledges hammer. He also has a number of bandits in his area.
Getting critical hits on sledge is difficult with the red visor being his only weak location so instead focus on guns that can let you keep your distance so SMG’s or assault rifles are likely a good idea as they can take down his shield reasonably quickly. Circling around to either the left or right side of the room will give you more cover so you can stop and let shields recharge if necessary. It may also be useful to leave some of the bandits alive in order to get a second wind. This is not an easy battle, but it is a reasonably direct one. This should also get you an xBox 360 achivement .
Conclusion
Borderlands allows considerably more freedom than many other first person shooters and combining that with the leveling system makes for a very fun game and a huge amount to explore so while you can rush through this game doing mostly the story missions exploring this area is a lot of the fun of the game and shouldn’t be overlooked.
References
Source:
Users Own Experiance
Image Credits:
Borderland Wiki, https://borderlands.wikia.com/wiki/Borderlands _Wiki
XBox 360: Screenshots
This post is part of the series: Borderlands Walkthrough
A walkthrough of borderlands covering all of the main storyline quests and giving tips for leveling and getting items as well.