With the last of the Borderland Vault keys in your grasp with only killing Baron Flynt in your way, the final part of borderlands is a rush forward to The Vault and The Destroyer which is one of the most difficult fights in the game of Borderlands.
Borderlands Walkthrough: The Vault
With the third vault key in your possession and the ClapTrap rescued for Patricia Tannis there is only one piece of the vault left to capture, a few battles left to fight and a vault left to raid. So gather your weapons, collect your ammo, recheck your shield and prepare for the assault on Baron Flynt and take the final Vault Key.
Borderlands: The Salt Flats
The beginning of the quest to reach Baron Flynt is reasonably simple. Entering the Salt Flats you have to destroy four of the raiders this is simple enough though they are more likely to come out in pairs than those you have fought before. After that the Baron will open the gates to Thor in the center of the map. The enemies here are generally the same as you have been fighting. Make certain that before you enter the next battle you have ammo though as there is no good way to get more ammo once you are in the fight with the Baron.
To reach the Baron you will need to circle around the back of the Thor and look for a section that leads to the middle. Here you will find an elevator which will take you to the battle. This is a combination of other battles in some ways. A long section of area filled with bandits you will need to kill most of them before moving on in the battle.
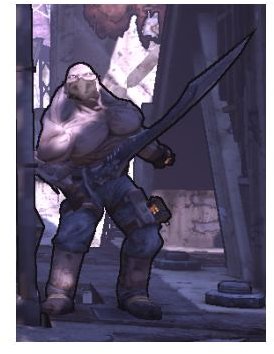
Borderlands: Hanz and Franz
Once enough bandits have been killed Hanz and Franz will appear. These are sort of subbosses and will generally attack together. Hanz will use melee attacks and grenades and is generally the best choice to kill first. If you circle behind one of the pillars it will help block the shots from Franz and the other bandits.
Franz will give you a bit more range, but can do damage quickly if you remain in the open. Circling around him and using some of the rooms can give you time to regain your shields and health as he generally doesn’t heal that quickly. Using the Soldier Class you can often use a turret to wear them down and save some ammo.
Borderlands: Baron Flynt

Once his bodyguards are dead Baron Flynt will come down to fight you. He will generally stay part way up the path forcing you to come to him. This is dangerous because he uses a shotgun which shoots six times quickly. If you are a sniper who can kill him at range it can be useful, but this is not easy, using the Berserker class is often easier as he won’t attack well when you are near him.
Otherwise after he shoots it will take a few seconds for him to reload. This should give you time to do considerable damage and alone killing him shouldn’t be hard.
Borderlands: The Back Door
With the Baron gone bandits are largely removed from the game and you will find the Crimson Lance most of the remainder of the game including fighting your way out of Thor. Get to a vehicle as fast as possible and follow the diamond. Be aware that the back door is a bit difficult to see so don’t go all the way to the end of the road where the Crimson Lance are yet. Stop just before the last bend and look for an entrance on the right side of the path. Fighting your way through here will lead you to Master McCloud and the Lance Royal guard.
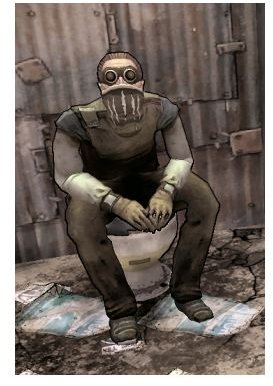
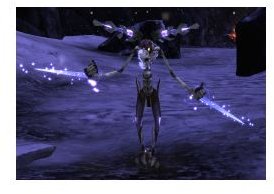
Borderland: Master McCloud
Master McCloud uses a Eridian Cannon which shoots very slow but powerful bursts of energy. In most cases you will want to deal with the royal guards first as their weapons are far more able to hit you than McClouds slow shot, though if you stand still it will kill you quickly.
Once you have the Royal Guards killed you will want simple circle McCloud and wear him down as alone he should never be able to hit you with his cannon so just wear him down and you should be able to get to the Borderlands Vault easily enough. For the Borderlands Hunter who may not want the direct route it is possible to shoot from outside of the room, though you will have to shoot quickly before the slow shots reach you.
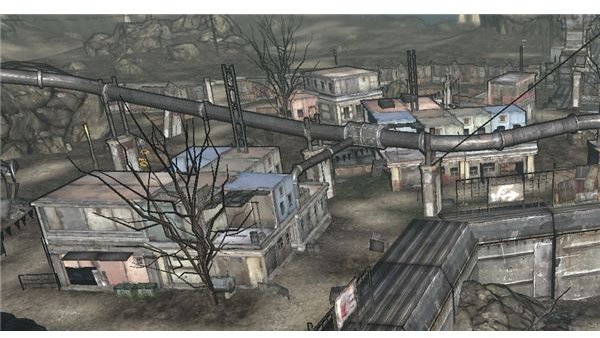
Borderlands: The Crimson Fastness
Largely a long battle you will need to fight your way through the base to Patricia Tannis. The only real difficulty here is that almost immediately after entering this area you’ll find a long hallway with a gun at the end and after trying the Echo Command you’ll run into a number of powerful Engineers which can be tricky if you don’t circle past their turrets.
Once outside there are three buildings you need to reach. Each has a gun turret and a number of soldiers outside. In two cases you can enter the building from the bottom, in the other you need to go to the top. In each case the opposite way has a gun chest that should be checked.
You will also see more guardians here. These are flying creatures with very powerful shields, but very low health. Lightning can help considerably with them, though at this point they are mostly fighting the Crimson Lance and can be avoided. Reenter the building, start the Echo comm. System and you will be ready to go to the vault.
Borderlands: The Descent
Once you have done that you will go back out the way you just came in and there will be a number of battles. In large part you can run past these if you want at this point. Once you have reached the descent you are going to be going down largely and so long as you’re careful jumping will be fastest.
Once outside again you’ll find more Crimson Lance and Guardians fighting. Of the two the Guardians will generally give you far more experience, but they drop very little so if you’re in need of levels taking them out is good otherwise simply go past them. Everyone is distracted and so long as you don’t try to get in fights you can largely avoid them which is espeically easy for the Siren class .
Borderlands: The Vault
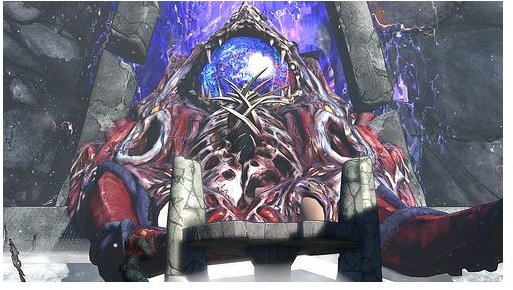
Having fought your way through the enemy you will reach the vault where you discover The Destroyer. A giant Lovecraftian creature filled with tentacles, teeth and other things that are very hard to recognize as anything.
At the back of this level you will notice not only can you leave but you can also use the fast travel to go anywhere in the game. This makes returning here easy so if you’re not more or less fully stocked with Ammo and weapons leave and buy them before starting the fight.
The destroyer’s main advantage is its health. This battle will go on for a while so having an extra weapon with regeneration, Eridian weapons or other ways to make your ammo unlimited is not a bad idea.
The main weapon of the destroyer are the tentacles which appear pointed upward and have knobs in them. These can shoot needles which will hit you far more often than anything else. The good news I that destroying those tentacles can give you a second wind and will help wear down the opponent.
Aiming for the eye near the top of its head gives you a good chance of critical strikes as well as the tongue which comes out of the middle of the mouth. Both of these will help wear it down quickly.
Once you have worn it down tentacles will come out and grab the pillars. At this point you can hide behind these tentacles. Watch for more of the tentacles which can shoot at you though as you will not be protected from those as well and be able to wear it down and if you keep the rocket tentacles down you should be able to defeat it.
Borderland: After the Vault
With the Destroyer destroyed you’ll be able to collect the vault key, and finish out any other missions you may want to do after watching the credits. You can also play through the game a second time with your current level and equipment and the enemies increased in difficulty to match them. In addition there is some excellent downloadable content such as The Zombie Island of Dr. Ned .
Resources
Source: Author’s own experience
Images, Borderland Wiki, https://borderlands.wikia.com/wiki/Borderlands _Wiki
This post is part of the series: Borderlands Walkthrough
A walkthrough of borderlands covering all of the main storyline quests and giving tips for leveling and getting items as well.