The Kayran is probably the first big monster that you’ll find in the game. This big squid has the whole harbor locked down, so there’s a lot of money just waiting for us. It’s not going to be easy though. You’ll need a lot of steps before you can actually bring him down.
The Kayran
You can get the foreshadowing for this one by seeing any of the big posters hanging around town. You’ll get the quest regardless of any efforts on your part, when you go into the inn to talk to Triss, Roche and Dandelion. At some point, you’ll hear a commotion outside. Follow Triss out the back door to see the big Kayran attacking the pier.
Once the dust settles, you’ll get a chance to talk to the men involved.
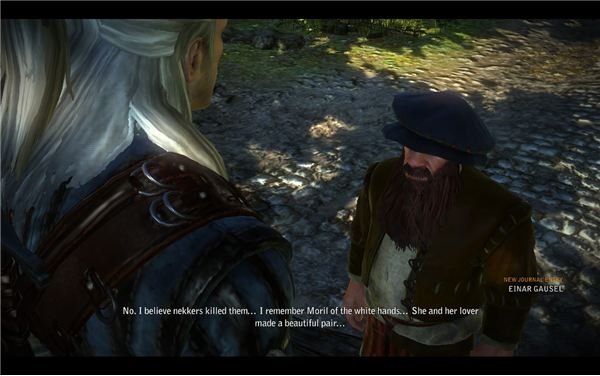
There’s a woman, named Sile, on the dock who can give you a few words of wisdom on the Kayran. I suggest you learn what she has to say, and note that she has a room above the inn. It’s on the second story, and accessible by the outside stairs.
The men on the docks may get a bit belligerent. I suggest that you use one of your signs to talk them down. Convincing them to attend to their wounded man seems to be a good solution.
Before you go, there are two things to do. One, in case you haven’t noticed, you need a silver sword. It will not be fun fighting monsters in the forest with a steel sword. It’s doable, but there’s no real reason to do it. Two, you can negotiate your payment, and in fact probably should, before you go much further in attacking the Kayran.
Tense Negotiations
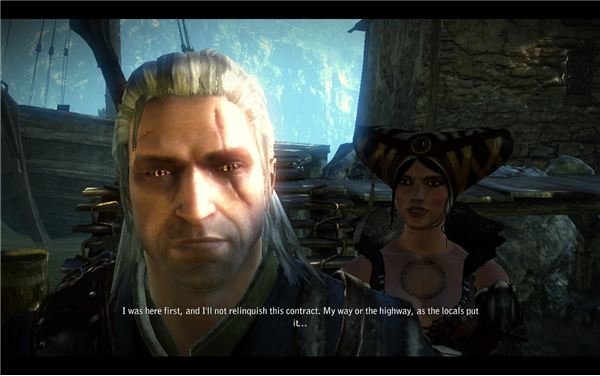
Find the Merchant. He’s right by the harbor entrance in town. You can talk to him and insist that he up the fee to compensate for your extra assistance. You can use signs if you want, but just threatening to tell Sile that she’s being underpaid is enough. Threatening to walk away seems to be the safest step. Geralt will also ask for an advance at the end, regardless of how aggresively you choose to ask. It should be about 200 orens, which is a nice start.
I suggest that you take this money and go to the dwarf blacksmith over in the nonhuman district. He has silver ore for sale, and you can pick up the rest of the silver sword’s component around town. Most of them seem to be in the boxes next to the merchant, in fact. You should be able to buy the ore you need, and then craft a silver sword before you go.
If you need more money, you can also go into the basement of the inn and win the fist fighting tournament.
Cedric
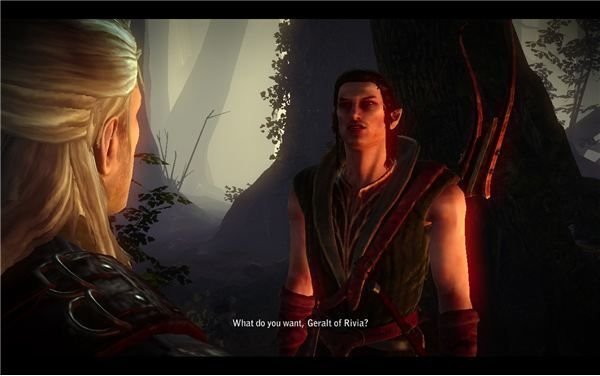
Since Sile and the merchant both suggested that you find Cedric along the outskirts of Lobinden, that’s the best place to start. Walk out the door at the town square to go outside to the marked area. Triss will stop you as you go through the gate, and warn you about the job. She should agree to tag along at the end though.
Follow her a few steps down the road and up the ladders to find Cedric in his watchtower. Once the cutscene plays out, you can talk to him about a number of things. While you’re here, I suggest that you talk to him about hunting in the area. This will unlock his selection of traps. You can also ask for any other Witcher’s work. This will give you “In the Claws of Madness.”
The main thing is to ask about the Kayran, of course. He’ll point you toward the recent shipwreck that the Kayran caused. That’ll be our next stop. Triss will teleport off ahead of you to begin the inspection.
The Shipwreck
Move down the road toward the marked wreck. There are two camps with bandits at them. The first should have three. The other has two. Be careful of the big man with the spear. The lesser bandits aren’t as much of a threat. I’d suggest using a lot of signs, or possible even laying a trap outside the camp to lure them into. Once it’s two-on-one, you’re fine. That third man can really make things difficult though.
If you can use an Axii to turn it into two-on-two, or a Quen to ignore some damage, you should be okay with just charging into the fray. Once you’re down to two, just hold a parry and counter-attack whoever comes after you, and you’ll be fine.
Make sure that you look for a chest in the second camp. I found 50 orens in it, which isn’t too bad at this point in the game.
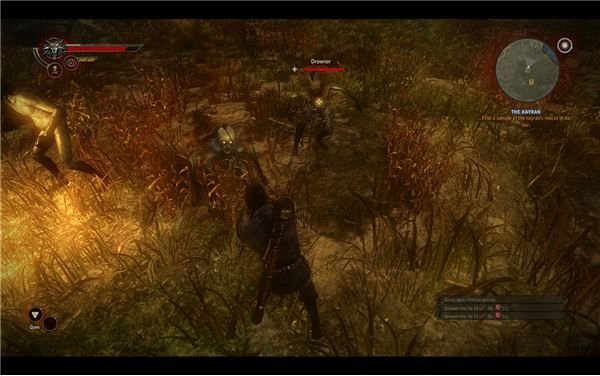
Triss will be waiting at the end of the road. Run up to automatically talk to her, then follow her off of the path and down the slope to the right to reach the marsh with the shipwreck. As Geralt warns, the area is dangerous.
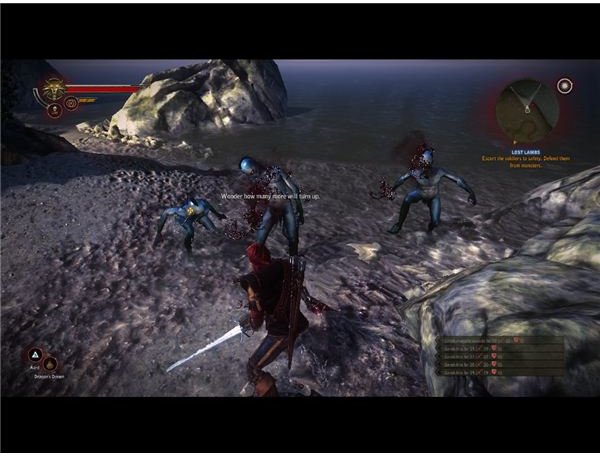
Five drowners will pop up once you drop down. If you’ve got a silver sword, this isn’t too hard. Thankfully you can just hang back and let Triss distract them a bit. She will sling fire magic around and often draw all five to her. This will let you get in some free hits. You’ll want to keep Quen up, if you don’t want to die very quickly. Dodging is also vital, because staying in one spot will let them surround you and beat you down. Fast style works quite well, so just stay mobile and focus on one at a time.
Once you’re done, inspect the mucus to learn that it’s sick and poisonous. Triss will suggest that you go find Ostmurk. You can try to find it yourself, or just talk to Cedric. He’ll point you toward the caves in the south.
The Ostmurk
If you want to be extra safe, then you can choose to get this Ostmurk for your Mongoose potion. It is nice, but not completely necessary. The ideal is that you never get hit, but, it also doesn’t make much sense to turn down a quest. There’s extra loot in the cave anyway, so I figure that it’s worth it.
Move forward and watch out for nekkers and endregas along the path. If you don’t plan to kill the nests, then just keep moving and only engage the ones that chase you. Also note that none of the monsters out here like one another. It’s fairly easy to just let them kill one another.
Nekkers will die to a few quick silver sword strikes. If you keep jumping between them, they shouldn’t even land a hit. Warriors are slightly worse, but not horrible. Just use Quen if you see the medallion go red, and keep moving. Save often too!
The cave is a marked cave behind a waterfall at the back. There are a few drowners in the water, so be ready for that. Again, it won’t be horrible, if you have Quen and you can move quickly between them. The pond lets you move around a lot, and you should be able to pick them off fairly easily (in comparison to other fights in the forest at least).
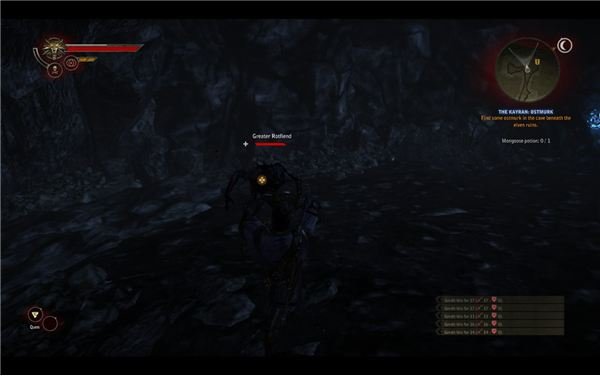
Move through the waterfall to enter the cave and start your search. After a few turns you’ll run into some nekkers. The spawns seem to be semi-random. I’ve seen warriors in different parts, so I can’t get too specific. Note that the normal ones should die in about three fast strikes. If you’re locking onto them, you should also be leaping around so much that you barely get hit. Warriors are annoying, but you can leave them for last. Just take out the weak ones and then back the warrior into a wall. In one-on-one combat, you should be able to just beat them to death without any dodging.
The only real trick to the Ostmurk cave, is noting that there is one hotspot in the middle, with two spawning points. Don’t just keep moving at this point. When you encounter the nekker spawns, right after the first two, fall back a bit and fight them on your terms. If you try to push forward, they’ll easily overwhelm you from all sides. Keeping your back to the fairly cleared side is much better. Then just work through the weak ones as they rush you and grind down the warriors. It is possible for them to spawn behind you, but there shouldn’t be more than a pair.
Once the tide is stemmed, loot the bodies and look for the dead man in the side cave with some valuable trader junk on him. Then just turn the corner and push forward against the occasional nekker until you find the glowing Ostmurk on the side of the cave. There’s one final foe, a greater rotfiend, here. There’s just one though, so you should be able to just hit it repeatedly and end the battle.. Grab the Ostmurk, and then just backtrack out.
Do be careful though, since it looks like the pool outside is a spawning point for some Scoia’tel. You may have to handle them on your way out.
Making the potion isn’t hard. Just meditate and mix up some Mongoose potion with any of the herbs you can pick up around the forest. Once you have it, you’ll just need to hold onto it until the big fight.
The Kayran - Basics
If you’re done with all the prep, you can go ahead and face the Kayran. Just walk up to Sile in her room above the inn, drink whatever potions you need and tell her that you’re ready to go face the monster.
I strongly suggest that you drink a Swallow potion beforehand, along with the Mongoose one. You may also want to drink something to boost your Vigor, if you plan to use a lot of magic. If you want to use the Kayran trap, you’ll need to buy the diagram from Cedric and then make it. I actually didn’t think that it was worth the money, but it’s up to you. Basically, it just lets you avoid a fairly minor spot of combat, since it will chop off a tentacle for you, which isn’t that hard.
Start by walking down the road once you regain control, and approach the shipwreck that you found before. Go down the path until you get to the bottom. Sile will then spring her trap and lure in the Kayran for you to fight. She’s going to be busy containing it, so you’re on your own here.
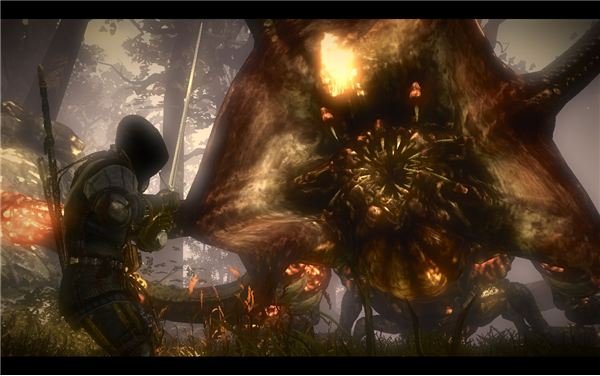
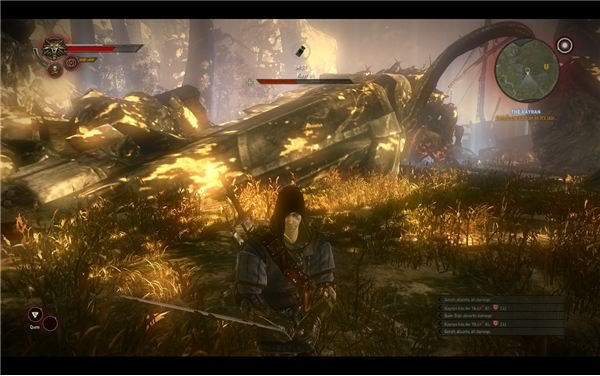
The concept is actually fairly easy. The Kayran has a few attacks. It can smack you with its tentacles for a lot of damage. This is telegraphed by it raising the arm that will hit you. You need to dodge when you see it raise up. It can spray a green slime onto you, which will stick you in place. If you stick to the sides you’re usually safe. You’ll need to beat a QTE (right-clicking to fill a bar) to get free from it, and then dodge past the two tentacles aimed at you.
It can also chuck rocks if you try to approach it on the far left or far right, and it can blow you back with a somewhat damaging spray if you get too close.
Killing the Kayran
For the most part, the battle is just a simple boss fight. You need to take out 3 tentacles, to do this the easiest way. The two center ones are not vulnerable. Avoid these at all costs. The two on the left and the two on the right have a glowing red spot where the weakened tentacle is held to the body. What you need to do is move over to the left or right side, lay a Yrden sign trap, stand on it until the arm raises and then jump out of the way. If it hits the trap, the tentacles will be stuck on the ground. You can then run up and rapidly hack away with fast attacks at the glowing red spot to cut it off completely.
Once you remove a tentacle, it will become enraged and try to attack most of the field. There’s a big safe spot in the back left though. If you just hang out near the bridge support, you’ll be fine.
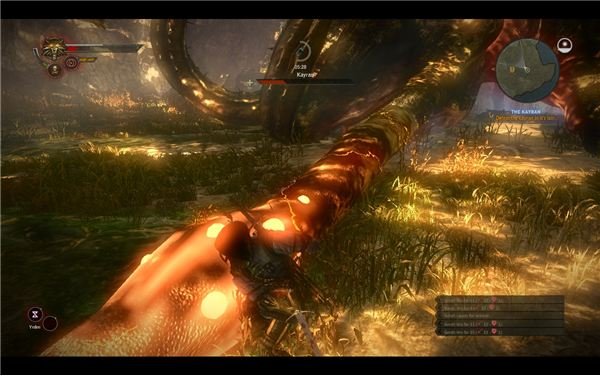
The easiest way to get three tentacles seems to be to start with the one on the right. Move past the ones in the center and lay a Yrden trap quickly after an attack. Then dodge out and take off the first arm. Run across the field to the left as soon as possible. It seems to be fairly easy to just make it across while it wildly flails its tentacles around. Once you make it to the left corner, you’re safe. You’ll know that the rage attack is done once all the remaining arms slam into the ground and then rest there for a moment.
From this point, get the two on the left with the same techniques. Once the third arm goes down, you get a unique chance to end this one a bit early. Watch for a large ground swing attack at the end of the tantrum. As the tentacle approach, you’ll get a QTE to use a right-click to jump onto it. Then watch for it to switch over to a left-click frenzy. Click repeatedly to fill the bar and attack the arm, then watch for the signal to jump off of it with the spacebar. The arm will then swing into the bridge and make the ruins crumble onto the Kayran.
As soon as you regain control, move to the foot of the fallen bridge and cast Quen. The two remaining arms will throw rocks at you, and try to hit you. A Quen spell can fully deflect it, once, so keep it on at all times.
Move up the bridge as quickly as you can. Geralt will move slowly up the slope, so it’s a little tricky. The arms won’t be able to actually hurt you if you have Quen though. They’ll just knock you back and make you start over. If you zig zag across the face of the bridge, you should be able to make it to the end and trigger a big finishing cutscene.
And with that, the Kayran will be dead. Walk up to the head to loot it. We mainly want the Kayran skin. It can be made into really good armor. If you forget to grab it now, you can come back later though. After that, just walk back to the harbor and find the merchant. Talk to him and confirm the kill to get a very hefty reward. Now’d be a good time to go shopping.
References
All information and screenshots from Witcher 2.
Due to the branching nature of the game, your experience may differ. Please feel free to note any differences you spotted in the comments below.
This post is part of the series: The Witcher 2 Walkthrough - Chapter 1 - Flotsam
We’re starting off in Flotsam, and there’s a lot of things to do. I’ll cover how to survive the first ambush, sneak around Loredo’s house, kill the Kayran for fun and profit, track down the assassin and track down a rose of remembrance.