This long chapter is basically a 2 part mission. We need to hold our ground against a large antlion force before we head off to the core of the antlion nest. If you need any help holding out against the antlion hordes, then look here.
An Introduction to Antlion Defense
Drop down and into the next tunnel to stumble right into the allied base. There are 2 rebels holding down the forward post along with Alyx and her vortigaunt healer. For now we have to hold the line until the rest of the vortigaunts make it.
This is a standard and fairly fun defense mission. While the vortigaunt is talking to you, go ahead and break the crates. There should be an SMG here too, so grab it and collect some of the ammo and health. Follow the rebels back out for their little tour of the base. There are 4 access points to the base. There are 3 tunnels and a breach in the wall. The little alarm system hints at the strength of the assault. There are 2 turrets available to defend the tunnels for a bit. There is an ammo crate for shotgun ammo on the left side by the breach. There is a chest of SMG ammo on the right side by the far tunnel. There are also 2 boxes full of hopper mines, if you want to use some. I didn’t find them that effective, but it’s better than nothing.
Okay, so we’re ready to start. The first assault is on the left tunnel. The turret and the rebels should actually hold them off just fine. Remember that you have unlimited shotgun ammo for now, so use it to blast the antlions. You can also use the SMG, but I didn’t find it to be as useful.
Hold off the first attack and grab more shells. The second attack is on the breach to the far left. It isn’t too bad. You can move a turret over if you want, but it won’t actually help that much. There just isn’t enough room for it to fire. Just take up a spot and use the shotgun.
The third assault is on the far right tunnel. It’s a step up in action though. It’s a level 2 and you’ll be facing 3 lanes of antlions instead of 2. Move over both turrets and take up a position again. If you keep up a steady rate of fire, you should be able to cut them down before they get close.
The fourth assault is a split one. There’s a level one on the left and center tunnel. The rebels will cover the left tunnel (Tunnel 36 if you need a reference). Grab a turret and move it over to the center tunnel. You might want to grab the other and put it by the rebels. You don’t need 2, but they could use a little help. Hold the center tunnel. When the attack is over, grab some more shotgun ammo and get ready. It’s about to get serious.
Expert Antlion Defense
The fifth assault is a big step up. There are 3 tunnels at level one. The rebels will cover the breach. You need to cover the center and right tunnels. Grab the other turret and move it back to the center. It takes about 2 turrets to truly hold them back. If you split the turrets, then they might be able to knock the unguarded one over and flank you. Besides, we don’t need a turret to hold off a level 1 breach. Just use the SMG and then switch to the shotgun when it runs out of ammo. You should be able to hold them off just fine.
The sixth assault is a lateral move. It’s another big assault. You should be able to move one turret and have it cover the center by itself. The rebels can help it out if it gets overrun. The rebels will move over and cover the level 2 on the far right tunnel. Give them a turret too to help them out. You just need to cover the breach. Use the shotgun and blow them away as they come out. If you have enough ammo, then it’s just a shooting gallery.
The seventh is kicking things into gear with a level 1 on each tunnel. The rebels will cover the center tunnel fairly well. Leave one turret where they were on the far right. It will hold out just fine. Grab the other turret and move it to the left tunnel. Keep an eye on it, but it should be fine. We’ll hold the breach again. Just grab more shotgun ammo and pick them off as they emerge.
A Last Stand
The eight is on the way. All of them are lit up, except the left tunnel is now a level 2. The rebels will cover that one. Put a turret on the center and right. They should be able to hold. Then take up a position by the rebels to help keep the antlions off their backs and handle the breach. They’ll do a decent job and the turrets should manage their sides well enough. Just hold on and keep firing. If you’re hurt, you can approach the medic to get some more health. Both turrets will burn out and explode near the end of this attack. The attacks on the right side should have ended though, so just focus on finishing off your side.
The ninth is a false alarm. The level 3 is your vortigaunt reinforcement team. Take this time to grab more ammo from both boxes and reload. If you really want, you can also grab hopper mines and lay them in the tunnels. I didn’t bother with it, but it’s your call.
The tenth and final assault is a code 3 on each tunnel. Just pull out your shotgun and stay on the metal ramp. The vortigaunts should keep the antlions from flanking you. In fact, if you get a chance, you should really just watch and enjoy the damage that the vortigaunts can inflict. It’s pretty cool to finally seem them in official combat. The assault should slow down and stop right about the same time as you run out of shotgun shells. Just hold out with your new allies.
Go ahead and get more ammo and health while the vortigaunts inspect Alyx and decide that they need a special antlion essence. This is our next mission. You’ll get our original vortigaunt friend as a follower. Go down the tunnel with him and he’ll fire up the generator. Then just go through the door and into the next tunnel.
The Start of a Long Trip
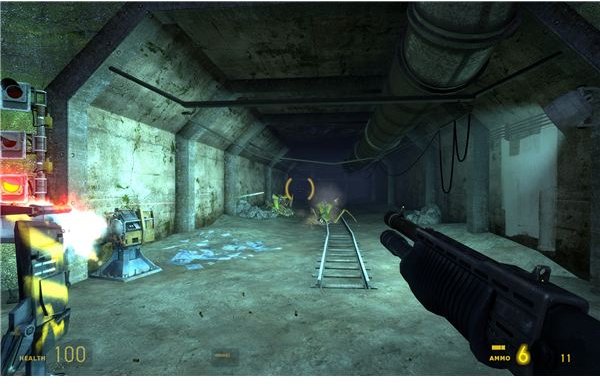
There are a lot of antlions below. There are a few acid-lions and normal ones. The vortigaunt should nail the first group with a shock wave, so you can take them out while they’re down. He’ll help you out as you go. He can usually kill an antlion with one blast. Once the antlions are clear, you might want to just use the magnum for the far away ones. It’s pretty effective for that range and you should have lots of ammo.
Just keep your back to a wall and clear out the antlions. A few more acid-lions should show up as you move forward. Clear a path and move down and around the lower ledge. The next step is to curve up and around into the tunnel system. Once you get past the last of the acid-lions up front, you’ll just have to face them sporadically in the tunnel. Just give them a double blast at close range to take them out. You’ll eventually come out to another hole that will drop you down into a mining room.
A Little Exploration
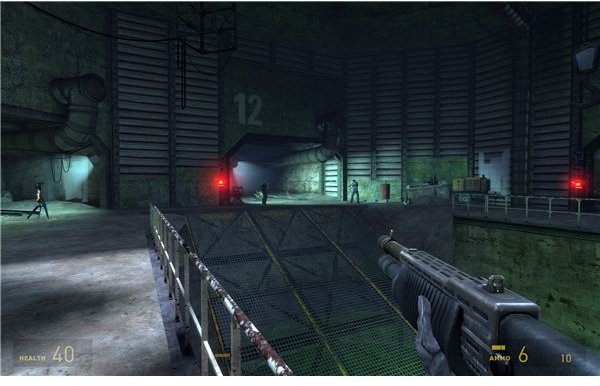
Move forward a bit and save. Step out onto the boards to get a few more supplies. The whole thing will give way under you and briefly catch on a ledge. Move over to the ladder and climb out to earn a bemused chuckle from the vortigaunt. Look through the boarded up fence. You need to pull off the boards and open the door, but the room is full of zombies. Shoot each one of them with a round from the pistol to wake them up. Then let the vortigaunt tear them apart.
Open the door and move over to the other side. There should be a few more zombies, so be alert. In particular, there are 2 fast zombies that are just playing dead. Shoot the bodies first to check. You need to get past the fence to let the Vortigaunt over to the over side. Grab the pack of steel, 2 barrels, and a crate and move them onto the lift. Then just jump on to ride it down to the bottom. There’s a few more zombies here, so be alert. Look over to the little caged area to trigger a zombine. It should harmlessly blow itself up. Move over to the lift in the other room. Kill the few zombies who approach, and look at the lift. This is our ride up.
This post is part of the series: Half-Life 2: Episode 2 Walkthrough - Part 1
We’ve got a long way to travel with Alyx and her vital information. We need to make it through the long forest path all the way up to White Forest to join the rebel base. If you need any help getting past the antlions, zomies, and combine in your way, then look here.