It should shock no one that the hospital isn’t a friendly place. There are lots of zombies and combine soldiers each looking for Gordon and Alyx, so it’s going to get heated. If you need any help getting out of the hospital, then just take a look here.
The Hospital
When you’re ready, walk away from the downed gunship and go over to the door. Wait by a pillar and ambush the 3 soldiers with your shotgun. Advance through the door, but be careful since a hopper is waiting around the corner at the end of the hallway. Disable it, then go to the corner and shoot the 2 mines blocking your path. Alyx will take this opportunity to upgrade to a shotgun, so we’re in pretty good shape.
Advance after she kills the field. Use the hopper mine to blow up the 2 zombies and then turn into the room on the left. Grab the supplies and then kill the zombie in the bathroom. Advance down the hallway with Alyx and be alert for any stragglers or new spawns. The doors should blow at the end. Kill the combine who runs right into you and then go forward a bit to watch the Combine soldiers being overwhelmed by the zombies. Let the 2 groups fight for a minute and then clean up the survivors with Alyx.
A Three-Way Gunfight
Go down the hall and watch out for remaining the hoppers. 2 zombies should come out of the surgery room. Kill them and go through the open door. The zombie behind you will finally break through
gh. Alyx will probably kill it. Grab the supplies in the room he was just in. Go forward to the open doors and get out into the hallway. Then take up a spot by the door and start firing. There’s a Combine position at the end of the hall, another elite in the hallway further away, and a horde of zombies moving in from the double doors across from the elite. Just start firing into the crowd and pick off whoever you can. One of the entrenched soldiers usually throws a grenade. Use it against the horde. The few elites here will try to use the pulse rifle’s alternative fire against you. Just stick close to the door to avoid it.
Once the massacre is over, go down the hallway and grab some more supplies. Watch out for the possible hopper mine in the room to the left though. Your goal is just to go down the recovery wing. There are some other supplies to get, but they require unnecessary fighting.
Water Puzzle
Go down the recovery wing and blast the 4 zombies in the lounge. When you’re ready, open the double doors and let the zombies loose. Fall back and help Alyx blow them away. Be especially careful of all the poison headcrabs from the poison headcrab zombie. You don’t want to get bitten by them before the fight. Once they’re dead, go forward and drop down the hole. There seems to be more shoddy construction though. You’re now in a flooded room.
Swim under the bars and go up the steps. Shoot the 4 barnacles and then swim across to the other path. Turn to the pillar and flip the switch. Flip it back off for the time being though. Look up and kill the 2 barnacles who are trying to eat you through the new hole in the ceiling. Then swing out and shoot the 2 barnacles blocking the jump to the middle platform. There’s another seesaw puzzle here. Grab the blue barrel and put it under the sinking bridge. Test it out once to make sure it will stay up. Then flip the switch again.
Jump over to the middle platform and get onto the pipe setup. Walk along it but stop when the barnacles drop their tongues down. Look up and blow them both away. Get into the office and kill the poison headcrab. Grab some more supplies and then jump out of the window and onto the path. Move over to the now open exit. Swing around and on to the upper level. Wait a moment for Alyx to drop down after a moment of awesomeness. Keep moving forward and past the pile of Combine bodies.
Escape
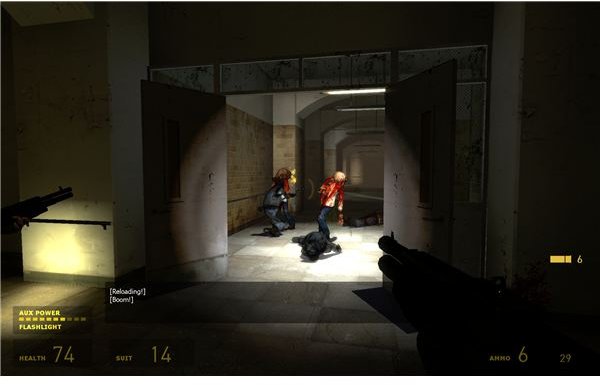
Move over and look down into the room below. Kill the poison headcrab carrier and then wipe out as many of the poison headcrabs as you can. Drop down and nail the last fast headcrab. Grab some supplies and then get a hopper mine. Drop it over the portion of broken glass to kill the annoying headcrab carrier in the hallway. Then put one by each of the double doors. 2 zombies will tear down each of the 2 sets of doors. Kill these 4 if the hoppers miss. Then stick close to Alyx and keep firing as they stagger into the room from both sides. Once the attack is over, go out and down the hallway to the right. Go into the examination room and get some more shield energy and health. Don’t bump the wire, since it will shock you a bit. Open the door and go out into the hallway.
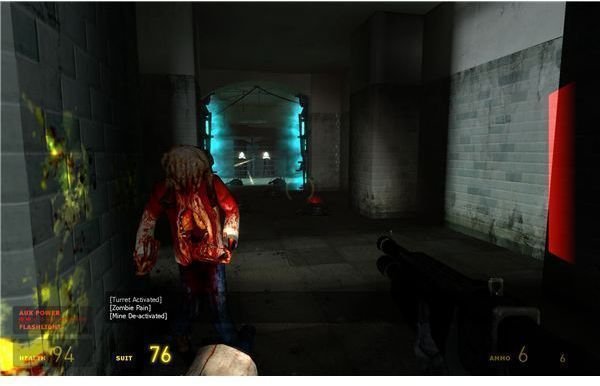
Step out and watch some turrets shred the 2 zombies to pieces. You now have to push forward against those 2 turrets. If you want, you can use the door as a temporary shield, but it’s not too effective. Go out and take cover by the first corner on the right. Alyx and the turrets will handle the wave of zombies that pour out from the room next to you. Just hold your shotgun and blow away anything that rounds the corner. Go over to the next corner on the right. The turrets, hoppers, and Alyx should be able to handle most of the zombies again. You can go into the room across from you to get some more supplies if you need them. Then rush over to the next room on the right. Get behind cover and pull the plug. The turrets should retire now. Then just advance through the room and past the machinery. Go through the push door and then reveal your position to the Combine advisors again as the chapter ends.
This post is part of the series: Half-Life 2: Episode 1 Walkthrough - Part 2
Your new mission is pretty simple. You have to meet up with the resistance and get out of City 17 as soon as possible. This means fighting all of the zombies, antlions, and Combine remnant that now control large portions of the town. If you need any help beating these enemies, then look here.