To accompany the standard Team Tactics and formations in FIFA Manager 10, there are also a selection of advanced options - General Orders you can give to the team and Individual Orders to give to your players.
Advanced Team Tactics
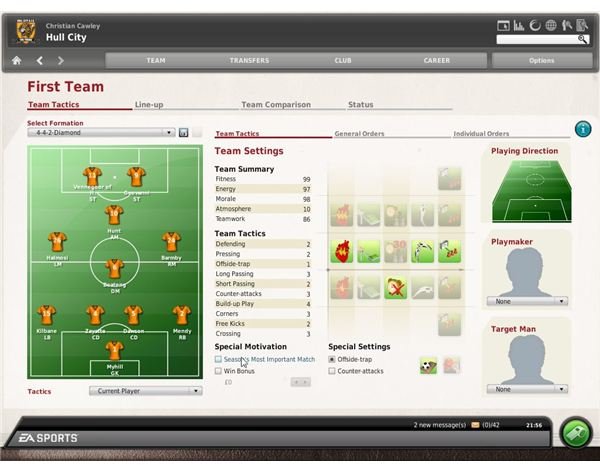
As well as Team Tactics and the ability to set a Playmaker and/or Target Man to lead your attack, FIFA Manager 10 also offers some advanced tactical options, both on a team and per-player basis.
While in the early stages of the game you shouldn’t need to use these too much, it doesn’t hurt to take a look and maybe employ one or two of the options as you get into the game. They’re not too obvious in the First Team > Team Tactics screen (I would say that they’re quite well hidden in plain sight) but can be called upon at any time before or during a match.
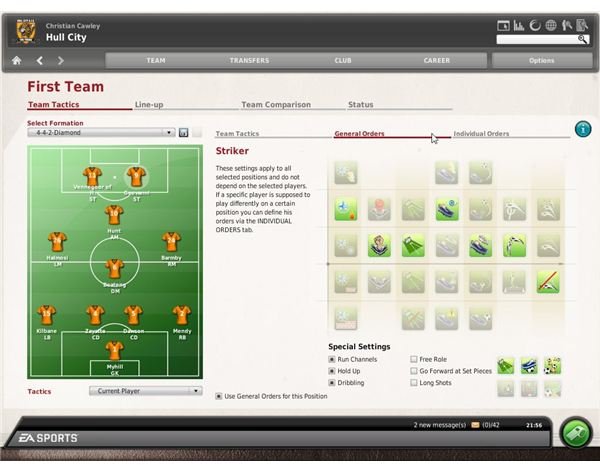
General and Individual Orders
FIFA Manger 10 arguably has the largest selection of advanced tactics of all of the current best selling football management sims.
Available as individual orders and team orders, the following settings can be used to alter the way your team plays:
Positioning Bias: used to determine how your team (or individual player) will position themselves on the pitch, this order ranges from Very Offensive to Very Defensive, with the latter indicating that the players should play very deep around their own goal – scoring goals with all players on this setting is unlikely.
Tackling: a self-explanatory order, tackling can be set to Aggressive, Robust or Normal, the weaker the less likely your team is to concede free kicks and penalties.
Forward Runs: players skilled at getting forward should be encouraged to do so Often, while those that you want to stay back should be set to Never.
Passing Style: an Italian team might adopt a Patient or Cautious passing style – Manchester United would choose Direct while the successful Newcastle United team of the mid 1990s might have chosen Risky. Most teams would choose Normal.
Passing: Slightly different to Passing Style, Passing refers to the length of the pass, and ranges from Long to Short.
Crossing Position: particularly useful when playing with wingers and attacking full backs, Crossing Position determines whether the ball is delivered from Deep, up near the corner flag along the By-line or a combination of the two.
Crossing Frequency: again, if you’re using wingers to get the ball into the box with crosses, you might have this order set to Always – if you’re playing a traditional 4-4-2 formation and working the ball through the middle, you would have this set to Rarely.
These various orders change slightly as you cycle through the various formations that are available – for instance, more players have a Positioning Bias of Attacking or Very Offensive in the 4-3-3 Offensive formation.
Tailoring formations to suit your own players might require some adjusting of the defaults – careful tweaking is required however, with the formations best tested in friendly matches rather than in a competitive match.
Special Settings in FIFA Manager 10
If there is a certain task you want your players to attempt during the match, the Special Settings allows you to point them in the right direction, based on their abilities.
You might want a particularly skilful winger to make runs with the ball often – by selecting Dribbling, he will do this.
Midfielders or attackers with mercurial skills might benefit from being given a Free Role, while one of your attackers might be a good candidate to Hold Up the ball in attack, allowing his team mates to get into position.
Long Shots look particularly good when launched into the back of the net by appropriately skilled players, while forwards might be persuaded to move into space and Run Channels.
Finally you might want one of your best headers of the ball to Go Forward at Set Pieces to give you some height in the box.