We’re getting right into the action as WW3 rages. This first section of our guide will take you through the first three missions: Black Tuesday, Hunter Killer and Persona Non Grata. These starter missions are far from easy, so if you need help surviving or using the special weapons, look here.
The Path to Wall Street
We’re starting out back home. The battle for New York City is raging, and we’re going right into the heart of it.
Once you get out of the damaged humvee, move up to a barricade and start firing on the Russians ahead. The barricades make for great cover. If you’re crouched behind one, you shouldn’t get hit much. There’s also an APC backing you up. Keep an eye on it so that you don’t get run over though.
Once you’ve moved down the street, you should be able to move up toward a shack on the left. This is a great spot to finish off the rest of the soldiers. As your squad reaches the end, an enemy humvee will pull up. If you’re on the left side of the street by the metal shack, you should be able to just peek out a bit and light him up.
The next set of vehicles moving down the street are your reinforcements, so link up and start firing on the soldiers to your right. Again, the left wall seems to be a good spot. Move along and stick to the already destroyed cars as you make your way over. There’s a working taxi in the mix, next to a police car. If you shoot it a bit, it should explode and take out a far number of soldiers behind it.
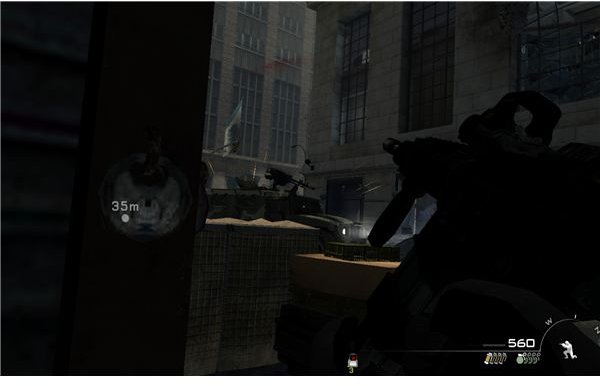
Get into a good spot on the left and keep an eye on the building to your right. Once the enemy Hind moves in, you’ll need to sprint inside the nearby building to take cover.
A Short Detour
Once you’re in, just move up the steps and follow Sandman. After you breach the door, open fire and use the couch for cover as you push up the ramp. Keep clearing the way, but watch for a side path that leads through a bathroom. If you go through this little area, you’ll be able to flank the Russians at the end of the hallway quite easily.
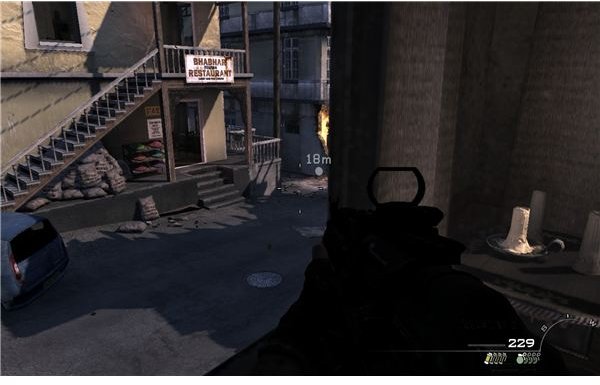
Go ahead and get your introduction to the nine-banger now. Toss it out after Sandman opens the door, and gun down the two very disoriented soldiers. You should be able to move up with the rest of your team and find the store. Use the balcony to get the fight off to a good start. Fire on the few men down on the floor, then move down the steps and get behind a display case.
Note that these display cases aren’t that great for cover. Bullets can go through the broken frame, and that’s about chest level for you. If you start taking too much damage, remember to go prone to get out of their sight. Once you get behind cover, a lot of soldiers will come pouring through the main entrance. Just hold the fire button down to clear a lot of them out while they’re bunched up, then toss a few grenades over your display case to take out a few groups.
Once the left side is fairly clear, move on over to Sandman on the right and take out the stragglers there. Watch the door for the last few that come through, and you should be fine. Once the area is clear, you’ll go through the entrance to link up with another group.
Toss a grenade behind the red barricade line to scare off the soldiers at the blockade, then move up and use the cover for yourself. After you’ve scattered them a bit, go ahead and take Sandman’s advance and use your grenade launcher. This area has a lot of cover, so it’s pretty useful. Aim shots to the left of the pillars and statues (so the explosion goes off behind them) to clear out the first wave. Once you’re out of grenades, move up to the hot dog cart and clear out the rest.
Note: This is the last time that the grenade launcher is very useful. Feel free to trade it out for a backup gun from any of the dead soldiers around you.
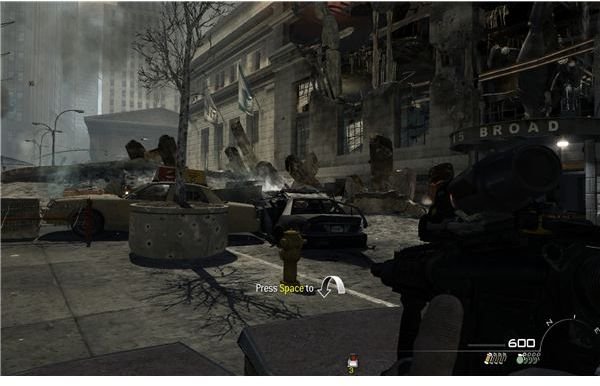
Move up and take cover by the pillars to fire on the soldiers guarding the Wall Street entrance. You should be able to pick them off fairly easily. When their humvee starts firing at you, just wait for the gunner to fire a burst, then pop out during the break and put a few rounds into him.
Move up the right side by the destroyed vehicles to flank most of the remaining soldiers at the entrance. Your team should move up and secure it.
The Stock Exchange

There’s an ammo box over to the left of the entrance if you need to refill (and you probably will). Once you’re ready, move up the steps to reach the trading floor. This place is fairly crazy and very open. You really need to watch out for flankers. Keep one side to a wall to stay safe as you clear it.
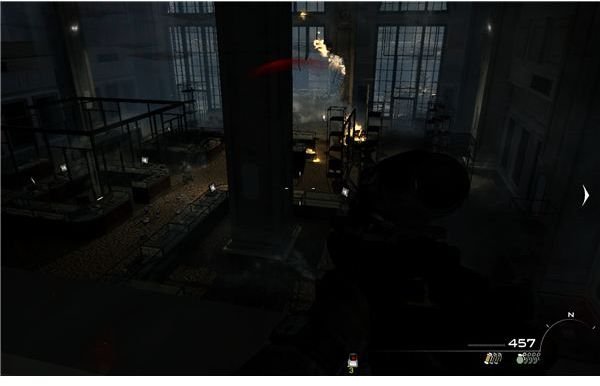
Don’t rush in after Sandman, hang back and fire on the first set of soldiers from the cover of the entrance. Then follow him over to the left side of the trading floor. Use one of the booths for cover and look for groups of soldiers. Remember that you should have plenty of grenades and nine-bangers. The nine-bangers are quite useful in here, since it’s easier to disorient the soldiers and finish them off, than it is to try to land a perfect grenade throw.
Once the left side is fairly clear, just follow Sandman up the scaffolds. Four soldiers will run out onto the nearby balcony. I suggest that you just get behind the signs at this first landing and take them out. Once it’s clear, move across the scaffolds and climb the ladder to the rooftop.
Destroying the Jammer
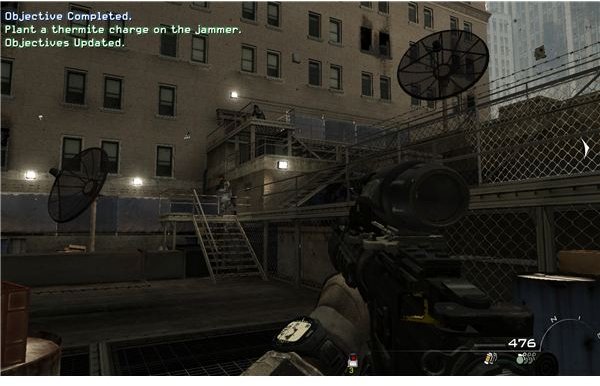
Run to cover on the first set of vents, and fire at the soldiers running down the steps. Once the first five are down, you can move up and take cover by more vents and blocks. Don’t listen to your team. Despite their “cover” you’ll die before you reach the power supply. Just move to the left and get behind a tall vent. You can then easily fire on the soldiers guarding the tower. They don’t have much cover from this angle, so just keep shooting and watch out for their grenades. Someone on your team will call out when it’s clear.
Advance to the tower, plant the thermite and then set it off to take out the tower. After enjoying the spectacle, look out to the rooftops and note where the shooters are. Just go prone behind the vents that are between you and them, and wait for the predator drone to activate. Pull it up, and use the first missile to take out whichever group is larger. When the Hind shows up, aim the missile in its general direction, and guide it into the body as it hover around your position. Once the Hind is destroyed, your helicopter will show up.
You’re the door gunner for the time being, so fire on the stragglers on the rooftop as you rise up. They can’t hurt the helicopter, but they can certainly kill you. As you rise, you’ll run into a few Hinds. Just aim at their main body and then let the recoil cover your shots up to the rotor. A good shot to the center of the rotor seems to be an instant kill. Keep the first two off your back, and then fire at the second set that chase you. Once the fifth arrives as you go above the construction site, you’ll need to be ready to test your aim. Pour some fire into the body as it circles the tower, and note that you’ll get one good chance to fire at it through the building. Do as much damage as you can, so that when you rise up into the air you can kill it quickly.
After the scene plays out, the mission will wrap up.
Raiding the Submarine
Start out your mission by holding down the forward key and following Sandman. His propellor has a blinking blue light on it, so you should be able to follow him fairly easily. After a brief warning, you’ll start seeing mines. Just watch your sonar for red lines and yellow dots. If you stick right behind Sandman you should be fine.
After the submarine passes, swim toward the back of it and hit “F” to trigger the animation. After the scene plays out, you’ll be on top of the surfaced sub and ready to raid it. Get into a crouch and fire on the defense team. There’s no cover up here, so you need to be quick. Wait for Sandman to throw a grenade down the hatch, then climb down after him.
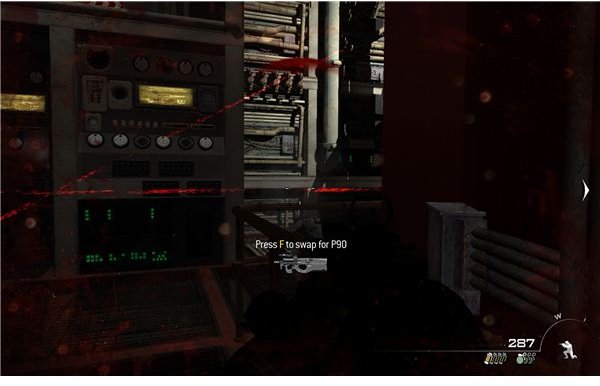
Advance and fire on the first pair of guards that you see, then go through your door. After killing the poor sailor on fire extinguisher duty, watch the window in the hallway. Fire through it to kill a few more armed guards. As you turn the corner on the hallway, watch the doorway ahead. Fire through it to kill another pair of guards rushing to the scene. As you walk past, you should be able to find a Striker on one of the dead guards. Trade your pistol in for this. An automatic shotgun is incredible for these close quarters. You can usually just fire from the hip and get an instant kill at medium range, since they have nowhere to run.
Blast your way through the next set of hallways until you get to a bit of a confusing maze. Switch back to the MP5, and watch for the laser sights. Just about every guard has one, so it’s easy to see where they’re hiding. Kill the first two, and then swing to the right. Sandman has the left side covered, and the right’s easier anyway. Kill the two men that you should be able to catch out of position, then flank any of the surviving guards at the exit.
Rinse and repeat this tactic for another corridor (although you’ll be facing better armed and armored guards) until you reach the door for the bridge. Switch to the Striker and reload it, then plant the charge and get ready to breach.
There are five men inside, including one with a knife that will try to charge you. While you have the advantage of slow motion, fire a blast into the rusher, then aim at the set of guards across from you. The Striker’s spread will probably kill both of them with one shot. Work toward the right to get the last armed sailor and the captain.
Wait for Sandman to grab the codes and punch in the coordinates, then activate the console to turn your key and start the attack. Climb up the ladder to the top of the submarine, then get into your zodiac on the side.
Escaping From the Submarine
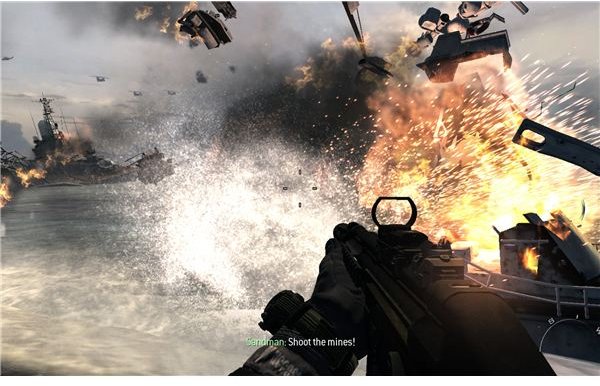
Just drive forward for now. You should be safe flowing the other zodiac. Just watch for the buoys and the occasional wave that will push you around. About halfway through, you’ll be forced onto the deck of an overturned aircraft carrier. When you do, you’ll get a chance to aim at the patrol boat chasing you. Hit any of the mines in back for an easy kill.
Continue the chase and go through the burning wreckage. After jumping off of a second aircraft carrier deck, you’ll be able to drive the zodiac right into the helicopter. Enjoy the final scene and get ready for a change of pace ahead.
Defending the Loyalist Hideout
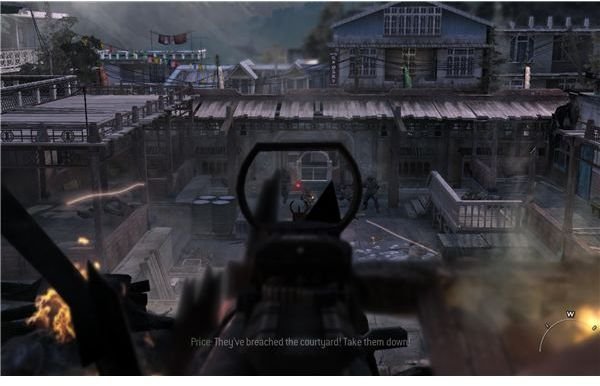
Time to get back to Price and Soap, and things are getting off to a quick start. As soon as you gain control of Yuri, move to the balcony on the right side. This is actually important, because the Hinds will gun you down if you try to fire out of the big hole in the wall. You’ll stay alive on the balcony.
Aim down into the courtyard and take advantage of all the soldiers rushing through the narrow gates. You should be able to gun down the bulk of them quite quickly. Watch the rooftops, and then just wait for the smoke to come. After they pop smoke, the doctor will be killed by a strafing run. Run back to Soap and get on the right side to give him the adrenaline shot.
Follow Price out of the room. If you want, you can trade your pistol out for another assault rifle. It’s up to you. It may make more sense to wait and trade it out for a heavy machine gun that one of the attackers will surely drop by the main gate.
Regardless, leave the doctor’s room and fire down the hallway to take out the first set of soldiers coming through the windows. Follow Price down the steps to join the loyalists in the courtyard. Get behind one of the pillars and turn the gate into a killing field again, then watch the rooftops for shooters. Once the path is clear, you’ll be able to charge out into the main town.
Reaching the Helicopter
Cover the fleeing villages by shooting the three soldiers at the end of the street, then advance. This entire street is basically just one big grinder. You’ve got a lot of loyalists helping with the push, so use them to your advantage. Don’t just follow Price either. He’s immortal, you’re not. Stick to the right side, and use the cars for cover, then get into a building at your first opportunity. You’ll be able to fire out the windows to clear the end of the street.
As you approach the waypoint, another five heavily armed soldiers spawn at the corner, so wait for Price and a few loyalists to take up positions at the end of the street, then follow them and easily gun down the new soldiers with their help.
Follow Price to the left and engage the new group of soldiers, then follow him out to the building on the right. No one else should attack after you breach the door, so just follow Price down the path until you get the UGV.
The UGV
This is what I like to call a coffee break. The UGV is a killing machine, and it’s pretty much invulnerable. Just enjoy your rampage. Note that even though your grenades are limited, you’d be hard pressed to actually run out, so fire them at any group of soldiers, or at anyone hiding behind cover. If you want an achievement, use them to take down the helicopters that show up. If you take them all down with grenades, you’ll get it.
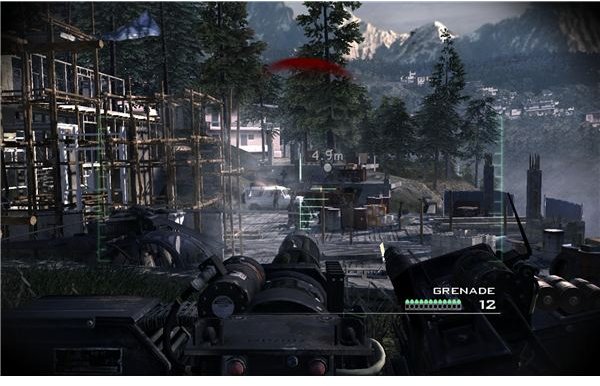
Use the minigun to cut a path through the first set of soldiers blocking the road, and hit the Hind on the rotor to easily bring it down. Move forward to the construction area, and take out the three Hinds moving in. Since your aim should be pretty stable, this isn’t too hard. Again, just aim for the rotor and they go down quickly.
Push forward to the waypoint and chuck a few grenades around to set off a bunch of explosive barrels and clear the landing field. Make sure that you kill the man on the large machine gun too. It’s one of the few things that can damage you. Watch for the incoming helicopter, and then just hold the field until Price and Nikolai load Soap into the little helicopter. At this point, a drone will take out the UGV. When you regain control, sprint down the street and make it to the construction area. Once you enter the sliding point of the mission, just steer a bit to the left to dodge the falling building, and curve a little to the right to get past the falling tree. Once you hit the water, you’re done.
References
- All information from a “Hardened” difficulty playthrough of Call of Duty: Modern Warfare 3.
- All screenshots from Call of Duty: Modern Warfare 3
This post is part of the series: Call of Duty: Modern Warfare 3 Walkthrough
The Call of Duty series continues with this big finish to the trilogy. You don’t exactly start off with a tutorial either. You’ll be fighting a constant war for the next six hours, so I hope you’re ready. If you need help with any mission, just look inside.
- Call of Duty: Modern Warfare 3 Walkthrough - Missions 1-3
- Call of Duty: Modern Warfare 3 Walkthrough - Missions 4-6
- Call of Duty: Modern Warfare 3 Walkthrough - Missions 7 and 8
- Call of Duty: Modern Warfare 3 Walkthrough - Missions 9-12
- Call of Duty: Modern Warfare 3 Walkthrough - Mission 13 to the End