Beginner players often have little guidance navigating unknown dungeons for the first time. This guide will cover bosses and directions to completing the Wailing Caverns instance.
Quests
Before starting the Wailing Caverns instance, players will want to have the following quests in their log. The first is “Leaders of the Fang”. This quest is gotten by following the chain starting with “The Forgotten Pools” from the Crossroads. Next is “Serpentbloom”, and is obtained from Apothecary Zamah in the Pools of Vision at Thunderbluff. “Deviate Hides” is from Nalpak and can be found in the right eye socket of the skull entrance to Wailing Caverns.
Getting There
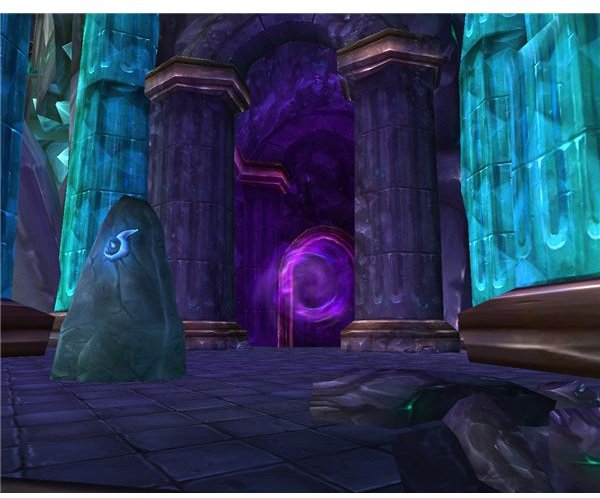
The Wailing Caverns is located in the Barrens and just west of the Crossroads and on the northern bank of the Lushwater Oasis. There players will find a large cave in the shape of a skull. Once in the cave, simply follow the first path to the left until reaching the large swirling instance entrance.
Anacondra
Once inside the Wailing Caverns, players are greeted by the Disciple of Naralex. Each player should talk to him to receive the Druid buff Mark of the Wild. Following along the path, the party will encounter a couple of low level starting enemies, to help them get oriented and figure out the basics of each unique group situation.
A little ways down the path, the cave opens up with a huge drop in front of players. Here they will encounter a new enemy, Druids of the Fang. These druids are able to heal and cast sleep spells. The first boss is located in this room, and the path circles around a gorge in the center of the room. Lady Anacondra is located in one of four locations in this room, and it is random every time. If a Rogue is available in the group, they can scout the area out and find the exact location of Anacondra. If not, simply perform a circuit around the room until Anacondra is found.
Lady Anacondra is a very easy fight. She is just like the Druids of the Fang encountered earlier in the instance. Kill any enemies accompanying her first and then focus on killing her. She goes down easily. She commonly drops Serpent’s Shoulders. These are leather shoulders with 59 armor and 9 agility. Now, the group can drop down into the gulley and begin heading west through the water.
Kresh and Cobrahn
On the way west, the group will encounter a large turtle named Kresh. This is the second boss in the Wailing Caverns instance and is a basic tank and spank battle. That is the group deals damage while the boss attacks the tank until the boss is dead. Kresh can drop Kresh’s Back. This shield item has 471 armor, 9 block and increases defense rating by 6. The group can then simply travel west and up a steep ramp to a higher level. There are many enemies to battle across this pathway, but they give good experience and shouldn’t generate any problems.
At the end of this path, the party will encounter Lord Cobrahn. Cobrahn is widely considered to be the easiest of the four Fanglords. When pulled, four non-elite snakes come with him. Mages can cast Blizzard on the group and kill them shortly, while the group tanks and kills Lord Cobrahn. Lord Cobrahn drops very good loot, including Leggings of the Fang, one of the rare pieces of the set acquired in Wailing Caverns.
Pythas and Skum
After a long run back east to the first room, players should continue east, killing crocodiles and Deviate Shamblers. After a great deal of killing, the group will encounter Lord Pythas, who is often considered the hardest of the Fanglords. This is because when pulling Pythas, two Druids of the Fang and a Deviate Shambler come with him. The group should have a mage Polymorph Lord Pythas, so the group can exterminate the extra enemies before turning to focus on the boss. From this point, he is a simple tank and spank battle.
Lord Pythas drops both the Armor of the Fang rare piece of the set and the Stinging Viper, a one handed mace with a poison effect. Shortly along the path from Lord Pythas is Skum, a huge thunder lizard. He comes with two Druids of the Fang and there are a number of patrolling enemies that walk around there. Groups should make sure to eliminate everything around before starting on Skum. Once ready, Skum is a simple fight, just like a normal thunder lizard with extra health and damage. Skum drops the Tail Spike, an average rare dagger, and the Glowing Lizardscale Cloak, which has 20 armor, 6 agility and 2 stamina.
Serpentis and Verdan
The group should then continue working their way through the instance until at last reaching a huge cave with Lord Serpentis and Verdan the Everliving lying in wait. Serpentis is an easy and straight forward battle consisting simply of tanking and damaging him. Make sure all party members stay far away from the looming Verdan. Serpentis drops several rare items, including Boots of the Serpent, part of the Serpent set, and the Venomstrike bow, one of the best bows available for low level Hunters.
Verdan is a very straight forward fight as well, but that doesn’t mean it’s easy. He has a huge amount of health and can hit for amazingly high amounts of damage. All damage dealing classes should be very careful not to pull agro from the tank, as a few hits could kill a Mage or Warlock. Verdan drops the Seedcloud Buckler, a decent Paladin shield, and the Living Root staff, a staff with spirit, stamina and spell power.