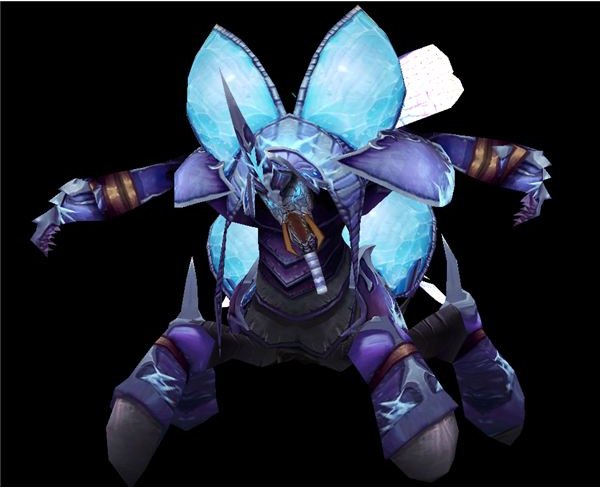
Trial of the Grand Crusader is a heroic mode version of the Trial of the Crusader raid. The heroic version can often catch groups unprepared, but this strategy guide will help you complete the trials with ease. This portion of the guide prepares you for the final encounter with Anub’arak.
Preparing for Anub’arak
This guide assumes an understanding of the normal version of Anub’arak.
Anub’arak on Heroic mode follows much the same strategy as in normal. The main difference that the raid must adjust around is that there are only a total of six Frost Spheres to be brought down during the entire encounter - meaning a strategy for placement and kiting Anub’arak when burrowed is essential.
Also different in the heroic version of the fight is the fact that twice as many Burrowers spawn, and continue to do so into Phase 3 of the fight. Burrowers also use Shadow Strike, a deadly backstab attack that will one-shot anyone in the raid who is hit by it. Skittering Scarabs are also untauntable .
Raid Group Composition
The final encounter of Heroic Trial of the Grand Crusader, Anub’arak requires thoughtful planning, coordination , and timing on the part of all raid members. Here’s what is essential for your group for this encounter:
- Tanks: Two tanks are necessary for the fight, and a shield tank (warrior or paladin) is the preferred tank for the Burrower adds.
- Healers: Two healers will manage the fight without an off-healer. One healer should be focused on single-target healing for both tanks, while the other healer focuses on raid healing (occasionally spotting the tank healer as necessary.)
- DPS: For the remaining DPS , it is recommended that at least two be ranged. This allows one ranged to focus primarily on bringing down patches of frost, while a second is ready to back up the first if he or she should be slain in battle.
Also consider having a version of Mortal Strike (a healing debuff ); it is extremely helpful due to Leeching Swarm in Phase 3.
Positioning and Frost Patches
Positioning Anub’arak correctly is important in this fight. More important is the positioning of the limited frost patches, and their use by the raid.
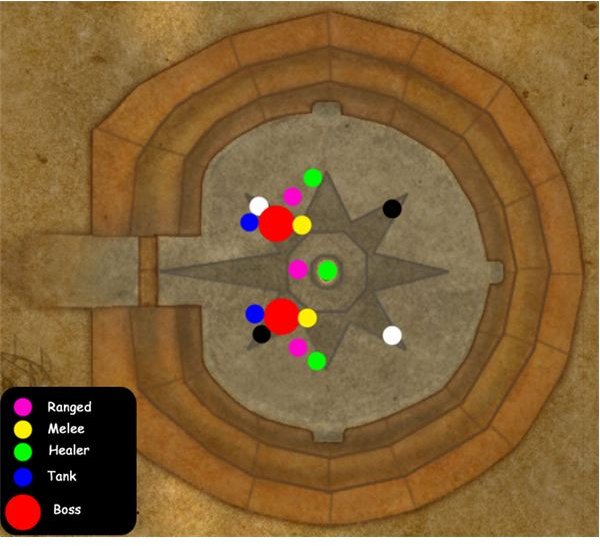
The diagram to the right reviews the positioning of Anub’arak as the fight begins in phase 1. The main tank will position Anub’arak approximately where he stands before the fight begins, facing him away from the raid. All DPS - ranged and melee - as well as the healers should stand as close to Anub’arak’s back (with the exception of the ranged who brings down the Frost Spheres.) This will aid the off-tank in quickly grabbing new Burrowers as they spawn and run after raid members who have aggro (often the healers.)
The diagram also shows the approximate frost patch positioning. The first patch must be brought down immediately, as close to the front of the room near Anub’arak as possible. The off-tank will tank their adds on top of this frost patch. The main tank should then adjust Anub’arak’s position so that melee are able to cleave onto the Burrowers, while Anub’arak is kept at a reasonable distance from the patch so that he does not break it on his first burrow.
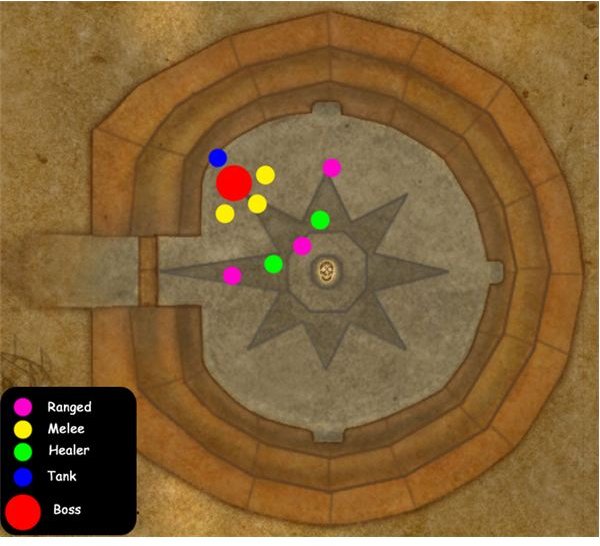
The second frost patch is to be brought down at the back of the room, as far back as possible. This should be brought down just before Anub’arak submerges. As will be explained in the fight strategy, this is the first frost patch that should be broken.
The third through sixth frost patches should be alternated between the front and back of the room, in order to kite Anub’arak as much as possible to maximize the use of the frost patches. However, this will be adjusted as Sphere positioning cannot be fully controlled.
Final Preparations: Raid Member Roles
Before starting the fight, it is important that every raid member understand their role in the fight. Debuffs, interrupts, positioning, frost patches, and DPS prioritization is crucial to success.
- The main tank is designated to tank Anub’arak. This is mainly a simple matter of keeping the highest threat on Anub’arak, but also requires the main tank to position Anub’arak around frost patches in such a way that melee can cleave between the boss and the adds, while keeping the boss out of the patch.
- The off tank must pick up Burrowers as fast as possible as they spawn, and tank them on top of the frost patches. If their frost patch is lost, they must move the burrowers to another patch while keeping them stunned, if possible. The off tank is also responsible for helping interrupt Shadow Strikes.
- At least one melee DPS must be assigned to interrupting Shadow Strikes from the Burrowers as they occur.
- One ranged DPS must be assigned to bring down Frost Spheres as their first priority, in the order outlined above.
- One healer should be assigned to focus healing both tanks, while the other healer is assigned to focus on the raid. Both healers should be prepared to spot each other as necessary.
Defeating Anub’arak
Now that your raid is prepared, the fight against Anub’arak can begin.
Have the main tank position Anub’arak after the first frost sphere is brought down. The off tank should begin tanking the Burrowers as they spawn on this frost patch, while melee cleave from Anub’arak onto the burrowers as possible. The off tank, as well as at least one melee DPS, must focus their attention on interrupting Shadow Strikes from the burrowers. If these strikes are not interrupted, they will kill a raid member, making the rest of the fight more difficult, if not impossible.
Timers from Deadly Boss Mods will be extremely helpful to watch both the Shadow Strikes, and for the designated Sphere DPS to move away a few seconds before Anub’arak burrows, preparing the second frost sphere at the back of the room.
As Anub’arak burrows, all raid members except the tank handling the Burrowers must move away from the frost patch at the front of the room in such a way that Anub’arak will not run through it on the first set of spikes. During this second phase, there are three key components:
- All players should move pre-emptively toward the next patch of frost in the series (starting from patch two). When assured they are not targeted for that set of spikes, they should move again to the next patch.
- All DPS, especially ranged, must focus their DPS first on the scarabs as they are untauntable. Enraged scarabs always become a priority. Those who are being attacked by scarabs, even if melee, should kite them. Once all scarabs are dead, DPS can focus on the Burrowers.
- One patch of frost must be left for the next phase of the fight for the off-tank to tank on. If five patches have been used, the next person to be targeted by spikes must attempt to kite them away from the last patch until Anub’arak emerges.
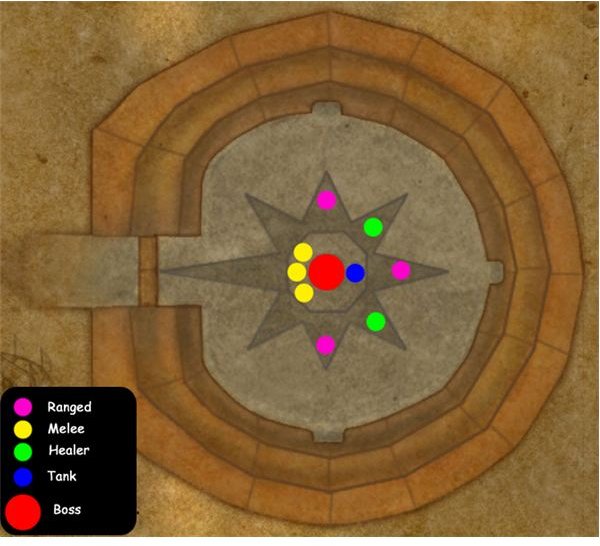
When Anub’arak re-emerges, the main tank and off tank must immediately position themselves around the remaining frost patch. DPS now should focus entirely on Anub’arak, in a goal to not have Anub’arak submerge again (while a second submerge is doable, it is highly difficult and not recommended.) Continue the phase 1 strategy until phase 3 begins.
When Leeching Swarm begins, use Heroism/Bloodlust if it is available to your raid. DPS should use all cooldowns to bring down Anub’arak as fast as possible. Healers must aim to keep tanks healed as high as possible, while keeping the raid at around 30% health or lower.
Survive this phase, and you have bested Anub’arak! You can view the available loot for Heroic 10-man on WoWhead .