Trial of the Grand Crusader is a heroic mode version of the Trial of the Crusader raid. The heroic version can often catch groups unprepared, but this strategy guide will help you complete the trials with ease. This portion of the guide takes a look at preparing for Northrend Beasts.
Preparing for Northrend Beasts
This guide assumes an understanding of the normal version of Northrend Beasts.
Northrend Beasts on heroic has a few major challenges in store for the unprepared raider. Of major note, the damage done to tanks, especially by Gormok the Impaler, is significantly higher. Players will also not receive a speed boost after Icehowl’s massive crash. To be ready for Northrend Beasts on Heroic, tanks and healers must be prepared for heavier damage, and the entire raid must be competent enough to dodge Icehowl’s charge, as a single failure at this can wipe the raid .
Recommended Add-ons include:
- Deadly Boss Mods , which provides several timers and assists during the raid encounter, and
- Omen Threat Meter , which helps players watch their current threat level on the target to prevent pulling aggro from a tank.
Raid Group Setup
In a 10 man raiding environment, your group is often going to be restricted by the people and classes that are currently available. Rather than look directly at what classes should be available at all times, make sure you compose the raid with these guidelines in mind:
- Tanks: You will need two tanks . Preferably, at least one of these tanks should be a shield tank (warrior or paladin), but all tank types are acceptable and can work together.
- Healers: You will need two healers , and healing balance is crucial. Ideally, you will need a single-target healer (such as a paladin or discipline priest ) and a raid healer (such as a druid, shaman, or holy priest.) While two single-target healers, or two raid healers, can accomplish healing the raid, they will find it very difficult as the encounter has a huge balance between raid and single-target healing. Teamwork and communication with the healers is crucial.
- DPS: Aim for a general balance of ranged and melee DPS . It is not essential to have an even split of 3 melee and 3 ranged, but having at least 2 of each type will help reduce potential problems with both Gormok and the Jormungar. Having only one ranged or only one melee is again possible, but more difficult; having none of one type will prove extremely difficult.
- It is helpful to have at least one paladin and one shaman in the group. Though not necessary, paladins and shamans offer essential group utility throughout the fight. Paladins offer Blessing of Protection and Salvation, while Shamans offer Heroism/Bloodlust.
Gormok the Impaler
The first phase of the fight, Gormok the Impaler , is often where groups find their first major challenge.
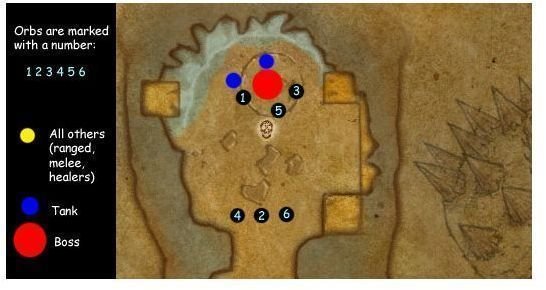
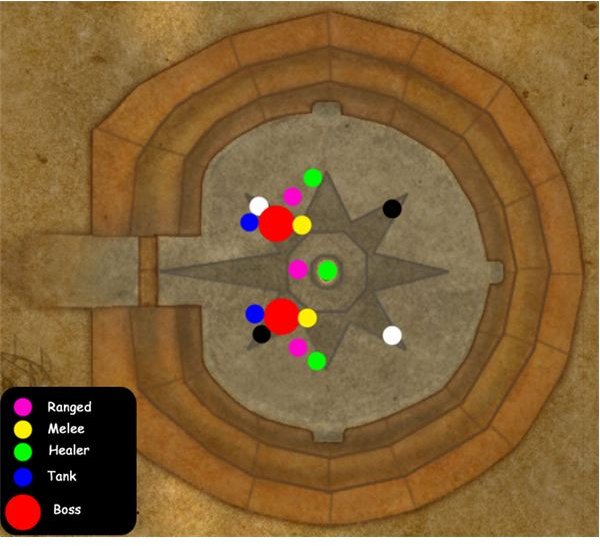
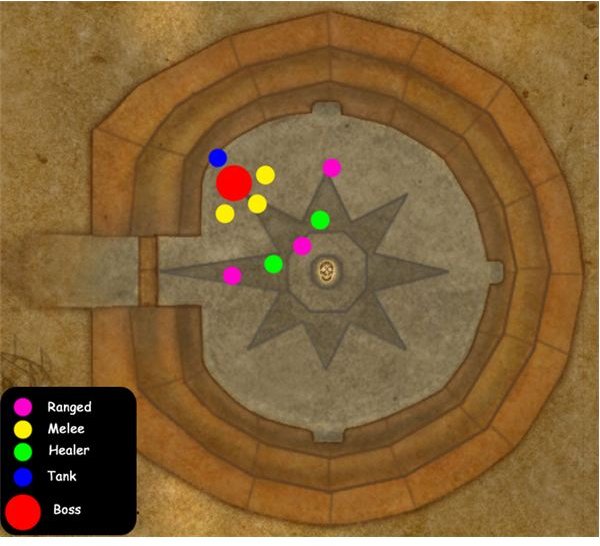
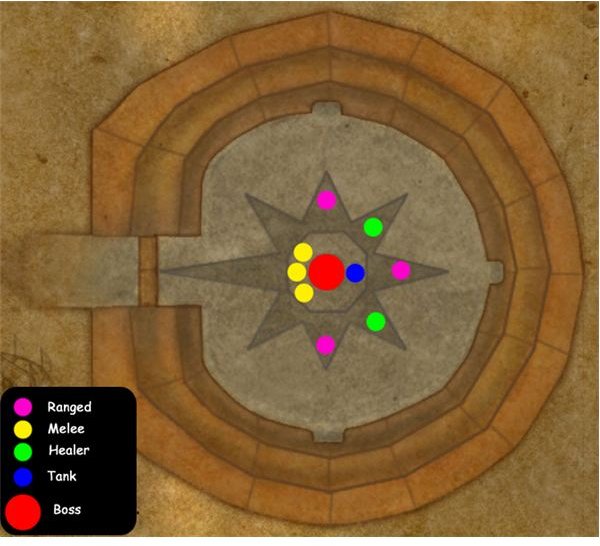
Positioning for Gormok the Impaler is illustrated in the diagram to the right. Both tanks should stack on top of each other (represented by a single blue dot) and tank Gormok in the center of the coliseum. Melee DPS should stand behind Gormok, while ranged and healers spread out along the star points, ranged making sure to stay on the front and sides of Gormok to be in range of healers.
As mentioned earlier, Gormok hits significantly harder - in fact, his Impale does 150% weapon damage and 2625-3375 damage per tick, as opposed to 100% weapon damage and 1400-1800 damage per tick in normal mode. Similar to the normal version of the fight, tanks will want to rotate tanking Gormok, at a maximum of three stacks of Impale each. One healer should be focused on healing the tanks through this phase of the fight, while the other focuses on the raid, although both healers should be prepared to help each other as necessary.
Fire bombs are much more deadly in Heroic, and leave a stacking DoT on the players which adds up the longer they stand in the fires. Even three stacks of this debuff can be fatal, so it is essential that ranged be ready to strafe left or right out of a bomb at a moment’s notice.
Snobolds also prove an additional challenge in Heroic, and must be killed as swiftly as possible on ranged targets. Any ranged that receives a snobold should run into melee, standing at the back of Gormok (essentially underneath his back legs.) This movement reduces downtime from melee running to a stunned target and back to Gormok, and also allows melee to cleave damage onto Gormok while killing the Snobold. Snobolds that land in melee, on the other hand, can be ignored throughout the fight, and may be killed once the raid has ensured they are ahead of the timer for the next phase, or killed quickly between Gormok’s death and the worm’s entrance.
The strategy for the remainder of the fight is continued in Part 2 of the Northrend Beasts guide.
This post is part of the series: World of Warcraft Trial of the Grand Crusader 10-man Strategy Guide
Trial of the Grand Crusader is a heroic mode version of the Trial of the Crusader raid. The heroic version can often catch groups unprepared, but this strategy guide will help you complete the trials with ease.