You’ve got your new graphics card, and need to have it fitted into your PC. However, rather than pay the local computer hardware store to fit it for you, why not do it yourself? Installing a graphics card isn’t difficult nor is it time consuming.
Install the Graphics Card Yourself or Pay an Expert?
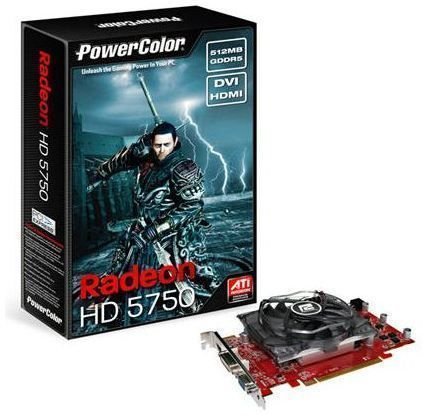
Ok, so you need to replace your current graphics card. Perhaps the one currently in your system is failing, or perhaps you need some extra power in order to play that latest games title. You’ve ordered your graphics card online, or bought it from a local supplier, but what now? Do you entrust your PC to a computer store, or attempt the job yourself?
It’s a fact that a computer store is likely to charge you for the installation work, but in truth, installing a graphics card isn’t difficult and doesn’t take long.
In this article, we’ll look at the steps required to replace a graphics card, and how you can quickly and easily remove your old graphics card and replace it with a new one.
- Download latest drivers for new graphics card
- Remove old drivers
- Gain access to inside of PC
- Locate old graphics card
- Install new graphics card
- Test & Troubleshoot
- Close up PC
Installing a New Graphics Card - Getting Started
You’ll already have selected your graphics card so all that’s left is to fit it into your PC. However, there are a couple of things you need to do to your current system first before you do anything to the PC’s innards.
Firstly, visit the vendor responsible for your new graphics card’s GPU (Graphic Processing Unit) and download the latest drivers for your card. Drivers are the software which interacts with your PC’s operating system, and provides the operating system with instructions on how to use the card.
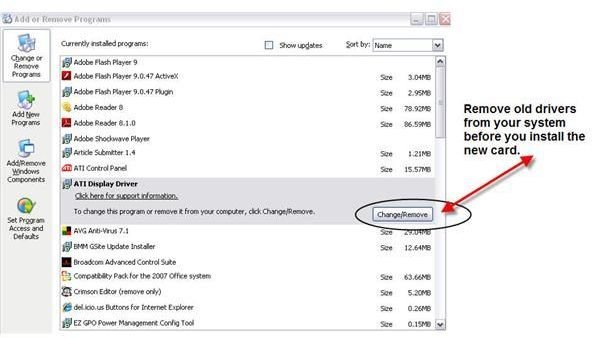
Once you have downloaded the new drivers for your new card, it’s time to remove the old ones. This is very important as leaving the old drivers on your PC could cause conflicts with your new drivers and make your PC unstable. You should always uninstall old drivers before installing new ones, even if the drivers are from the same vendor. To uninstall your old drivers, browse to your Control Panel and look for Add/Remove programs. Once you have found it, look for reference in the program list for your current graphics card.
For ATI cards, it will say something like ‘ATI Display Drivers’, while for Nvidia cards, it will say something like ‘Nvidia Drivers’. When you have found them, highlight the entry and click on the ‘Change/Remove’ tab to remove the software and once finished, close down the PC. The next step is where you need to get your hands dirty!
Installing the New Graphics Card
Place the PC with it’s right-hand panel down on a sturdy work surface. This is because you will need to remove the left-hand panel to gain access to the PC innards. Judge left and right by looking from the front of the case, and using an appropriate screwdriver, remove the retaining screws from the back of the case, laying the panel to one side. Now, before you actually touch the card inside, ground yourself in order to get rid of any static electricity you might have stored up – static electricity is very bad news for delicate electrical components! To ground yourself, touch a metal facing of your PC or a nearby radiator. Alternatively, wear an anti-static wristband which will draw electricity away from you and funnel it through the PC case.
Now, locate the graphics card and remove the retaining screw from the graphics card backplate. The graphics card is typically the top-most card in the PC. To make doubly sure, check the back of the PC and look for the D-SUB connector – this is the blue socket where your monitor plugs into. If the two are level, you’re in the right place! Grasp the card by the topmost edges and pull the card out of the slot – try to pull the card out in a straight 90-degree angle to avoid damaging the slot.
Take the new card out of it’s anti-static packaging and again holding the card by the edges, line up the card with the slot and push down firmly, making sure the card goes all the way into the slot. Don’t be scared to use a little force if required as the fit might be quite tight. Once you have the card firmly in the slot, screw it into the backplate and attach any power fittings the card might require. Be firm, but gentle when attaching the power fittings as even the slightest knock can cause the graphics card to loosen slightly or not fully connect with the motherboard, causing your PC not to boot. If this happens, loosen the backplate slightly and realign the card, again making sure it’s fully in the slot before tightening the screw again.
Now that the card is in place, reconnect the PC and switch on! It’s often best to leave the case-side off while you finish the installation, just in case you need to troubleshoot the installation if it doesn’t work. Once the PC has powered up and logged into Windows, the PC should automatically detect the new hardware and begin the installation wizard. If you downloaded the latest driver for your card from the Vendor site (either ATI or Nvidia) then you’ll be able to skip the wizard, and browse to the location where you downloaded the drivers. Double-click on the driver file and the drivers will self install. Reboot the PC when done, and all being well, you’re new card should successfully complete the installation automatically.
All that’s left to do is reattach the side of your case, and enjoy the new graphics muscle your PC now possesses! Although, remember, if your graphics card supports it, it might also be beneficial to download the latest version of DirectX so that your new graphics card can take full advantage of the new features.
Congratulations! You’re done!
Images