The Blackmarsh has several cool side quests to work on while you’re searching for Kristoff: The Trail of Love, The Burden of Guilt, The Lost Dragon Bones, Tears in the Fade and The Summoning Circle. Just look here if you need help with these Dragon Age Awakening side quests.
The Trail of Love
You’ll find this note on a skeleton along with an angry letter. We have a trail to follow.
The first trick is merely a poor choice of words. The poor men really just meant a rooster’s place of rest. There’s a little chicken coup close to the entrance of the destroyed village. There’s a hidden clue in the coup or hen house. If you can’t find it, then hold down the TAB key.
This gives you the next note. It just means a tree over by Kristoff’s camp. It’s the big forked one all by itself. You can’t miss it.
The next spot isn’t accessible until we kill the Baroness. It’s right next to a giant dragon skull. Once she’s dead, walk out of the town toward the entrance to the level and look for a path to the right. The hidden clue is right next to the giant dragon skull.
The next clue will take us back to Kristoff’s old resting place by the crypt. The clue is on a log.
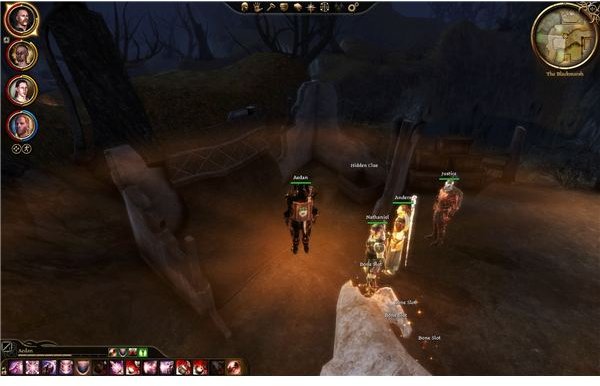
This takes us back to the summoning stones. Click on the tallest for the last clue.
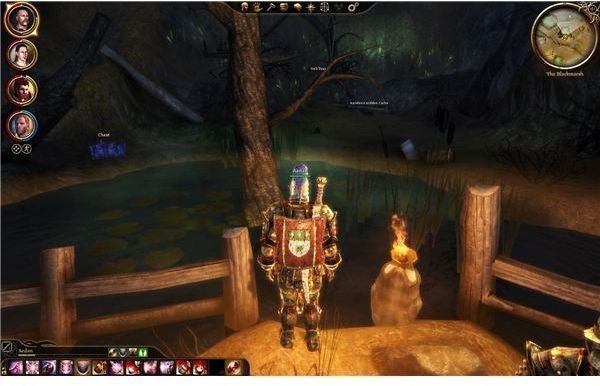
The pond he’s talking about is over by the bridge we just crossed on our way back from the crypt. There’s a little floating bottle by it. It has Corin’s Proposal in it. This is a nice ring that boosts all attributes by two.
The Burden of Guilt
You can get this quest by finding an “Ancient Letter’ hidden by a crate. It’s near the main mansion in the ruined village in Blackmarsh. You can read the letter to see that the old Baroness was doing a whole lot of sacrifices to maintain her youth. It seems that this aide had some fairly understandable guilt about that one. We can find his hidden cache by the bridge across the marsh, along the way to Kristoff. If you look to the left, there’s a chest there too. The broken barrel holds the hidden cache. A few werewolves will probably attack, but that’s it. Kill them and grab the cache. It seems that he didn’t sell his soul for much though, since there was only a sovereign and a few gems in the one I found. It’s better than nothing though.
Tears in the Fade
This is a pretty quick one. When you enter the Blackmarsh, you should see several different Fade Tears. You can’t cross these barriers and there isn’t anything that you can do to take them down in the real world. When you cross into the Fade, you need to seek out the three Fade Tear Apparatuses. These are right along your main path. Just look for the devices on the top of the ramps. You should be able to kill the desire demons guarding the devices by simply rushing them.
The Lost Dragon Bones
There are some dragon bones scattered across the swamp from a past epic battle between the Baroness and the Queen of the Blackmarsh. The good news is that they usually show up well if you hold down TAB. You don’t even need a line of sight to get a marker pointing you toward them. I’ll use the destroyed village as the starting point.
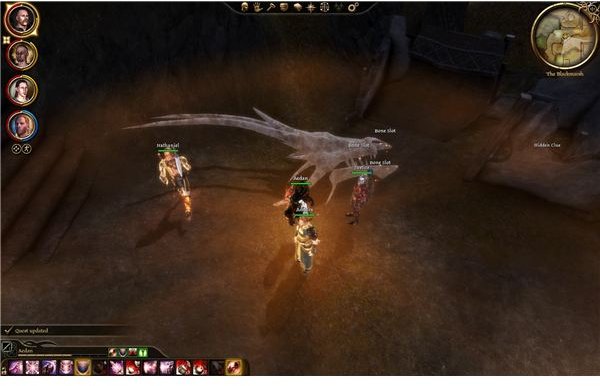
The first bone is a bit to the right in the little nook at the end of the path. Pick it up. The second one is a bit past Kristoff’s camp. It’s actually in plain sight and should show up quite well. It’s on a little raised hill. You can’t miss it. The third is in a little shack by Kristoff’s body. You’ll be able to grab it after you leave the fade. The fourth is at the docks. You’ll get the key to this area after you kill the Baroness and loot her body. The final bone is by the big skull. As you walk back to the entrance of the level after you kill the Baroness, you should see a new path branching off toward the right. Pick up the last bone and pop them into the skull. This naturally summons a giant ghost dragon that we need to kill.
Killing the Blackmarsh Dragon
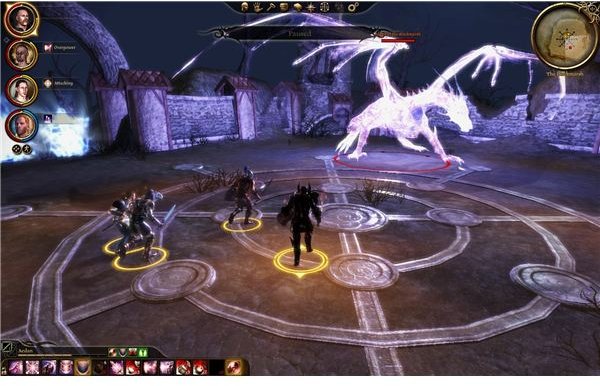
Head to the top of the mountain. The dragon will attack as you cross through the gate. This is a hard fight. The dragon, called the Queen of the Blackmarsh, is able to spit electric energy and fire. It can also sweep, kick and grab anyone in its mouth and smash them to death. The good news is that there are a few defenses. A good buffer in sentinel armor should be fine. Mine took about twenty-one points of damage from the whole thing. Justice should also be fine if he’s using Beyond the Veil. Nathaniel should stay behind the dragon. Unlike past dragons, you can effectively backstab this one for fairly steady and safe damage. Spells don’t work as well though. Cone of Cold freezes him for a second. Death Hex is usually resisted. Crushing Prison causes some nice free damage though, even if it doesn’t stop him. The rest tends to be hit or miss and you’ll probably want to just stick to using healing spells. Mark of Death from a rogue seems to work though, even if only for a few seconds.
The interesting note is what happens as you cause a lot of damage. At roughly the halfway point, the dragon will go into a big orb in the center and call up eight wisps. This will move toward the center. Have your fighters attack the line on one side and cast Blizzard or another area of effect spell on the center. Blizzard works well since it actually slows the wisps down. Each wisp that reaches the center will heal 394 points of damage. This makes it a bit of a grind to do it solo, since the most my buffer could get was three. Also note that you can damage the dragon by attacking the center core. If just one or two wisps are left, feel free to let your team start hitting the center orb too for free damage. It’s probably possible for a high damage squad to just do more damage than the wisps can cure. It’s a bit of a high-risk minimal reward plan though.
Just repeat this pattern until the dragon is dead. If you can keep Anders alive by hanging on the edge of the fight, then he should be able to do a few revivials throughout. If you have to pick, revive your buffer and then Nathaniel. Justice or Oghren are merely backups if your warden is a buffer.
Once it’s dead, search the dragonbone rubble to get the eldest dragonbone. Wade will like this and he can make a cool sword out of it. Search the dragon for some cool equipment too. Other than that, we’re done.
This post is part of the series: Dragon Age: Awakening Side Quests
There are a whole lot of side quests to do in Dragon Age: Awakening. Each area has its own series of missions. You can do everything from minor choices to slaying dragons. If you need any help with side quests in Blackmarsh, Amaranthine, or Vigil’s Keep, then look here.