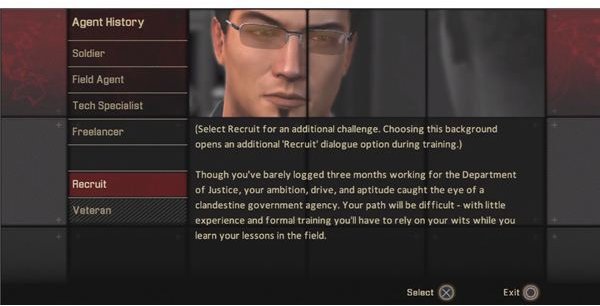
Well, we’re inside the Graybox and free again. It’s time for our training. I normally wouldn’t do a walkthrough for a tutorial, but there are several bonus missions that you can do for useful equipment or extra experience and money. If you need help getting high scores on the tests, look here.
Introduction
Why am I writing a level on the training level? Well, you can get off to a good start by scoring high on the tests and getting access to some fun bonus missions in your training run. Your goal should be to get over 100 points in each level. You can do the courses as many times as you want, so it’s really just a matter of patience.
Also, go ahead and hack the email system at Alpha Protocol. It’s a free 25XP if you’re any good at the hacking game. Nothing happens if you set off an alarm either. There isn’t anything too important on the system, but there isn’t any penalty.
Gadget Training Course with Darcy
I’m actually not that sure how you’d fail the gadget course. The only real way to fail is if the guards manage to do a lot of damage to you. If that happens, just do it again. As long as you lay the traps right or know how to do melee combat, then you’re good.
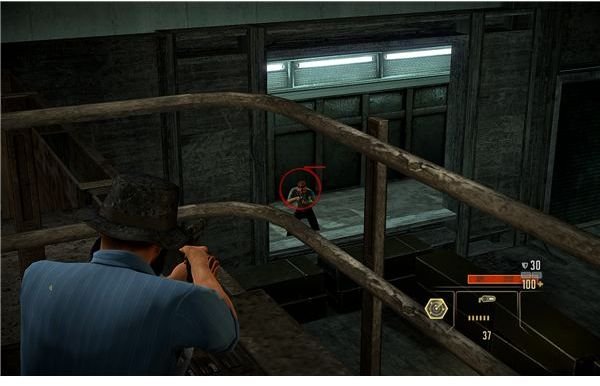
The start is pretty simple. Just aim well on the grenade round. No real rush here since he shouldn’t be timing you. Throw the EMP and then enter the next area.
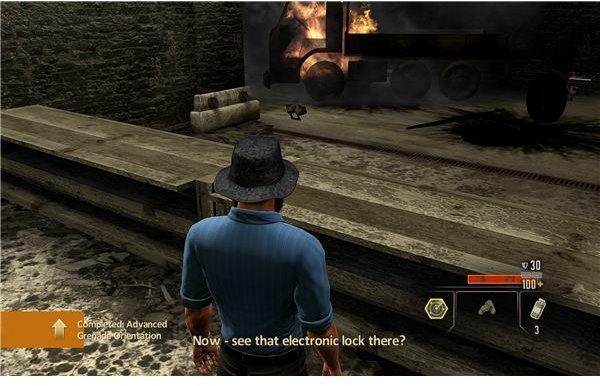
The timer should start up soon, so try to move fast here. It can’t hurt anyway to warm up a bit. Run up and plant a mine on the marked spot on the door. After you fry the guard, get ready to move really fast. You’ve got about ten seconds until three guards come through the door. Step up to the wall by the door and plant one. Plant a few on the surface of the boxes next to the door. We’re going to take cover here, so point them outward. You probably have time to plant about three or four. Run to the crate and start tossing them like grenades at the door. These should go off as the guards come through the door, if you space out the throws by a second or so.
Unless you’re just really unlucky, these mines will shock at least one of the guards. Hopefully it will get two. If you don’t get all of them with your mines, then just rush and start punching. A melee takedown counts just as much and they aren’t that tough. I took out the last guard with no damage taken on Recruit setting with only one rank in Martial Arts, so it’s definitely possible. Once the third guard drops, you’re set.
Walk back and report in for your score.
If you move quickly, you should have a huge score for time. If you didn’t take damage, then you get another ten points. You also lose points for damage, so you want to limit that anyway. The rest of your points should come from taking out the guards. If you mess anything up, just try it again.
Darcy’s Bonus
This is a quick little bonus, but a good one. You just have to survive against the guards and play with some radio mimics. You’ll get $20,000 if you succeed, so make sure you do.
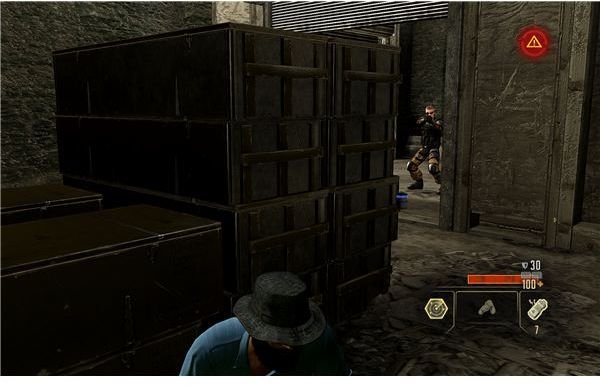
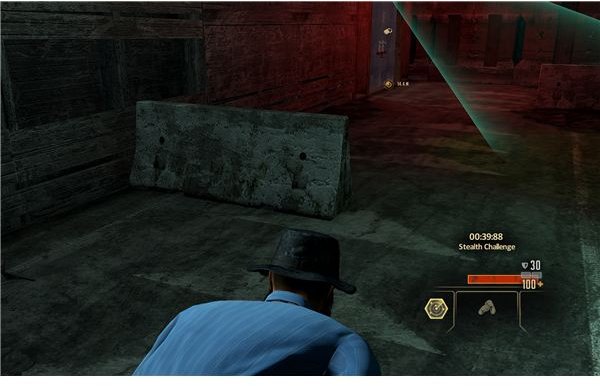
It’s actually an easy challenge. I’m guessing that this isn’t how they wanted you to do it, but all you have to do is hide and use the radio mimics. Don’t start out by the metal door. Get behind the crates but keep the door in view. Plant a mine right on the corner of the crate and on the wall facing it. Have a double blast waiting for any guard that wanders into the room toward you. If you stay behind the tall crates, then they won’t have a shot at you. If they try to rush you, the mines will take them out. Realistically, you can probably just beat them up as long as they only come one at a time.
The important thing is to use the radio mimics as soon as possible. As soon as it recharges, shut off the next alarm. As soon as you kill the third alarm, it’s over and you’ve got a lot of money for starter gear.
Weapons Training Course with Mina
Mina offers the weapons course. I won’t walk you through the basics. Just point and shoot for the most part. This is actually the only course I ever had trouble with in the game, for the record.
Three things to really remember. Time isn’t that important, unlike in the other tests. The difference between taking a minute and a half and two minutes was just five points. On the other hand, a miss costs you one point. Critical hits are worth five points. There is no reason at all to rush. Just fire slowly and accurately. Go ahead and sprint between stations though.
The progression of the actual course is all that matters, so the starting training for pistols and firing from cover is irrelevant. You don’t even repeat it if you retake the test. To start the course out, get a really good start on the pistol range. Critical hits are worth an extra five points, so take your time and try to get all critical hits on the pistol range. Just hit the first three targets and then enter the course. Put one more in the last target and advance to the shotgun section.
This is easy. Level it right at the center of the course and let it get the full red ring for a knockdown shot. Hit the two targets with one blast as they cross the center. You should get a five point bonus for multiple kills with one shot and also get at least one critical hit from that blast. Repeat it with the second set further down range. You should have time to get another knockdown shot lined up.
Run forward through the path. Don’t bother aiming at the two targets that pop up. Just look in their general direct and fire blindly. At least some of the shot will hit them.
The SMG is the big trick. Even though you are supposed to just rake fire across the targets, you can’t do that without racking up a bunch of misses. Just fire two shots, one from each gun, at the target. Aim at the center and they should both hit. Just click once and let go. Take out the first five and then the two that come through the door.
Get up to the assault rifle course and get ready to lose a few points. Even with good fire control, you’ll probably send a second shot into the wall after the first hits the target. If you’ve been following my advice, these five misses won’t be a problem. Just line up accurate shots and finish off strong. This will end the test. Go up the ladder and back into the room with Mina.
If you took about two minutes or so to do this, which is reasonable, then you should have a free sixty points to start with. A few critical hits will boost that more. The hits throughout the course are each worth half a point. The multiple kill with the shotgun is worth five. Unless something went wrong, you should have more than 100 points.
Mina’s Bonus Mission
Mina will ask you if you want to have a little more fun with an extra test. Naturally you should agree. After hearing Darcy run his mouth off, go back to the course and climb up the ladder. Your pistol has a silencer and is loaded with tranquilizer rounds. Get up on the scaffolding and walk to the end. You should see Darcy shooting at the range. Crouch and then look through the bars. Line a shot up right on his head (or his crotch…your call) and wait a few seconds for the crosshairs to center. Fire one tranquilizer to bring him down and end the bonus test. Walk back to Mina to get a special recommendation.
You’ll also get a free 150XP and a free silencer. This is a pretty nice gift for stealth characters, since I believe it usually takes at least one mission before silencers are available in Clearinghouse.
Stealth Training Course with Parker
This one is also fairly easy. You just have to move quickly for this one. I was detected by both guards, which set off two alarms. I still beat the 100 point requirement by a lot though. I guess this means that doing a true “stealth” run isn’t that vital.
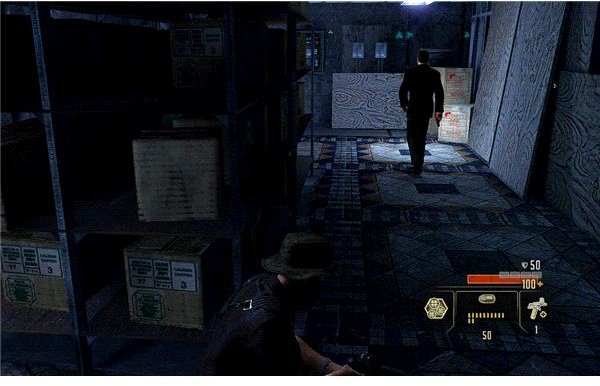
Start it off by quickly hacking the PC and sneak up to the little barrier. Stick to cover and then hug the wall to get past the camera. Leap across and go ahead and drop off the ledge, but hang for a moment. You should have good view of the moving cameras. Wait for the first to move away and then watch the second camera, the one that covers the rest of the room, back and forth. Once it crosses the pillar, you should be safe to drop and move to the corner. Then quickly move to the door and pick it. You should have dodged both cameras.
I’ve generally messed up this part in my training runs. If the guard in this room sees you, just beat him up and keep moving. You should try to go ahead and take him out, since you’ll get points for disabling both guards. Climb the ladder and use the zipline to get right next to the guard on the floor. If the alarm is off, you should be able to do a silent takedown.
Go through the door to finish up the course. If you didn’t take too long, then you should be fine. If not, then you can probably run it again with a quicker time.
Parker’s Bonus Mission
Parker will take a minute to offer you this special mission, but it will come after a little chit-chat. Agree to do his mission. You’ll need to sneak your way back into the medical bay and pick up a data disk. This is actually pretty easy. Head back to the hallway and you’ll find that the guard for the restricted area has left his post. Go through the double doors and move forward carefully. Just move forward while his back his turned and do a silent takedown. Check the side rooms for intel if you want.
Move on up and open the door. Carefully move forward while the camera points the other way and then go up to the next area. Just one guard up here and he spends a lot of time with his back turned. Just take him out and keep going. There should be one more guard in the final area. Just do another takedown and enter the medical bay. Grab the disk and start backtracking. It will still be clear, except for the first room. There seems to be a good chance that another guard will be waiting in the middle. Just be really careful. In my case, he saw me early, so I just rushed him and took him out before he could call it in.
Note that being seen isn’t a big deal. It just costs you a relationship point with Parker (technically two, since you miss out on a bonus for staying stealthy). Regardless, his opinion of you matters for literally nothing. So don’t sweet it. Accept your nice intel and finish up your conversation with him.
Conclusion
Once you’re done, you just need to report back to the interrogation cell for your final interview with Westbridge. Talk to him and learn about the conversation system some more and then head on in for your first briefing. We’re going to Saudi Arabia next.