
Get through all five cases in a matter of hours! We give you hints and must-do’s for each case. Be a super sleuth and impress Gil Grissom in the Nevada Lab!
Case 1: Burning For You
At your crime scene, take note of the seal and the rear view of the cab. Take a snapshot of the Burnt victim and notice the footprint beside (take a cast of it) and use your tweezers to get the red plastic.
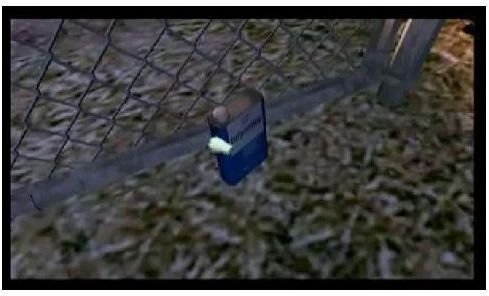
Next, find the insect in the dumpster and use your gloves to collect the gas can beside it. On the fence, click on the metal plate. Get the blue jean cloth and examine it (get the flake too). Afterwards, look for the turpentine can and lift a fingerprint off it, then click on the map and door.
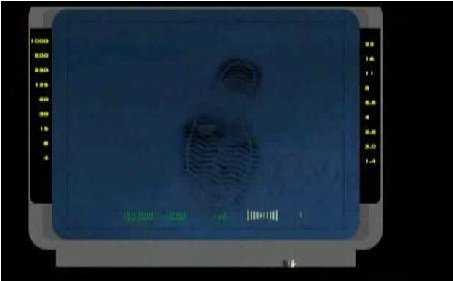
Make your way to the Mobile Lab. Using the Trace, get a fingerprint result and Edsel Danville will appear. Next, go to the Morgue (exhaust all questions) and get the Victim’s fingerprints and DNA. Collect the cab driver’s shirt and the burnt flyer before finalizing talks with Robbins.
Go back to the Lab and analyze the Gas Can, Jean Cloth, Turpentine Can and Driver’s Shirt. Run trace on the victim’s particulates. While you’re at it, run shoeprint analysis on your evidence and the red plastic.
Talk to Brass and ask everything you can - once done he’ll give you a new crime scene. Get there and find a man lurking around and bring him to the Interrogation Room.
Images
Case 1: Playing With Fire
Talk to Debra Finch at the Tribal Leader’s house and get the flyer on the fridge. Go back to Debra and ask her about the flyer and Liz Sunderland’s whereabouts.
At the Fire Temple, talk to Liz Sunderland but don’t forget to check the turpentine can and the curtain behind the statue. Once you’re done there - you’ll be informed that the cab has been moved to the CSI Garage. Before going, talk to Debra Finch first.
Back at the CSI Garage, examine the cab and collect the Bank Receipt and the second insect. Using the Flashlight, find the Matchbook as well as the Used Match. Collect the used match by using Ninhydrin. Then, get the GPS Device and Lighter. Don’t forget to lift the prints off the lighter.
Run back to the Lab and run trace on the prints from the Matchbook. From there, compare and confirm Ed’s fingerprint to it and the Lighter’s print to the earlier Sample B. Run a search on the Bank Receipt and the GPS Device before seeing Brass. Exhaust all options, move on to the Interrogation Room and do the same. Afterwards, confirm the DNA from Ed’s singed hair and the flake from the Jean cloth.
Now go to the Tribal Leader’s House and talk to Debra. Collect a Matchbook and the 3rd insect and click on the following items: fireplace, stove, door, closet, shoes, two nightstands.
Case 1: Wrap Up
At the Fire Temple, talk to Liz and do the following: Collect Turpentine Can, fourth insect and click on fence, stepladders, statue, curtain, shoes, statue, mask, crate. Then move the poncho, and collect the condom (swabbing inside and out) before talking to Liz - and collecting her DNA. (Brass will call about the Security Video)
Go the Lab and enhance the video using Frame+ 8 times, where you’ll see the Poncho. Go back to the temple and get the Poncho as well as lifting fibers. Talk to Liz then back to the Lab again to confirm the DNA from the condom are Liz and Ed’s.
Interrogate Liz and Ed (talk to Brass to get warrant) then analyze the Poncho. Afterwards, haul Debra in for questioning. After all that, Brass will give you a new area.
At the Miniature Golf Course click on the following for extra points: grass, lamp, waste basket, golf ball, golf hole, pipe dumpster, and golf ball. Then collect the 4th insect, a roll of cash and the hair from the cash.
When you’re through, finalize the arrest warrant by confirming DNA from the roll of cash and the victim’s. Get the warrant from Brass, interrogate Ed and close the deal on Case 1!
Case 2: Double Down
Catherine needs you at the Apartment where you will need to click on the TV , statue, doorknob, note, sink, cookie jar,nightstand, insect, board next to the bed bullet cast-off and use the LCV & IntegriSwab to get the blood drops. Collect the bullet from the wall and lift the material from it. Take a photo of the crime scene. Find the photo of a couple, get fibers from the bedsheet and swab the blood from the blood pool. Swab the blood on the cellphone, too. From here, head on out to the Hospital, click on everything and go the Lab.
At the lab, compare the samples from fibers in the bedsheet and do a search on the photo you found to get a new location before you analyze the phone. At the High Roller’s Room, click on everything for points before talking to Shane Michaels.
Head to the Hospital to talk to Shane some more. In the process, you’ll get a call from Sara. Before you go, get Shane’s DNA to exclude him.
Back at the Hospital, talk to the victim, Connie and get a testimony from here about Everett. You should get her DNA, take her photos and get fibers from her dress, as well the Pregnancy Diagnosis. For points, click on nightstand, dress and letter. Go back to the apartment (left nightstand) and then back to Connie where she’ll give you the gun. Then go to Brass and get a warrant for Everett.
At the Luxury Suite, talk to both Everett and Nicole. Get his DNA and search the area. Collect blood from the knife, collect the handkerchief, lift fibers from Nicole’s overcoat and get Everett’s revolver to question him about it. For points click on the piano, marble picture, statue, flowers, the insect, plant and another insect.
Images


Case 2: Back at the Lab
Down at the Lab, get both Connie’s and Everett’s gun’s bullet and compare it with the one at the crime scene, Confirm that it’s Connie. Also analyze the green handkerchief and confirm that Nicole’s overcoat and the fiber from the bed are the same, that the blood from the phone and the bed is Connie’s (after analyzing the wounds).
Get warrants from Brass and interrogate Nicole. While this goes on, Sara will tell you that Connie miscarried. Offer condolences and get the baby’s DNA (confirm that its Everett’s) confront her and Everett about it. Then talk to Shane (he’ll give you a ripped photo) and Nicole.
Back at the lab, you’ll get the security photos of Everett and Nicole, then piece the ripped photo together before talking to Brass.
With the warrant, go the Luxury Suite and get the Prenup, the Email, the meds and the laptop (use the USB to get the file) and then go back to the Lab to analyze the file before talking to Jim again.
Talk to Everett, Nicole and Connie before going back to the Luxury Suites. Grab the green blouse and the memory drive in it. Get fibers from the blouse and use Luminol on the stain as well as IntegriSwab on it.
Finally, match the material from Nicole’s blouse to the material in the bullet. Enhance the video, analyze the the USB drive and the luminol before talking to Brass about arresting Nicole. Once there, bust her attempted murder and end the case!
Case 3: Shock Rock
Go with Warrick Brown to the Hot Rod Casino and talk to Todd Hinkley. Take a photo of the crime scene and click on these various items, video camera, stage, band, guitar player, girl. vocal pedal the guitars, logo and insect, Get the pedal and lift prints from it and collect the loose screw. Pick up the mic and lift print’s from it too. Now, between the speakers, collect the tequila bottle. Lift prints from the bottle label, neck and cap. Don’t forget the makeshift straw and getting blood samples from it. Head on to the back of the room and collect the power cord before talking to Todd again.
Before heading to the Morgue, go to the Luxury Suites first and talk to Kathy. Now back to Doc Robbins, exhaust all conversation pieces as usual and then click on the foot cream for extra points. When you’r done head on to the Lab and work on the Echo pedal (remove cover, move the switch and get residue from Polarity Switch) Run trace on all four fingerprints (examine too) and then enhance the video 7 times before analyzing the residue from the Poliarity Switch
So getting to Luxury Suite, first talk to Kathy (you can play the piano if you want). Pick up the threat note on the table and read the deleted email from Todd (use the USB stick) check out the suitcase at the 2nd floor and collect Andrea’s clothes and find some reside there. Also pick up the photos of Todd and Andrea and finish talk to Kathy.For the points,click on the small table, statue, plant. the insect, bag,
Before heading to the Lab talk to Jill at the High Roller’s Room, get her autograph, click on the posts and grab an insect. Use the autograph to determine that it’s the same hand that wrote the threat. Analyze the letter from Todd and the residue from Andrea’s clothes before asking to interrogate Todd from Brass. After talking to him head back to the High Roller’s and pick up Jill’s DNA from the coffee mug she left behind.
Images


Case 3: Onwards
Grab a residue from Jill’s dress as you interrogate her, analyze it at the Lab then question her again. Now head on out to the Recording Studio and talk to Eddie Tillis. Take a look at the CDs and the Letter before talking to him again. Then, lift the fingerprint off an audio CD you found.
Head back to the lab and compare it to the fingerprint on the Echo Pedal - confirm it to Eddie’s , listen to the Audio CD and then get a warrant to search his studio. For bonus points, click on the CD rack, computer monitor, insect, audio equipment, other equipment, exit door, tequila bottle and guitar. Collect the Audio CD and collect the letter from Jet Charter as well as the file from the laptop. Click on the table, and press the AMP. Collect the ground prong and confront Eddie about it.
Confirm that the ground prong was used on the power chord, analyze the file from Eddie’s computer and listen to the audio. When you’re done take him to interrogation. He’ll give you a location for his Jet and in there you should collect the fire extinguisher and the hidden video camera. Also, get some residue of the jet and collect a screw for comparison. Clicking other items means plus points.
Again, match the screw from the echo pedal to the jet and analyze the video (7x) then, finish up by analyzing the fire extinguisger and the jet residue. Afterwards, talk to Todd - he’ll lead you back to the private jet where you’ll find another audio tape. Confirm that the audio tape from the Jet is the same audio tape and get ready to arrest Kathy
Case 4: In Your Eyes
Greg Sanders will assist this time around as you go to Dr. Bandereet’s House (Crime Scene). Talk to the wife and get the clothes from Amita while you examine the blood before you talk to her again. Click on the answering machine, radio, fireplace and the insect and lift the prints off a bloody footprint and blood from the fire poker. The flowers as well as the photograph and closet are bonuses but take a photo of the wall and ceiling splatter. Grab the broken teacup and swab for the liquid. Take a photo of the victim and acquire his DNA. Talk to Amita again and get her shoe size as well as residue from her slipper then head on out to the morgue.
Back at the lab,piece the teacup back together and examine the fingerprints (fire poker) and confirm that the bloody footprint belongs to Amita’s slipper and that the blood from the fire poker belong to the victim. Finally analzye the residue from the slipper and the liquid from the teacup.
Get back to Amita and she’ll point you to the Driveway where upon clicking on the manhole you get your insect. Click the container and the red shart (get the framents). Other items except for the tiremarks are bonuses, where you’ll need to get the tires cast. Get the blood drops from the garage and collect samples, Go to Brass and Robbins before you go back to your Lab.
Confirm that the blood on the driveway is still the victim’s and analyze the tire treads. Grab the tape recording from the trash bin and listen to it before confronting Amita again.
Go to Aadya’s house and talk to her, while there take a photo of the muddy footprint outside her house. At the Garage, gather all the broken taillights with your glove. Now head back to the lab and confirm that Amita’s footprint matches the muddy footprint at Aadya’s house. Fixing the broken taillight will hone you in the type of vehicle used (truck). Gather your things and talk to Brass.
Case 4: Blood Everywhere
At the Garage, get the insect from the front seat of the car and Aadya’s note as well as the files from the Laptop you found. Inside Aadya’s house, get her fingerprint and a piece of torn fabric. Take some residue from it before swabbing the sink for blood (via luminol) and getting the files from the laptop as well as clicking the containers to get the insect.
Back at the lab, match Adya’s fingerprint to the fingerprint you found and the victim’s blood to the blood found on her sink. Also, don’t forget to analyze the encrypted files you got and the residue from the silk fabric.
Go to the victim’s pool house and use Mikrasil to get the scratch impressions on the window.Click on EVERYTHING but get a sample of the residue from the pool house and the blood from the pool house door. Get back to the lab and analyze the residue. Then go on a roll as you talk to Brass, Aadya, Brass and Aadarsh.
Now head back to the garage and click on the toolbox and the vacuum cleaner. Don’t forget to get the Dyson Root 6! When you’re done, go back to talk to Amita. Piece the broken teacup together from the debris found in the vacuum. When you’re done, go confront Aadarsh and consult with the morgue
Confirm that the blood found on the poolhouse door is that blood used and they’ll open for you. Once there, swab for the blood found on the silk robe, gather the screwdriver and click on all things clickable for points. Head back to the lab and confirm that the silk robe found and the torn fabric the same and the scratch impression made by the screwdriver. Finally, confirm that the victim’s blood was found on the silk robe. Interrogate both mother and daughter before heading to the victim’s bedroom and to the pool house to find the crossword puzzle.
At the lab, analyze the crossword puzzle and go back. Make Aadya recant her confession and haul Amita back there for a case closed!
.
Images

Case 5: The Peacemaker
Gil Grissom needs you in this final case as you head to an Old West Tourist Museum. Talk to the shooter and get his DNA and prints. Take a photo of the place and the victim noting its arms and legs. Get the pink fibers with a tweezer and focus on the gun. Swab for the blood on the first gun and take the second one. Extract the bullet from the wall and near the postcards. Lift fingerprints found on the two guns and retrieve the bullet from the cash register, the bullet on the sales rack, the bullet on the window sill and the bullet found on the floor. Around the t-shirt stand is more blood - get the blood on the floor. The first bug is on the rug and all other items add to bonus points.
Get back to the lab and confirm that Keith matches the fingerprints on the two guns and the blood on the floor. Then get to the morgue and ask away (remember to click on the nipple ring). Now go back to the lab and get bullets from all 4 guns. Match the bullet on the floor , on the victim’s shoulder and on the cash register to the first 9mm. The bullet on wall, postcard and victim’s chest to the 2nd 9mm and the ones on the sales rack and window sill to the Peacemaker. Analyze the stain and match it to sample B.
Go back to the museums and set the lasers, do this by clicking on all the bullet holes - afterwards collect glass shards. Talk to Brass about Interrogating Keith and when you’re through piece together all the glass shards back in the lab.
Go talk to Jill at the casino (collect the bug by the plant) and Eddie Tillis at the Recordindg Studio (bug on cd rack). Then go to the triplet’s apartment and question Anthony and Billy (get their fingerprints). Now get the photo of Kathy and the pink bra on the pool table, afterwards lift prints from the laptop case. Finalize this by talking to Billy and asking about the bra
Images


Case 5: The Triplets
Run back to the lab and analyze the pink bra you found. Confirm it with the pink fibers and run trace on Ed’s fingerprints and the ones in the laptop. Then, get to Brass so you can interrogate Keith, Anthony and Billy. Go back to the apartment and get the file from the laptop. After you do, get a warrant to interrogate Eddie as well.
Go back to the casino and talk to Jill. By now, you can also interrogate Kathy.
Go to the Crime Scene and get the scratch impressions on the table, the metal fragment and the fingerprint from the shirt rack. Confirm the metal fragments with the scratch marks and get Billy’s prints from those at the shirt rack. You’ll now have enough to search their apartment.
Case 5: Wrap Up
At the Apartment, collect the Triplets’ gun with your glove.Get the jeans with the broken zipper and lift the prints from the cellphone. For extra points, click on the two guncases, the boxes under the bed and the desk.
Back at the lab, confirm that the zipper from the jeans matches the metal fragment at the crime scene. Now confirm Anthony’s fingerprints with those of the cellphone’s. Upon analyzing the phone (image enhancement) you’ll see a photo of Ed Jr and Jill. This will give you enough motive to arrest Anthony and Billy. Arrest them and finally close the case by getting closure from Jill!