Sure, World of Warcraft got boring for you in the past, but with Cataclysm coming out, and all your old friends reactivating their accounts, it’s about time for you to reactivate and see what all the fuss is about. Our guide will walk you through the process.
World of Warcraft is the undisputed king of the MMORPG world. With millions of subscribers and one of the largest game worlds in the industry, there is plenty of content to keep most gamers interested for some time.
But, even with all the things to see and do in Azeroth, even the most dedicated of players needs a break. Some people leave because of guild drama, changes to their favorite class, or just simple boredom but, like the mafia, those who leave inevitably find themselves pulled back in by the promise of an upcoming expansion, missing old in-game friends, or just that old, familiar urge to kick some butt in PvP or any of the game’s multitude of dungeons.
Most veteran WoW players have come and gone at least once from the game. If you’re a former player looking to get back into the swing of things before Cataclysm is released (you’re not the only one) or you’re hankering for a little MMO action but are not sure how exactly to go about reactivating your account with all the changes Blizzard has made recently, this guide is for you.
Reactivate Your World of Warcraft Account
For starters, you’re going to have to log into account management not through the World of Warcraft main site, but through Blizzard’s Battle.net doorway . You can still head over to the main WoW page and hit the account management link if you like, but you’ll just be transferred straight to the Battle.net login page.
So, whether you start from Worldofwarcraft.com or Battle.net, you’re going to end up at Battle.net.
How to Reactivate your WoW Account
Once you’re at the login page, enter the email address and password associated with your old account. If you haven’t previously created a Battle.net account and merged it with your WoW account (this was something they required a year or so ago, but if you weren’t playing chances are you haven’t done it), then create a new Battle.net account, login, and select “Merge a World of Warcraft account” from the pull-down “Account Management” menu. Follow the steps, enter your old login, and you’ll be good to go.
-
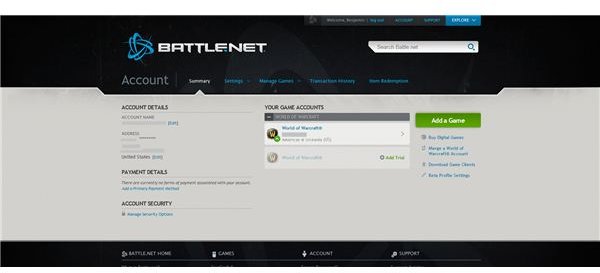
Once that’s finished (or if your accounts were previously linked), you’ll be taken to the Battle.net “Account” screen.
-
On the “Account” screen, click on the World of Warcraft account on the right side of the screen to be taken to the World of Warcraft Game Management Screen.
-
 Advertisement
Click the “Set Up Game Subscription” link in blue near the middle of the page.
-
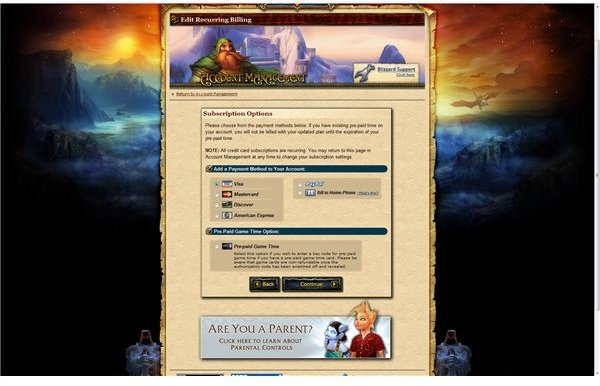
You’ll be taken to the old World of Warcraft Account Management Screen. Here you can select your payment type. Press “Continue” when you’re finished.
-
The next screen asks you to set up your subscription plan and enter your payment information. If you choose to pay with Paypal, you’ll leave WoW.com to enter your info at their website. If you’re paying with a credit card, you’ll need to enter your full card and billing info, then hit continue.
Your next screen should be a confirmation page. Congratulations, your WoW account has been reactivated. Now login and get started downloading those patches you’ve missed.
This post is part of the series: WoW Account Management & Security
A must read series of articles covering how to keep your World of Warcraft account secure and deal with other account management issues.