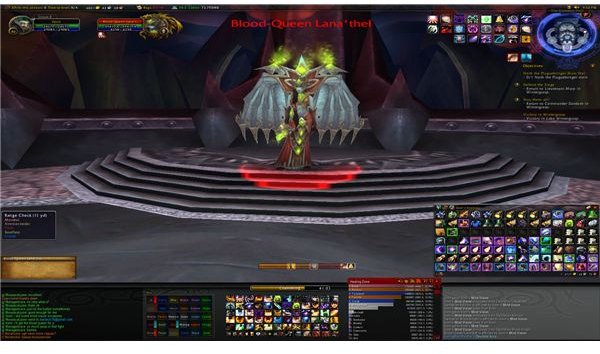
Mimiron is considered to be one of the most difficult boss fights among all of the Ulduar Watchers. He has four unique phases that get progressively more difficult and each has its own set of abilities the entire raid team must be aware of. Learn more in this complete WoW Ulduar boss strategy guide.
Tiny Evil Robot
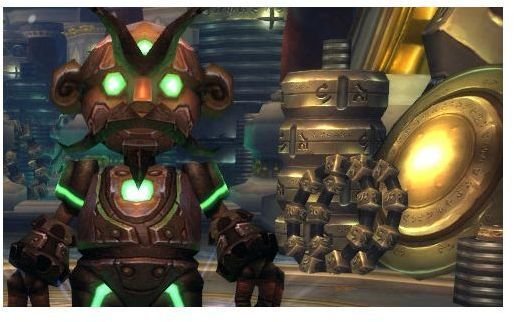
Mimiron is one of the watchers found in Ulduar - along with Hodir , Thorim , and Freya . Mimiron is reached via a tram which transports players the the Spark of Imagination, the area of Ulduar where Mimiron invents his deadly machines. Mimiron is a Mechagnome, and the watcher primarily responsible for creating “life” in Azeroth. Along with his counterparts, Mimiron has been corrupted by the Old God Yogg-Saron and his current designs are more focused on destruction than construction.
The Mimiron boss encounter is a very complex, four stage battle that stresses every aspect of your raid: healing, tanking, damage, and avoiding bad things. In order to defeat Mimiron your raid must remain incredibly focused, and understand every single aspect of every stage of this high difficulty encounter.
Phase One - Leviathan Mark II Tank
Land Mines - One of several abilities phase 1 Mimiron has is Land Mines. These will drop in a random pattern all around where Flame Leviathan is being tanked. Melee and tanks have to be particularly watchful of these land mines, and position themselves near a gap for easy exit. Stepping on a Land Mine may not be an instant kill, but it wastes valuable mana that your healers will desperately need in the much more difficult stages of the boss fight.
Plasma Blast - Plasma Blast is an incredibly high damage ability that Mimiron uses on the main tank. It is channeled, and announced through an emote by Mimiron. Boss mods such as Deadly Boss Mods or Big Wigs will announce this ability’s use through a raid warning. Damage avoidance and mitigation cooldowns, coupled with heavy healing are required in order to keep the tank alive through this, so everyone must stay attentive.
Shock Blast - Shock Blast is a particularly deadly ability that mainly effects the melee and tank. It deals massive amounts of damage in an AoE around Mimiron of around 20 yards. Ranged and healers should be safe, but the melee and tank have to run out of range as soon as it starts casting, and they see the blue-white spark animation around him. This is why it is important that players in range of this ability already have an exit strategy for avoiding Land Mines. You only have a few seconds to escape Shock Blast, and any hesitation will kill you. As soon as it begins to cast, get away in a hurry.
Napalm Shell - Napalm Shell is a randomly targeted ability that will hit any ranged player. It deals a large amount of fire damage to the target and anyone near them, and also inflicts a strong fire damage DoT to anyone hit by it. Anyone targeted by Napalm Shell is going to need heavy healing until the DoT ticks off. To avoid multiple people taking damage, anyone standing at range needs to stay spread out from others, giving a nice buffer zone so that only one person ever gets hit. Much of this damage can be mitigated by using a fire resistance totem or aura.
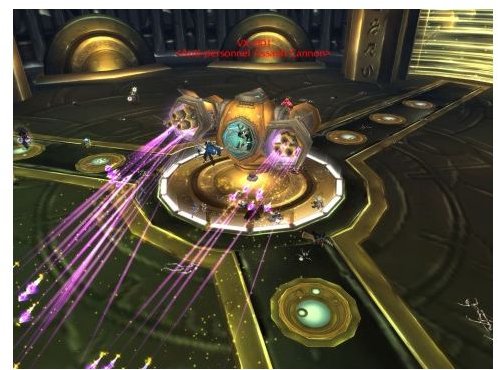
Phase Two - VX-001 Anti-Personnel Cannon
Between the transition of Phase One to Phase Two the raid will have a little bit of time to recover. Anyone low on health should bandage themselves, allowing healers time to stand still and regen as much mana as they can. Also during this transition time, the raid needs to move into position for phase two.
Rapid Burst - Rapid Burst is Mimiron’s main attack during phase two. He will target a random raid member with it, firing off several damaging bursts that hit anyone in the line of fire of the attack. Ranged DPS and healers have no choice but to heal through this, but melee can duck behind the boss, avoiding much of the damage. One strategy for ranged is to have them broken into groups, set wide apart from eachother. Assign each group specific healers, and you should be able to manage most of the damage. Two groups should be used on 10-man, and six on 25-man. Keep these groups spread apart, and put one healer and 2-3 ranged DPS in each. On 25-man positioning is very important. Place ranged groups between the black lines (resembling spokes) on the ground - not on them. Melee, on the other hand, should only ever be on a spoke. If melee is targeted by rockets or Rapid Burst, they should move clockwise or counter-clockwise to the next spoke. This strategy minimizes much of the damage during phase two and makes healing very efficient.
Heat Wave - Heat Wave accounts for the vast majority of damage during phase two. It is an aura-like effect that will hit everyone for fire damage throughout the phase. A fire resist totem or aura should be used to help mitigate as much of this damage as possible. Phase two is considered by many to be one of the most healing-intensive of the four phases because of this ability. For this reason, many raids choose to use Bloodlust / Heroism during this phase in order to get through it quickly.
Rockets - Mimiron will occasionally fire rockets at the raid. The targeted location of the rocket is shown by a red circle on the ground. Players have a few seconds to move out of these rockets, but if they do not, it will instantly kill them. These red circles can be hard to spot so people have to remain diligent about watching for them. One thing that can help is enabling Projected Textures in video settings. Rockets can hit both melee and ranged.
Laser Barrage / Spinning Up - The final phase two ability is called Laser Barrage, and is preceded by a cast called Spinning Up. When Laser Barrage happens Mimiron will pick a direction and begin firing, rotating steadily clockwise. Players familiar with the Lurker Below boss encounter can use that as a reference. When Spinning up starts, players need to immediately move away from in front of him, and continue to move as he rotates around. If you do not move out of the way, Barrage will kill you immediately. Laser Barrage is random, and it is sometimes possible to get through the phase without him ever using this ability.
Phase Three - Aerial Command Unit

In Phase Three Mimiron will be flying around in what looks like a mechanical head. He will be out of reach of melee, and therefore the tanks as well. Instead, this head must be tanked by a ranged DPS class with a high amount of health, like a Moonkin Druid or Warlock. Alternatively, a Protection Warrior can tank the boss using Spell Reflect. The main component of Phase Three is the adds. There are three different types:
Bombots - Your raid should be familiar with the dangers of Bombots from fighting XT-002 Deconstructor. Bombots are the first adds that will spawn during phase three, and are incredibly dangerous. The best way to handle them is to use root abilities like Chains of Ice, Entangling Roots, or Frost Nova to keep them away from melee and have ranged DPS burn them down quickly. Bombots originate right below the flying head and move towards raid members.
Junkbots - The other two types of adds during this phase spawn in beams of light. Junkbots spawn out of green lights, and are fairly negligible. Tanks need to pick them up but they are a low priority for DPS.
Assault Bots - Assault bots spawn out of yellow-orange lights, and are quite dangerous. They deal heavy damage, and should be a high DPS priority. When the assault bot is killed, a player, preferably a melee DPS, needs to loot a Magnetic Core off it and use it directly underneath the flying head. Your raid have 1-2 people designated for this that can find and use the item from their inventory very quickly. For this to work the loot type must be set to Free For All.
Ground Phase - The Magnetic Core, when used beneath the boss, will root it to the ground for around 15 seconds. While grounded, the boss takes additional damage and can, of course, be hit by melee. This is a great time for DPS to unload into the boss, using cooldowns as much as possible.
Phase Four - The Completed Machine

In Phase Four your raid must fight every component from the previous phases, but this time all at once. Many of the key abilities will still be used by the various sections of the boss’ body, but not all.
Leviathan Tank (Bottom) - Will cast Land Mines and Shockblast but will not use Plasma Blast or Napalm Shells.
Anti-Personnel Cannon (Middle) - Will still use Rapid Burst, Rockets, and Laser Barrage. Will no longer use Heat Wave.
Command Unit (Top) - Will fire its main magic attack at the ranged tank, but will not summon adds.
The bottom and middle sections will need to be tanked just as they were in the previous phases, and one tank is capable of tanking both. The top can be tanked by a ranged DPS or Spell Reflect Warrior, just as in phase three.
When phase four begins, all three sections will be at 50% health. Additionally, all three sections must be destroyed within 15 seconds of eachother or else it will repair itself.
One way to organize DPS is to have ranged focused on the head and melee focused on the tank. At designated intervals, both can switch to the chest to even it out with the other pieces. Alternatively you may choose to focus on one section at a time, getting it low before switching. Just be aware that incidental AoE might destroy a piece if you bring it too low.
The hardest part of phase four is keeping the boss positioned well. You’re going to want him to always be in the center, but because of some of his abilities he may move around. For example, during Shockblast, the tank has to run out. Mimiron will follow him as soon as the cast is finished, and he’ll have to be repositioned. This normally isn’t a problem, unless the chest is also casting Laser Barrage. This movement could endanger raid members that were otherwise safely out of the way. If your raid is getting into a situation like this, a holy Priest can use Guardian Spirit and let the tank stay in, and cheat death.