XT-002 Deconstructor is the fourth boss found in Ulduar, but only the second with an activated “hard mode” that rewards improved loot, among other things. This XT-002 Heartbreaker strategy will show both 10 and 25-man raid teams how to do this hard mode achievement.
You’re a Bad TOY!
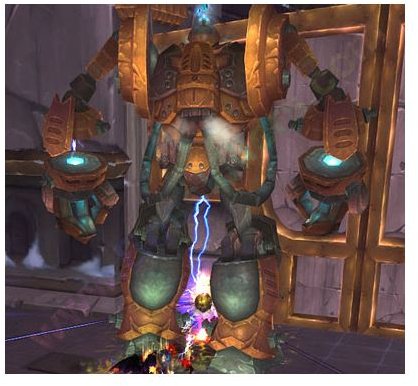
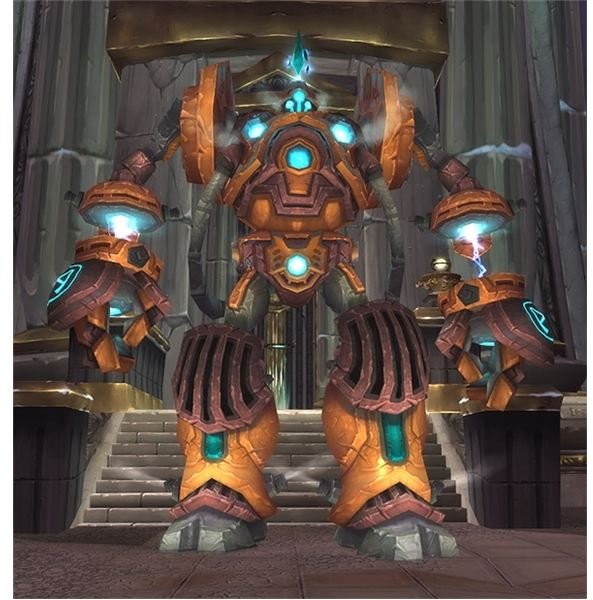
XT-002 Deconstructor is the famous child-like Ulduar boss located in the Siege area just outside Ulduar proper. His whines and cries echo in raiders’ heads as they try to sleep at night, plagued by visions of light bombs and gravity bombs exploding all over the place. Once you get the hang of the XT-002 boss fight , however, it really isn’t that hard to do. To compensate, Blizzard gave XT-002 a “hard mode ”.
Hard modes are found all over Ulduar. They are “triggered” events that cause the boss to behave differently than normal. For XT-002, the hard mode is triggered by destroying his Heart during a “heart phase”. At 75% life XT-002 goes into his first heart phase, becoming completely immobile. His “heart” drops out of his chest where players can attack it. Normally after 20 seconds the heart returns to XT-002’s chest and the fight continues as normal.
To activate the hard mode, the raid has to do enough damage to the Heart to kill it during this first phase. This will almost always mean using Bloodlust, and all available 2 and 3 minute DPS cooldowns. In our raids, even the main tank switches from Frost Presence to Blood Presence to help out with this, and healers do as much damage as they can. Your raid will need very high overall DPS to successfully kill the heart.
Heartbroken
Once the heart is destroyed, hard mode is activated. From this point forward there will be no more heart phases and no more add phases. However, you will still have to deal with the first wave of adds resulting from the first heart break. Scrapbots can be completely ignored because when the heart breaks XT-002’s health is reset to 100%, and therefore the scrapbots can’t heal him for any more. You’ll still need to destroy the Boombots and Pummelers.
After the adds are dead the raid can focus on dealing with the changed boss encounter. XT-002 will still do Tympanic Tantrum, Light Bombs, and Gravity Bombs. The big difference is that his damage is increased, making healing through these exceedingly difficult. Your healers are going to have to be up to the challenge, and it is a good idea to have DPS classes that can self-heal do so during the Tantrum, and if they are targeted by a bomb.
Additional or Changed Abilities
When the heart is killed, all damage done by XT is increased by 15%, and his health is increased by 50% (60% on 25-man).
Light Bombs and Gravity Bombs get new effects, in addition to the health and damage increase. When a Gravity Bomb explodes it will leave behind a void zone where the player was standing. It is very important that players have a designated area to run to when they are targeted by Gravity Bombs.
Light Bombs will summon Life Sparks when their duration ends. These Life Sparks will move into the raid and deal a large amount of AoE nature damage to everyone in the room. Additionally, they will “cleave” whoever has aggro on them and hit the two nearest people in range.
Proven Strategies
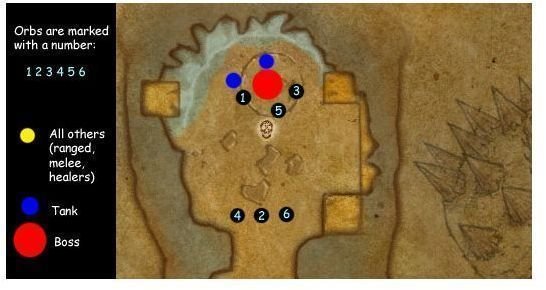
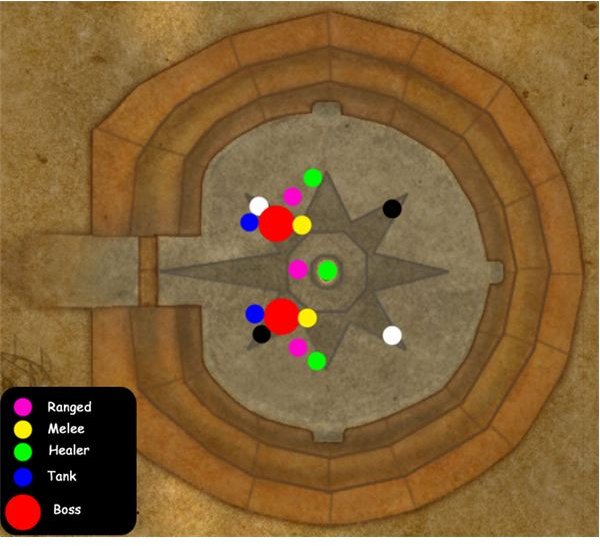
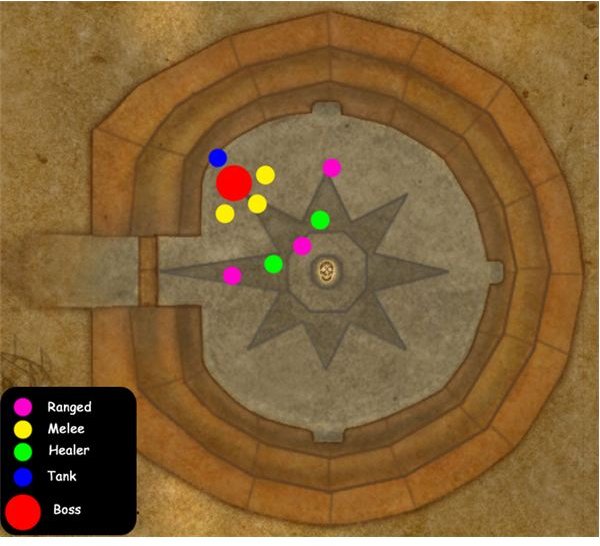
The most difficult part about XT-002 Heartbreaker is deciding what group composition to bring. For 25-man mode this isn’t really an issue - you use two tanks, the normal amount of healers (6 or so) and normal amount of ranged and melee DPS. On 10-man, however, it is a bit trickier. For all of the following strategies, the raid essentially clumps behind the boss. This strategy can vary slightly - some guilds like to form a line behind the boss, either horizontally or vertically, and have a set area to step into for bombs.
2 Tanks, 2 Healers
The 2 tank 2 healer method for XT-002 Heartbreaker makes dealing with Pummelers and Life Sparks much easier, but cuts down on overall DPS. Unless all of your other DPS is extremely high your raid may run into the 10-minute enrage timer and not be able to defeat the boss. The off-tank is responsible for taunting pummelers during the first and only add phase, and for tanking Life Sparks while range DPS kills them. It is best to have the off-tank doing as much DPS as possible when he is not busy tanking things. This may involve a weapon-swap macro and possibly stance changes. Death Knights and Feral Druids make good off tanks because it is easy to switch between DPS and Tanking.
When a player gets a Light Bomb, they should be instructed to run to one side of room - either left or right. At this point the off-tank needs to prepare for the Life Spark to spawn, and tank it away from the rest of the group while ranged DPS kills it. Players targeted by Gravity Bomb should run to the opposite side of those with Light Bomb.
1 Tank, 3 Healers

The 1 tank 3 healer method of XT-002 requires the raid to have the highest DPS of all the possible strategies. Not only do they have to be able to kill the Heart, but they also have to be able to kill the boss before the enrage timer. If your DPS is up to the task, then this is the easiest way to do the boss. It places a little more strain on the main tank, but the third healer makes accidental deaths and running out of mana much less likely. To deal with the Pummelers and Life Sparks players have to be aware of who has aggro . When the Pummelers spawn have a Hunter misdirect them to the main tank. If that isn’t possible, a DPS class like a Warrior can taunt them and drag them near the tank, where the main tank can then taunt them.
For Life Sparks, have players targeted by Light Bomb get near one side of the tank - for example, the right side. Make sure they’re near and in line of sight of the tank but not close enough to hit the tank or melee with Light Bomb. When the Life Spark spawns the main tank will be able to easily taunt it. At this point all DPS, including melee, need to switch to the spark and kill it.
1 Tank, 2 Healers
This method is best suited for the raid with very solid tanks and healers, but lower DPS. It allows one more DPS class to be active but does place much more strain on the healers. This method works identically to the 1 Tank 3 Healer method, but is less “safe”. To help avoid accidental deaths, especially during Tantrum, it is very helpful if every DPS that can possibly do so use some kind of self healing - and possibly assist others. This won’t cut into DPS very much because Tantrum is short, but it will make all the difference if healers are struggling to keep players alive through Tantrum.