Geralt of Rivia isn’t given much time to rest and recover. It seems that bandits are attacking Kaer Morhen and Geralt needs to rise and defend his home. This glorified tutorial section has a few tricks up its sleeves though. If you need any help making your choices, just look here.
Introduction
Normally, these guides will start off with a table of contents describing all of the merchants and valuable NPCs in the relevant areas. The Prologue is quite linear though and just serves as a tutorial for most of the game’s basic mechanics. For this reason, the quests and important events will be handled in their linear fashion.
Some New Friends
Geralt’s rude awakening is your chance to test out the game’s combat. This early part isn’t too hard. It’s basically just a matter of learning how the combo system works and slicing your way through to the goal.
Go ahead and pull the training sword out of the dummy. Charge into the fray and try to land a combo on one of the bandits. You have them far outpowered, so just try to get the timing down for now. Once the last bandit falls, you’ll need to follow Lambert up the ramp. Once you get to the top, you’ll notice that the situation has drastically changed.
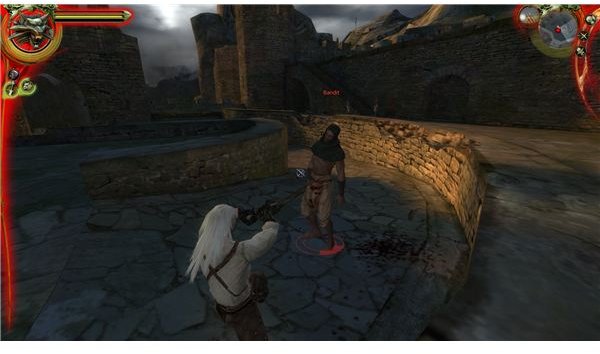
Vesemir’s orders are fairly clear. Go up the wall and into the upper courtyard. Just move from bandit to bandit and keep slashing. These guys are real pushovers and you won’t fight more than two at a time. Get up to the higher wall for the next combat lesson. Switch to fast style to cut through these assassins.
Don’t bother with the archers below. Just run to the tower for a helpful cutscene. Only one way to go after that. Head into this courtyard and fight a few more bandits. Switch to fast style to cut through the 2 archers quickly. Go down to the gate for the last group. Use fast for the little assassin and strong for the 2 bandits. Open the gate as instructed when you’re done.
You get to do a bit more exploration though. Follow Leo up the steps and into the hall. Go ahead and drink the Thunder elixer as instructed. You need to do it and it won’t hurt your chances in the next few fights. Go ahead and help Leo fight the first group of bandits. They still aren’t too tough. Go further inside to unlock the group style. This should let you cut through the entire group with a few slashes.
Approach the stairs to the laboratory to trigger the next cutscene. Nothing you can do about this situation now. Just follow Leo to the stone and gain the Aard sign (it always says the Igni stone, but that’s a mistranslation). Go back and blow away the pile of rocks to get out.
The Frightener or Savolla
This is the big choice for the Prologue. Do you listen to Triss and fight Savolla, or do you listen to Vesemir and fight the Frightener?
Frightener - If you decide to fight it, then a few things change. The big difference is that The Professor manages to loot more from the laboratory. This means that you will end up fighting an armored hound about halfway through Act 1. This is a bit of a tough battle, but it carries a nice reward. Killing this hound results in an extra piece of red meteorite. If you follow my guide for that act, then you’ll be able to craft one of the best meteorite swords in the game at the end of the first act.
There is also a bit of an issue with experience. Geralt isn’t usually the one to land the killing blow. This means he doesn’t get as much experience.
Savolla - This is a bit of an easier fight. You just handle him alone in a circle. The Professor won’t be able to loot the laboratory as much and you won’t face the armored hound. This means that you will not get an extra piece of red meteorite ore and you won’t be able to make as good of a sword at the end of Act 1. This isn’t as bad and you can actually just wait a little bit and get it shortly after in Act 2. It’s just something to think about.
The Big Fight

Killing The Frightener - This is actually a very straightforward fight. There will be a steady flow of bandits through the hole in the wall, but the other witchers can usually handle them. The only trick to this battle is avoiding the Frightener’s main attacks. It can dish out a lot of damage and you’ll have to run past it a few times. Move quickly and make sure that there’s a gap before you commit.
Go to the back wall and use the Aard sign on the cauldron. Then ring the small bell in the other corner. It’s a little hard to see, but it forms a triangle with the 2 cauldrons. Don’t use Aard on it. Just pull the rope. Use Aard on the last cauldron by the Frightener. If it is taking too long for your endurance to recharge, then drink the Tawny Owl potion. Once the Frightener is disabled, just switch to strong form and start racking up combos on it. All of the other witchers should do it too. This should hopefully mean that you can take off half of its health. Just rinse and repeat to kill it off. Triss should teleport in and tell Geralt to charge into the laboratory.
Killing Savolla - This fight is also pretty straightforward. Once you get inside, just charge the mage. He’s gaining power from the other bandits. Kill them off so that he becomes vulnerable. After that, it’s just a matter of chipping away at his health. He doesn’t really have many surprises. He’ll start to teleport around the circle, but this doesn’t do much except make combos harder to get.
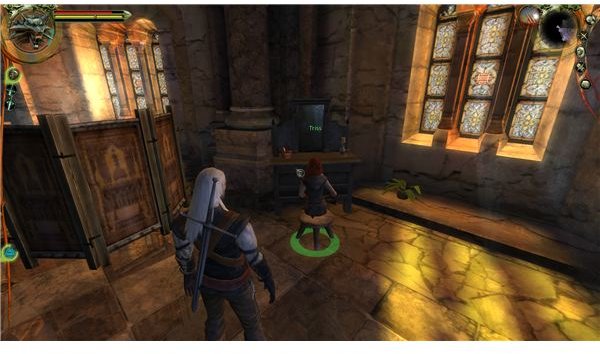
The one warning is that Savolla might dish out a lot of damage over the course of the fight. If Geralt’s health starts to get low, then go ahead and drink the Swallow potion that should still be in your inventory. Once he’s dead, take a second to loot the sapphire off of his body. Then go over to the stairs and talk to the wounded Triss.
Damage Control
Things didn’t go so well in the laboratory. Triss is wounded and needs a unique potion. There’s also some bandits in the upper hall that you’ll have to kill in the process. Go ahead and rest for an hour with Vesemir. Then head upstairs to start working on the potion.
Talk to Lambert. He’ll give you absolutely terrible directions. The white gull is in the armory, but the calcium is in a chest on the same floor. It isn’t in Triss’ room. Go through the door to the kitchen. It’s close to the fireplace. Then kill the few assassins and bandits here. Go through the door at the top to go to the first floor. Kill the few bandits at the beginning. They should present no real challenge at this point. Go to the right a bit and grab some loot from the chest here. There should be an unknown potion.
Go back out and just clear the hallway. There are some minor points of interest and little places to loot. If you want more food, water, and random stuff to trade, then go ahead and grab some from the side rooms. Your main goal is the armory at the end of the hallway. Go inside and grab the 2 white gull bottles from the chest. Go ahead and clean out the chest too. Read the pamphlet on Witcher’s to get a little of the backstory for the last massacre. Go out and start backtracking. Turn into the room on the right and loot the large chest. Grab the calcium, the 2 bottles of Swallow, and the book about Frighteners. Read it now.
Go back down and talk to Lambert to get the official formula. Then talk to Vesemir. You still need Celandine, but Vesemir has some already. So all that’s left is the Frightener’s Claw. It just so happens that there’s a dead one outside. Go outside. Get the claw and the Frightener’s eye too. That will come in handy later.
Go back to Lambert and Vesemir. Follow the instruction to brew the potion. Then go back up to the first floor and go through the door to Triss’ room. Talk to her and give her the potion. You can follow the obvious cues to also get your first sex card. You can do a quick boxing match with Eskel, but it’s pointless. Just tell her that you’re ready to go to the funeral.