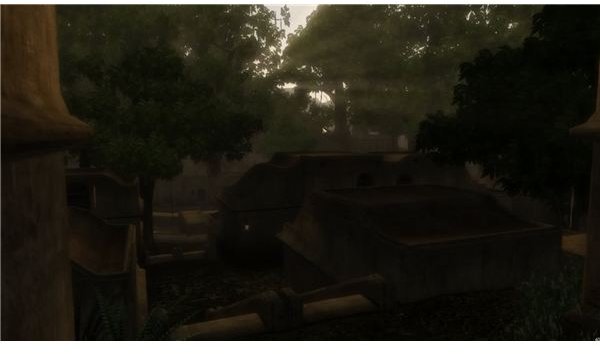
Have you ever wanted to play through the legendary Elder Scrolls III: Morrowind, but not been able to stomach the visuals? Well no more! With this guide, you’ll transform Morrowind into a modern masterpiece, bringing it’s dated graphics up to speed with today’s standards.
Making It Through Installation
In the last part of this guide, we gathered all of the files neccessary for the installation of our Morrowind plugins overhaul. In this part, we’ll be installing everything, and customizing a few personal options along the way. These will be mostly technical backend tweaks. The real graphical customization comes with using the MWGE menu. This part is still pretty simple. If you can click boxes and press Next, you should be fine. This part of the guide assumes that you’ve :
1) Downloaded the mod pack
2) Extracted the pack using a program such as WinRAR
If you still need to perform these steps, please refer to part 1 of this guide.
Starting Up Your Installation
Go to the folder where you uncompressed your mod pack. You want to run MGSO_Install.exe. You can find it in the Installation Data folder. After the installation opens, click Next. You then need to specificy where your Morrowind game is installed.
Default for a non-Steam version is : C:\Program Files\Bethesda Softworks\Morrowind
Default for the Steam version is : C:\Program Files\Steam\steamapps\ common\morrowind
Click the Next button after confirming your Morrowind location. Confirm, and click Start, and wait for the files to finish copying. Do not click the End button. After the files are finished copying, a BSA Registration Window will pop up. Simply click Update, and you’re done.
Installing the Morrowind Code Patch
After updating the BSA Register, a window titled Morrowind Code Patch will appear. Click everything under Graphics, Bugs, and Interface Changes.
The Game Mechanics section includes various options, select any that appeal to you. Make sure not to select Main Menu Wider Textures, as we the main menu textures will are customized with this pack. If there are any of the options in any of the menus that don’t appeal to you, feel free to uncheck them.
Finish by selecting Apply Chosen Patches and wait until you see a “Patch Succeeded” message.
Installing MoRRoWiNi
A window entitled MoRRoWiNi will appear next. Simply specify where Morrowind is installed, then click the icon with the pencil and then the door shaped icon. Click Finish in the main installer.
Installing .EXE Optimizer
The program EXE Optimzer will open.
In the Main tab, select Find Morrowind Manually, and again specify your installation folder. Navigate to the tab labeled Benchmarker and uncheck Benchmark Patches. Go back to the main tab and select Patch Morrowind. You will see “Finished. Applied <#> patches”. If you get any errors, ignore them. Restart exeOpt.exe after the main installation process if it fails this time around.
If you get many errors and it doesn’t appear to be ending, simply close EXE Optimizer and continue.
Installing MGSOO
Next, the MGSOO Menu will appear. This will allow you to personalize Morrowind’s advanced graphics effects to your own personal taste. It acts as an interface that modifies many of the mods included in the pack depending on what you select. These settings can be changed at any time by opening the app in the Morrowind/MGSOO folder. Distant Lands will have to be recreated every time you change your settings, unfortunately.
The Final Steps
Morrowind AnimKit 2.1 will open next, simply install it in an easy to access location, and you’re done! Animkit 2.1 allows the animations in Morrowind to be customized by various mods, fixing the originally atrocious walk/run/monster animations.
Next, simply run the Morrowind launcher as an admin, go to Data Files, and check all of the plugins.
Go to your Morrowind install folder, and open the folder named Mlox. Launch Mlox.exe.
Click Refresh Load Order and exit.
Patching Morrowind for More Than 4GB of RAM
If you are running a 64-bit system with more than 2 GB of RAM, you must install a patch. In the Morrowind folder, launch 4 GB PATCH (x64).exe as an Administrator. After that, you should be all set to use more than 2GB of RAM!
The Next Steps: Adding Content and Tweaking Visuals
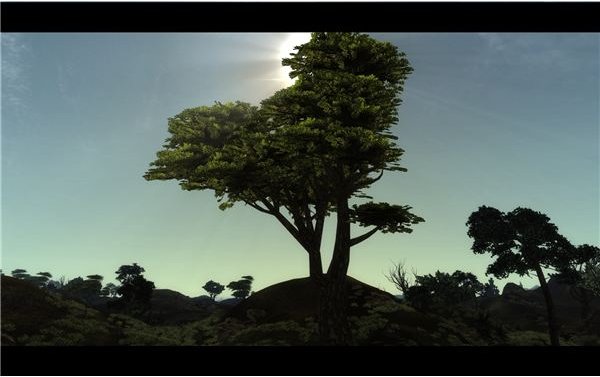
After this, you could simply select a preset in MWGE and be on your way to an already gorgeous looking game. You can use the Morrowind Graphics Extender settings menu to completely change the atmosphere and way your game looks if you so please. The next section of this guide will cover the settings of MWGE and how to create certain effects in your game.
Now that you’ve completely changed the graphical element of your game, why not start adding some new content to it? The amount of depth presented in many Morrowind plugins is very often on par with the original game content! For starters, check out the Tamriel Rebuilt project. It aims to put all of Tamriel into the Morrowind game, complete with new quests, items, characters, monsters, and huge new landmasses! For a veritable treasure trove of mods, you can check out Planet Elder Scrolls . They keep an entire database of mods on their site, and are known as the definitive source for all things Morrowind.
It’s almost time for you to go out and save Morrowind from disaster, fetcher!
This post is part of the series: Morrowind Mods & Customizations
Overhaul your Morrowind game play with these modes and customizations.