Our search for the Paragon, Branka, has now taken us to the heart of the darkspawn horde in The Dead Trenches. We’ll need to help the Legion of the Dead push forward and then make our way to the Broodmother if we want to finally reach the Anvil of the Void and save Branka.
Clearing The Dead Trenches - Part 1
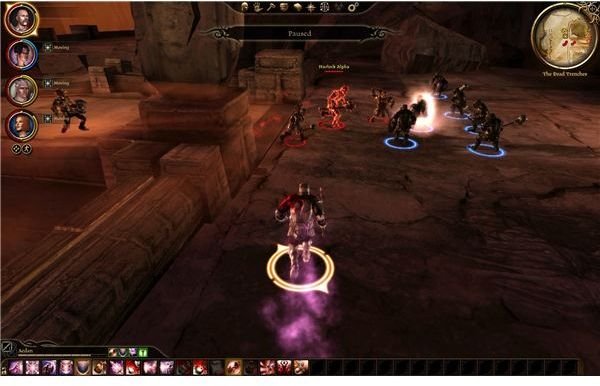
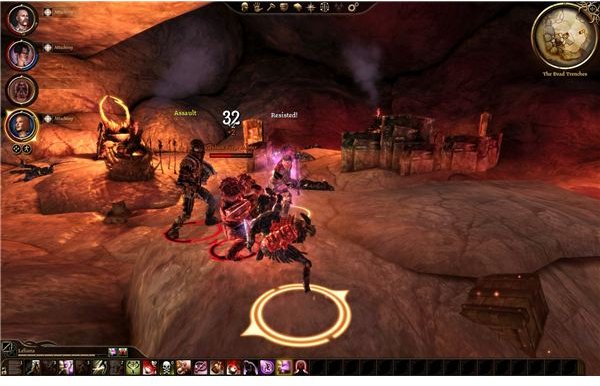
Well, there are a lot of darkspawn here and we’re going to be fighting them. Approach the bridge and get ready for a fight. There’s a full group of the Legion of the Dead here and they’re actually a lot of help. They can handle a lot of the fighting by themselves. Help them finish off the first group and then move onto the bridge. You should probably just put your party on hold and continue luring the darkspawn back to the dwarfs. There are just too many too fight all at once.
Once you’ve cleared a path to the end of the bridge, you should be able to attack the ogre here. There are ten archers on both sides supporting him. Try to get a good spell, like blizzard, on them to wear them down while you’re dealing with the ogre. The ogre itself should be a fairly easy fight. Just surround him with your fighters while the tank shrugs off the damage. The archers themselves shouldn’t do too much damage, so just roll them up when you’re done.
You should be able to speak to Kardol of the Legion of the Dead now. He’ll give you a little background and some news. Once that’s done, you can move around to the left side and get to the next group of darkspawn. There are just five of them. The only problem is that the genlock archers will probably run out to the big group around front, and it would be nice to take them down carefully. Try to freeze them if you can.
Follow them out carefully and make sure that no one is running forward stupidly. Stop and attack the bronto and the two darkspawn. Try to have your mage attack the emissary on the steps from a distance. This is the ideal option. If you can land a crushing prison on it, then this fight gets really easy.
Once the emissary and the bronto are down, you shouldn’t have trouble mopping up the rest. Kill them and loot the area. Move forward and go into the little side room on the left. There are four archers and two shrieks. Just cut them down and stick close together. Make sure that you grab the Boots of Legion that are in here. Move on out and go to the next side room. There are several corrupted spiders and darkspawn here, along with an emissary. Try to get inside and have your mage do some big crowd control spell. It’s really tight quarters, so it will be very destructive. Loot all of the sarcophagi and move into the next section. Be careful, stepping on the pressure plate by the door will trigger the statue to pit fire. This can hurt, so hang back as much as you can until it stops. The darkspawn in here aren’t tough. Just make sure that your tank is leading the way and that no one chases running archers. There is another pressure plate up ahead and it launches a fireball. Loot the sarcophagi in here and make sure you get the Gloves of the Legion from the first one by the statue. We need that for the Dead Caste quest.
Clearing The Dead Trenches - Part 2
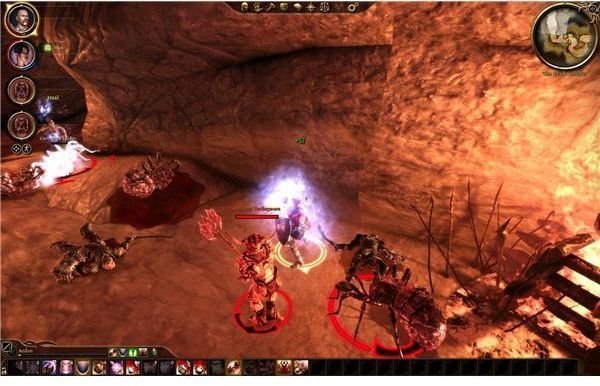
Move forward and into the caverns. The next fight is going to be a pain. When you approach the next group, a few more corrupted spiders will drop down. The worst part is that the emissary here is very tough and loves to cast curse of mortality and crushing prison on your tank. This is really bad. It’s very hard to kill the mage early though, especially since he’ll run away and trigger a bigger threat. If you’re doing the Admirable Topsider quest, then there will be an Ancient Darkspawn here. This guy is just past the main group and he’s got a lot of health and does a lot of damage. If you trigger him in the middle of the fight, it will be bad. So just keep everyone close and kill the melee fighters. You can handle the mage and the ancient darkspawn at once, if you still have a party. Neither one are that special, but you need to keep your tank alive and ready to fight.
Clearing The Dead Trenches - Part 3
Once it’s all over, loot the bodies and get back into the building ahead. The darkspawn in here are easy if you survived the last fight. Just cut right through the hurlocks and get into the large hall that looks like a temple. You can cross the floor and loot some more sarcophagi if you want. When you’re ready, move into the big room with all the darkspawn for another fight. In here is the Genlock Forge Master. You don’t have to actually kill him, if you don’t want. It’s just good for loot and experience.
The melee fighters at the front aren’t much. Just stick together and cut through them. The real challenge will happen when you approach the Genlock Forge Master. He can do obscene amount of damage with his crossbow and his unique hammer. My tank was taking about sixty-five to seventy points a hit. At the very start of the fight, try to get something like blizzard off at the start and cast it on the forge master and his archers. This should kill the men in back to make the fight a little easier, and chip off a fair bit of health on the forge master.
If you are fighting him in melee combat, you will need to have your tank under constant healer protection. Watch him closely and be ready to pop a potion quickly. If you can single him out at the end, you should be able to pull it off with a rogue and a mage as damage dealers. Killing him nets one very good bow and a good hammer, so I figure that it’s worth it.
Clearing The Dead Trenches - Part 4
Walk out and across. Go through the exit of the temple onto the bridge. As you cross the bridge, 4 shrieks will spawn on each side and attack. This is a really annoying fight because they will be able to use horror and other stun tactics to keep a lot of your party incapacitated. Just try to keep your tank alive. He’ll be the deciding factor.
Move on into the next room. There is a hurlock emissary here, so try to disable him with a spell. The enemies are actually skeletons, which I thought was a welcome change. Make sure that you loot the lone sacrophagus in here for the Armor of Legion.
Move forward again and through the tunnels. Don’t worry about the rhyme now. That little house of horrors is waiting for us in a minute. At the fork in the road, turn to the left. There are a few darkspawn and two emissaries here. We might as well kill them and loot the place.
Go down the tunnel until you meet Hespith. It seems that Branka made some questionable choices and we get to deal with them. Go outside and approach the middle area. Two ogres will spawn, but you should really be able to cut through these guys in a few hits. Move down and approach the metal doors. You can open this up to find a Legion of the Dead shrine. Walk through and go to the altar in back. Open it to get the Legionnaire key and the Helm of the Legion. The spirits don’t really like this too much, so bottleneck them at the little alcove and cut them down. They aren’t too tough and we’ve fought similar groups of spirits before.
You can look at the ritual gangue shade plate in the center of the room. It will give you a codex entry. If someone is wearing the full set of Legion armor, then it will spawn the shade. It’s easy to surround and pound by itself. Just kill it and pocket the 100 XP.
Go back out and look for the Omnious Doors. We now have to the key to open them, so do so and go inside. Save and make sure that your party is really ready for a big fight. When you get to the end, you get to fight a Broodmother.
The Broodmother - An Indirect Approach
This behemoth is our biggest challenge in here. It can’t necessarily do a lot of damage on its own, but the battle can go south quickly. There are two main ways to beat it.
If you’re really having trouble with the fight, then you might need to do it the slow and steady way. Do you see those two ramps behind the broodmother? The tentacles can’t spawn there and all the broodmother can do is spit at your party, which does fairly manageable damage. You just need to put your people up here and let your mages let loose with general spells to wear away at the broodmother. Your warriors can stand guard and even fight the tentacles if they’re bored. When the darkspawn spawn, they can bottleneck them on the ramp. Remember to set the party to hold to make this work. It’s long, it’s slow, and it’s boring, but it will work as long as you can stay healed and keep them supplied with lyrium.
The Broodmother - A Fun Approach
The fun way is to jump right into the fight. You can just hit the broodmother with everything you’ve got and kill her as quickly as you can. This is risky but it might work. You can also do a slow and steady general fight, which is what my party did. I also made it work with a fairly injured party, so I don’t think it’s too hard to do with a little luck.

There are a few things to know. First, those tentacles are your main threat. The broodmother is only dangerous in a few ways. The tentacles are your big problem. Charge the broodmother and attack the tentacles. They should all submerge once you get them down to about two-thirds of their health. Cone of cold is great here, since it freezes and damages the tentacles and the broodmother. Then you can just rush the broodmother and pound her for a bit.
I do hope that you have a good healer with you. I got by with some potions and Morrigan. She learned heal and picked up group heal through the spirit healer tree. That really helped in this fight.
The broodmother can spit or vomit to cause some damage to your party. She can also annoyingly sweep you away to stall the attack. The big threat is her crush attack though. She can grab one of your heroes and basically just kill them. The only way to stop it is to freeze or stun the broodmother, or put a force field on the captured person. Make sure that they heal as soon as possible.
After she’s lost about a third or a half of her health, she should scream. This will resummon the tentacles and call for about five darkspawn. These are just genlocks and hurlocks, so it shouldn’t be too much. The real problem again is just keeping the tentacles away. Use magic to do large damage to them all at once while the warriors quickly kill the darkspawn.
Once the darkspawn are dead and the tentacles are down, you can rush again and just hang on. Watch everyone’s health and try to stay alive.
She should scream again, or she did for me at least. This will summon the tentacles and call up two shrieks and two archers. The archers are basically worthless. The shrieks can keep your party stunned and vulnerable though. You have to use magic to take them out quickly or possibly your rogue. The good news is that we should be able to actually kill the tentacles once and for all. Run through them. Once the tentacles are dead, you are home free. Just keep popping potions and stay alive. I made it with just Morrigan and my warden. The broodmother won’t be able to do much damage in this state and you just have to slash until she dies. After that, just kill the archers to finish up the fight.
This post is part of the series: Dragon Age: Origins Walkthrough - Orzammar - Part 2
Our time in the Orzammar Deep Roads is just going to get harder. We have to grind through the Ortan Thaig, The Dead Trenches, and The Anvil of the Void. We will also need to choose our side when it comes to Branka and finally choose the real king of Orzammar.
- Dragon Age: Origins Walkthrough - Orzammar - Ortan Thaig
- Guide to “Paragon of Her Kind - The Dead Trenches” in Dragon Age: Origins
- Dragon Age: Origins Walkthrough - Orzammar - Anvil of the Void
- Dragon Age: Origins Walkthrough - Orzammar Side Quests - Part 1
- Dragon Age: Origins Walkthrough - Orzammar Side Quests - Part 2