There are a lot of scavenger hunt side quests in Orzammar. This part of the side quest guide for Orzammar will cover all of the quests that require you to find a bunch of things spread throughout Orzammar for your reward.
A Lost Nug
This is a quick little quest for some easy money. We just need to find the nug wranglers lost nugs throughout Orzammar. He’ll pay 12 silvers a piece for them. They aren’t hard to get though. You do need to talk to the nug wrangler by the doors to the Diamond Quarters before they spawn though.
The first one is actually right next to him. It’s in the alley you walked past to get to him. There’s another by the entrance to the deep roads. A third is about halfway across the big bridge to the Proving. This is right by the big plaza at the entrance. The last two are just a little further down the path. They’re by Filda near the statue and Brother Burkel (unless you already took care of his quest).
When you turn these nugs in, remember that he only takes them one at a time. This means you have to click on him five time.
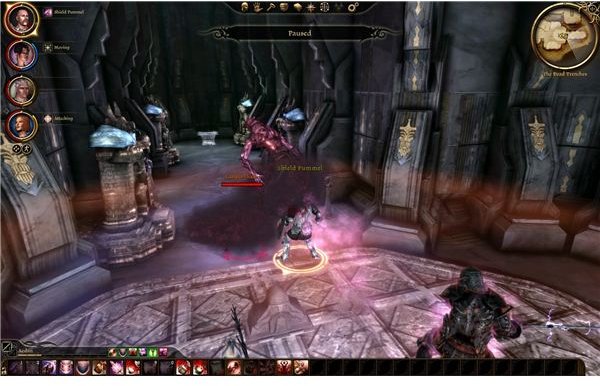
Asunder
This is a fairly quick quest that you should be able to do while you’re in the Deep Roads. It will start off once you find a small bloody sack with various dismembered body parts. There are three of these and each of them have a note that gets added to your codex.
The first one is Aeducan Thaig. If you’re following Prince Bhelen’s quest line then you will have found this while you searched the area for Lord Dace. If not, then you need to go there once the Deep Roads open. It’s at the back of the first large cavern filled with darkspawn.
The other two are in Caridin’s Cross. You should find the first after you kill a group of genlocks. Remember to hold down TAB to help find it. The second one is in the second area filled with deep stalkers. Note that it is not the area where you fight a matriarch. You will only fight normal deep stalkers here.
Once you have all three bags, you need to go to the altar of sundering in Ortan Thaig. It’s marked on your map and it’s part of the ruined city. You’ll have to kill a golem and some spirits before you get to it though. Once there save and then activate the altar to reassemble the demon.
It’s basically another pride demon. He looks like what Uldred was, for reference. He’s not as strong though. You have the choice to either free him and demand a reward or fight him. If you free him, you’ll get 25 sovereigns. The strange thing is that no one in your party should really care. I know that Morrigan, Sten, and Leliana are apathetic to it all.
If you fight him, you’ll need a little luck. He can cast crushing prison on your tank and basically take him out of the fight. You have to hope that he sticks to his main attack, which is some general slashing and an area of effect spell that causes flame or ice damage to those in a circle around him. It’s rough on your fighters, but your mage should be in a safe spot and ready to heal them.
Backstabs work well and magic seems to have a good effect. He can be stunned and briefly frozen, so use that to your advantage. Other than that, it’s basically just another fight where you have to stay alive and wear him down.
Your only reward for killing him is the roleplaying value and about 100 XP. It’s probably a better deal just to free him and pocket the money.
A Drifter’s Cache
This is another search quest, but it takes place in Caridin’s Cross. You need to search four rubble piles to collect a series of notes. Once you get them, the Drifter’s Cache will appear near the alpha ogre you probably already fought. The cache is surprisingly nice and has one of the piece of armor for the Effort set.
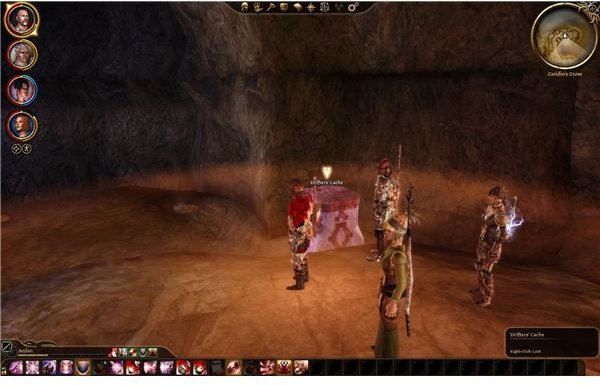
One rubble pile is in the room with all the deep stalkers close to the entrance. Another one is in the other big cavern full of deep stalkers on the western side of Caridin’s Cross. There’s one by the huge group of darkspawn in the center with the ballista. The last one you might find is right next to the western exit from the cave. Just consult your map. You can reach it easily from the darkspawn base in the center.
Once you have the four note, the cache will not only appear but it will be marked on your map. Just head back and claim your prize.
Jammer’s Stash
This is one you’ll run across while you’re killing Jarvia’s Carta. As you walk through her hideout, you should find a note from a dwarf called Jammer. He’ll mention that he has a special stash to share with his friend and that there’s a code to enter it.
You need to find the three common boxes throughout the hideout. They’re usually just in the major rooms you’ll walk through. The base is fairly linear so I doubt that you’ll have problems. At each box, you have to take the least valuable item. Taking the more valuable ones will trigger an instant injury for the person who opened the chest.
The first two are fairly obvious. The silver costume ring and the iron letter opener are the worst of the bunch. The final one is testing your knowledge of their mythical gem market though, which I doubt you memorized. To save yourself an injury kit, just pick the garnet one. Garnet should be the cheapest.
You’ll find Jammer’s Stash further into the cave. Right before you get to Jarvia’s herself, you should be able to see a long grey tunnel leading downhill. If you follow it you’ll find a few thugs and the animal pens. The thugs aren’t too tough and the animals are all tame. The stash is behind the tame bronto. If you have the three pieces of in your inventory, then they’ll open it just like a key. Get the money and the nice helm to finish the quest.
The Key to the City
This is a really good quest, since you can get an incredible ring for just running around a little bit. All you have to do for this one is find all five scrolls. They’re just lying on the ground throughout Orzammar. You should be able to find them easily if you hold down TAB. Note that you can find them in any order. I’m just trying to save you a little time walking. You might have also already grabbed some of these and not realized it.
Start off in the Hall of Heroes. This first scrolls is right by the entrance to the city itself.
Step inside the Orzammar Commons and walk out past the fountain and onto the bridge. You should be able to find a second scroll here. Move forward into the Proving.
The third scroll is in one of the side rooms. These might not be open yet if you haven’t gone a bit into the main quest for Orzammar.
Walk over to Dust Town. The fourth scroll is near the area full of beggars just past Rogek.
Move to the Diamond Quarter. Follow the ramp up to the area a bit above and behind the entrance. The fifth scroll is here.
This should make a new Ambassador’s Cache appear in the Assembly Room. The Key to the City is here and it can be used as a very good ring. It will boost all attributes by two, make healing more effective, and give you a bit of spell resistance.
An Admirable Topsider
This is a Deep Roads quest. I called out the locations during my main quest guide, but I’ll compile it. This quest will net you an amazing sword for a shield and sword user. It’s what I used until the end of the game. To get it, you need to find the three pieces and then rejoin them on the Topsider’s Grave.
The first piece of the sword is in Caridin’s Cross. A darkspawn emissary carries it on the path to the alpha ogre. A second piece is in the vase in Ruck’s camp. In order to get the third piece, you have to look at the grave marker in Ortan Thaig. This is the only way to spawn the Ancient Darkspawn in the Dead Trenches. You can find the grave stone to the right of the big area where the ogre fights the spiders.
Killing him isn’t actually that bad, as long as you take the fight slowly and don’t trigger him as part of the larger darkspawn group. He’s literally right on your path in the Dead Trenches. Right after you go through the first ruined temple area, you’ll come to a tunnel in the way leading past some wreckage. He’s near the exit to this tunnel.
Just get the final piece of the sword from him. If you return to the original grave site, you can touch it to reforge the sword and gain a Topsider’s Honor. This good sword is great for your shield carrier and it’s certainly worth a little backtracking.
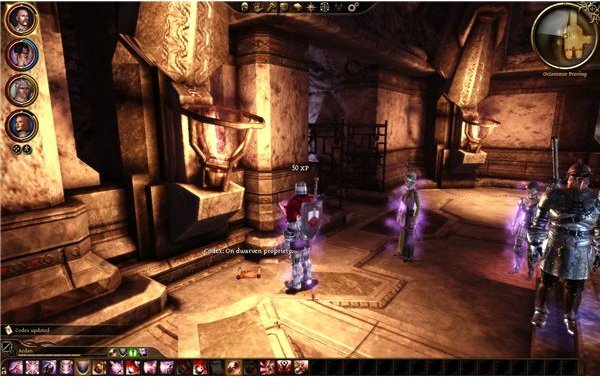
The Dead Caste
This one is another armor collection quest, but it has a little bit of a bonus ending to it. There are 4 pieces in the Legion armor set. You can collect this fairly good armor as you move through the Dead Trenches.
The first one is right after the main battle on the bridge. It’s in a side room in the first temple area in a sarcophagus. The second one is right past the dwarf statue that breathes fire. It’s in a sarcophagus too. The third piece is further inside along the path. The final piece is inside the Legion of the Dead Shrine. You’ll find it when you get the key to the Broodmother.
If you examine the plaque that describes the Gangue Shade while someone in your party wears the whole set, then it will spawn. It’s just a shade that you can kill for some free experience points, but it isn’t a hard fight so you might as well do it.
On your way to the Broodmother, you should see a highlighted container. You can get the Dead Caste Insignia. It appears that the Legion of the Dead applied to be a real House once upon a time. You can place this in the Memories book inside the Shaperate.
This post is part of the series: Dragon Age: Origins Walkthrough - Orzammar - Part 2
Our time in the Orzammar Deep Roads is just going to get harder. We have to grind through the Ortan Thaig, The Dead Trenches, and The Anvil of the Void. We will also need to choose our side when it comes to Branka and finally choose the real king of Orzammar.
- Dragon Age: Origins Walkthrough - Orzammar - Ortan Thaig
- Guide to “Paragon of Her Kind - The Dead Trenches” in Dragon Age: Origins
- Dragon Age: Origins Walkthrough - Orzammar - Anvil of the Void
- Dragon Age: Origins Walkthrough - Orzammar Side Quests - Part 1
- Dragon Age: Origins Walkthrough - Orzammar Side Quests - Part 2