Once you walk through the Frostback Mountains and enter Orzammar, you’ll find that things are a little complicated. You’ll need to take sides in the raging political debate to come up with a way to unite the city against the darkspawn. If you need help working with Bhelen or Harrowmont, look here.
Introduction
Orzammar has a lot of fighting for a party. You’ll need a good healer or a good mage if you want to survive. I did this with a party consisting of my warden (shield user and a general tank build), Sten as a warrior and damage dealer, Morrigan as a mage and healer, and Leliana as my rogue and assassin.
I was about level fifteen when I started this one. It was my next to last mission, with only the Brecilian forest left behind. The only special thing worth mentioning is that I was able to wear the Blood Dragon armor on my warden. It made him a pretty good tank, but wasn’t anything too special.
The Frostback Mountains
To get to Orzammar, you need to walk to the Frostback Mountain Pass. Follow the trail but keep your eyes open. This is where I ran into a group of fairly tough bounty hunters. If they have a mage, then take her out. It’s then just a matter of grinding through the warriors.
Approach the market area up ahead to learn that the gates to the city have been closed. Orzammar isn’t accepting travelers and Imrek, a messenger from Loghain, isn’t too thrilled about that. Talk to the gate guard to learn about the trouble. It seems that the king is dead and they need to sort things out or face a civil war. You’ll eventually have to mention that you are a grey warden. The treaties demand that you be addressed by the king, so you can enter. Imrek will naturally take offense to this though. You can use intimidation to scare him off fairly easily. If you have a decent party, the fight shouldn’t be too hard though.
You just have to kill the bodyguard that can cast spells, then focus on Imrek. It’s nothing that special, except that he has a fair bit of health. Just grind it out with a healer and you’ll be fine. Enter the city when you’re ready.
Understanding Orzammar
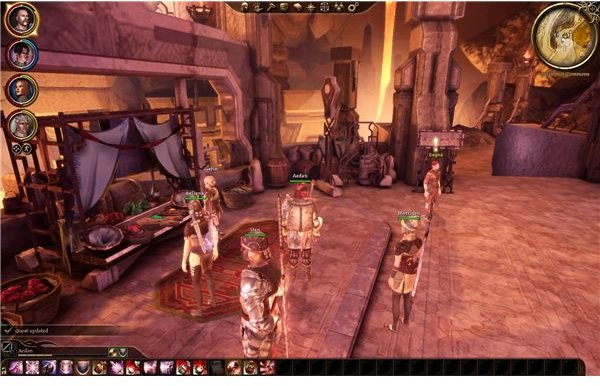
There’s a lot to see here and I’ll cover most of that in the side quests. There are 2 market stalls that you can deal with. They have several gifts for your party members too, including the golden mirror. This apparently looks just like the one that Morrigan wanted when she was a girl. This is one of her stories about her time with Flemeth. She should talk about it freely. You can get +20 approval for giving her the gift and saying that you remembered.
Other than that, we’ll focus on the main quest. As you can see when you entered, there are two factions. One for Harrowmont and one for Bhelen. If you were a dwarf noble, then you’ll remember Bhelen. We need to get one of these guys elected as king to prevent a civil war and get some forces against the darkspawn. We’ll need to gain their trust first though, since they are quite afraid of assassins.
You don’t necessarily have to make your decision until the very end. You can do all of the quests for one side and still pick the other when the time comes. You can’t just do both first tasks. This seems to make the game think you betrayed both of them and you’re stuck. So just do one and then ride it out. Also, don’t feel like this is a climatic good vs. evil thing. They are both shady and it might not turn out like you think. It will basically come down to which one you feel like supporting. Harrowmont is an isolationist who will pretty much keep things the same for better or worse. Bhelen is honest about wanting caste reform despite his tendency to backstab.
Regardless, you might want to wrap up a technicality in the quest. Move over to the Diamond Quarters. This is where all the government buildings are, just for future reference. Step into the Assembly Chambers and approach the big doors. You should get stopped by a cutscene to see that the assembly is in chaos. Steward Bandelor will end the session and close the chambers. You can talk to him outside to get that objective taken out of the quest book. He’ll just confirm that the assembly is powerless until one side is appointed king.
This post is part of the series: Dragon Age: Origins Walkthrough - Orzammar - Part 1
Orzammar is a huge city with a whole lot of quests. This first part of the guide will cover the beginning of the main quest. This should take you through the first task for Harrowmont and Bhelen, clearing out the Carta Hideout, and your first trip to the Deep Roads. If you need help, look here.
- Dragon Age: Origins Walkthrough - Orzammar - Finding Orzammar
- Dragon Age: Origins Walkthrough - Orzammar - Bhelen’s First Task
- Dragon Age: Origins Walkthrough - Orzammar - Harrowmont’s First Task
- Dragon Age: Origins Walkthrough - Orzammar - Killing Jarvia
- Dragon Age: Origins Walkthrough - A Paragon of Her Kind - Caridin’s Cross