It’s possible to get a bit of work from the Crows if you want. There’s some good fights, some cool gear, and you’ll basically still be doing work against Loghain. If you need any help with getting the crow quests or taking out the enemies in your way, then look here.
Introduction
The Crows may be an assassination organization, but most of the missions are just standard combat missions. I definitely suggest that you give these a shot. If you complete them all, you’ll unlock a new supply from Cesar the merchant. You’ll also get some nice equipment for rogues by completing the missions.
This one starts in Denerim. To get it, you’ll need to have completed one of the main quest options for the Blight. This is the only way to trigger Zevran’s ambush. You can only start up this quest after they attack, so you might need to catch it again on a second trip if you wanted to do the Sacred Ashes quest first.
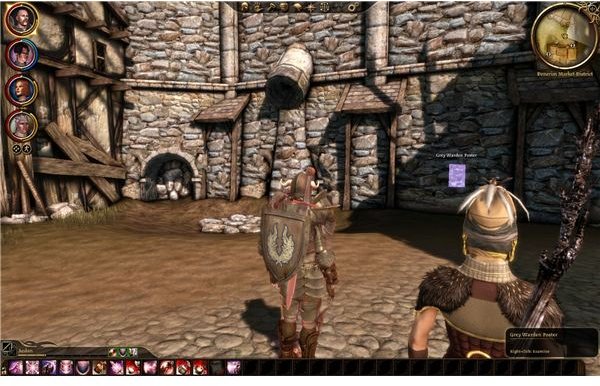
Once you’ve survived the Crows’ attack, you can talk to Master Ignacio in the open market. He’s standing next to Cesar and claims to handle “other services.” If you ask if he needs help, that should trigger the quest. When you try to leave the market district either through the main gate or by approaching the entrance to the alienage, a young message boy will give you your quest. You need to talk to Master Ignacio in the Gnawed Noble Tavern if you’re interested in working with the Crows.
Just go inside and walk into the first room. Ignacio is waiting there with a few thugs for protection. If you talk to him, he’ll offer to give you a few missions as a way to turn an enemy into a friend. There will be some decent rewards in the mix too and we’re working against Loghain. The only one who should have any problem with this is Wynne, and even she won’t mind too much.
The First Test
We need to kill some men in the tavern. They put up some poster claiming to be organizing a resistance group to aid the Grey Wardens. You may have seen the poster. It’s over by the alienage area, and should be fairly easy to see. It’s up on the wall. Look at it to get the code. They’re at The Pearl and you need to talk about griffins rising.
*Note - It’s possible that you already took care of this one. If you looked at the poster and tried to meet the resistance yourself, then you’ve already done this. It doesn’t seem to be bugged either. Ignacio should just acknowledge that you’re done and put the next two scrolls in the chest.
Just move on over to the Pearl and ask about the resistance fighters. She’ll point you to the back room. Click on the locked door to knock and enter a conversation. Tell them the griffen password to walk into the ambush. There are a few high level warriors here, but no one too difficult. Step inside and see if you can get back far enough to attack the female mage. Paedan and his other warriors aren’t too bad, as long as you can get Leliana to backstab them a few times and a mage to hit them hard while your warriors block them in. Walk back to get the next two scrolls for the missions.
Mercenary Hunt
There’s a group of quanri mercenaries camped out to the south of the city. They are called the Kadan-Fe. You will need to go out to the world map to reach them. This can be a very tough fight. Apparently they level up with you and increase in numbers. At about level ten I saw roughly eight quanri and several of them were yellow ranked. So this is a tough fight. The good thing is that if you can limp it out, you can just go back to camp to reset injuries.
There’s also not a lot of science to it. They are just a bunch of tough warriors. You just have to grind through them with magic while a warrior hopefully shrugs off their attacks. If you can’t do it, because there are just too many, then put your party on hold position at the entrance. Run over and draw a few of them over. Kill them at a safe distance. Heal and then rinse and repeat until they’re all dead.
An Audience with the Ambassador
You won’t be able to get this one until you get into the locked section of the royal palace in Orzammar. To do this, you need to follow the main quest for a bit. If you side with Bhelen, then you’ll gain access after the first quest. I believe it will take a little longer to gain access if you side with Harrowmont. You’ll need to finish up the entire quest to get in and attack the ambassdor. Note that nothing bad will come of this. It’s just a battle. Regardless, the ambassador’s room is clearly marked. You can just charge in and attack. There are only about six bodyguards and two archers. There’s nothing special about this. Mages are great for crowd control while your tank and warrior grind down the bodyguards. The ambassador himself is easy to kill once the melee soldiers are down.
Just report back in on your next trip to Denerim to receive your reward.
The Ransom
This is the fourth and final mission for the crows. Arl Howe has kidnapped a boy and is trying to do a ransom drop. Of course, this is just going to turn into a battle once both sides show up. The location is a new spot on the city map. Just head over there and get ready. If you wait long enough, Captain Chase will get tired of threatening the crows and he’ll attack. If you approach them, then he’ll attack too.
This is a tough fight. These are mostly yellow rank soldiers and there are a lot of really annoying archers in back. It took me a few tries to beat this one, although I did resist the urge to drop down to easy.
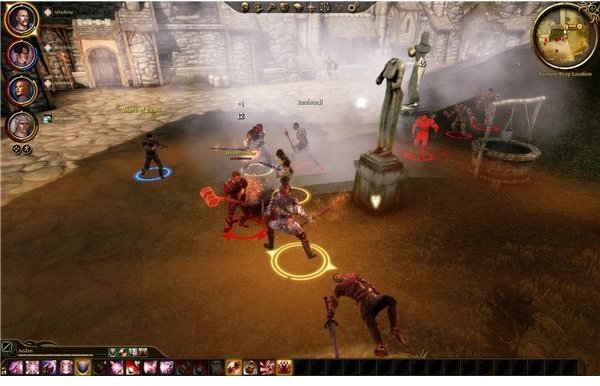
The key is getting a good crowd control spell out. You should be able to cast blizzard right before the fight starts, since casting it won’t make them turn hostile. Don’t worry about friendly fire with the crows. They are nice to have as distractions but they probably won’t survive the fight anyway. You’ll probably also have to blow through a lot of health potions. I think I went through about ten or twelve, especially after Morrigan was knocked out.
The only other thing is to try and hang around the edges of the fight. Let the crows do their job and try to roll up as many of the warriors as you can while your allies are alive. After that, it’s just a matter of trying to desperately stay alive while everyone tries to take them out. Rogues are naturally quite powerful here thanks to the chaos. They should be able to get a lot of backstabs in during the battle.
Unfortunately, this same chaos makes it play out differently every time that you play. You might just have to give it a few shots until you get it. The only other special note is that Captain Chase isn’t actually that special. He really just fights like any other warrior, so you don’t need to worry about taking him out first.
Once they’re dead, just loot everything and head back to Ignacio. He’ll thank you and give you some nice assassin gloves called Red Jenny Seekers. His partner, Cesar, will also have a special inventory available for sale now. If you want, you can backstab him and attack. I don’t see a reason to do that though. This will make Cesar leave and that will mean that you lose out on a lot of fairly nice and affordable gear. There is actually a set of First Enchanter Robes, which are pretty good for mages.
That’s it though. The quest line is finished.
This post is part of the series: Other Dragon Age Origins Walkthroughs
Take a look at some of these other walkthroughs for Dragon Age Origins.
- Dragon Age: Origins Walkthrough - Crime Wave
- Dragon Age: Origins Walkthrough - Mage Origin
- Dragon Age: Origins Walkthrough - Dwarf Noble Origin
- Dragon Age: Origins Walkthrough - Brecilian Forest - The Mage’s Treasure
- Dragon Age: Origins Walkthrough - The Trial of Crows
- Dragon Age: Origins Walkthrough - Dalish Elf Origins Story
- Dragon Age: Origins Walkthrough - Human Noble Origin
- Dragon Age: Origins Walkthrough - City Elf Origin Story
- Dragon Age Origins Walkthrough: Dwarf Commoner Origin Story