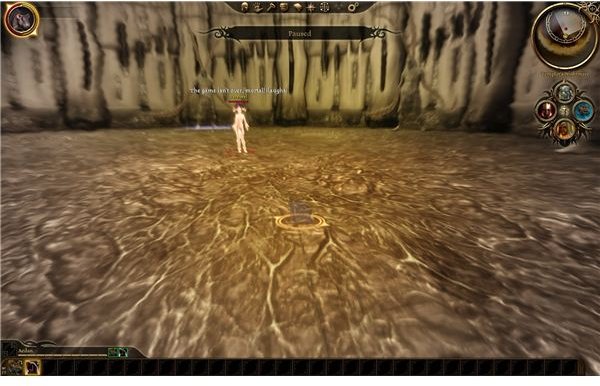
It’s time for us to finally break out of the Fade. I’ll give you all the information you need to get the rest of the essence fonts, kill the remaining demons, and free your party before you face Sloth himself for the grand finale. If you need any help with the fade, then look here.
Mage Asunder - The Upper Level
Go upstairs to the next level. They both look like upward stairs, so make sure you go to a place with enemies. A golem and two mages are up here. Juts hit the golem with crushing prison and charge the mages. You can slash them once and then use winter’s grasp. Take them out and search the room. Look at the note and the books to get two more codex entries, then crush the massive door and go outside.
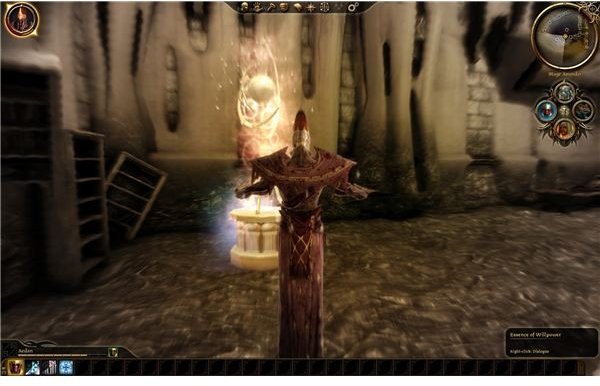
Move along this walkway to meet two priests. You can just smash them, slash them, or use magic. They aren’t tough. Go ahead and curve into the room ahead. There should be another mage and two golems. Just use the same tricks as before but shift it. Crush one and use winter’s grasp on the other. This will give you a moment to heal and kill the mage. Then just finish off the frozen one or refreeze him if necessary. Make sure that you get your new codex entry and use the essence of willpower here. It’s only visible as a spirit.
Go back and cross over on the first horizontal path. There’s probably a golem around here. Just nail him with a crushing prison and watch him fall. Turn to the left and wait a moment for your spells to regenerate. Go in the room on the back left and pause. There are three enemies here. There’s a mage, a mage pupil, and a priest. The priest isn’t a threat, but he can interrupt you and annoy you. You need to hit the mage with crushing prison and use winter’s grasp on the pupil. One more slash will finish him. Then use spells and slashes to kill the priest. Look for the codex here.
Go down the hall and watch the second horizontal path for another golem. Just use crushing prison and wait him out. Wait for your spells to recharge and enter the front left room, but save first. There are three golems here. Hit one of them with crushing prison and try to hit another with winter’s grasp. It’s going to be hard to survive long against them though. I suggest switching to golem form. You should be able to duke it out with two, as long as you use your abilities. Make sure you use slam as soon as it recharges and use hurl against them, even at point blank range. Quake should also do some damage. You should be able to survive against the two if you can dish out enough damage quickly while they are waiting for their talents to recharge. Use the font of strength in back to get a +1 to strength.
Use your golem to bust off the massive door that’s blocking off the second half of this upper walkway, but switch to spirit form quickly. There are two fairly weak arcane horrors here, and they might even kill themselves off with friendly fire. If not, then use crushing prison on one while you freeze the other. Do not fight them as a golem though, since they’ll do too much magic damage.
Mage Asunder - Killing Slavren
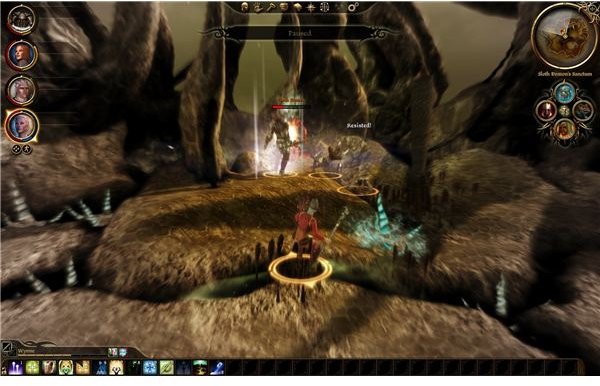
Slavren is waiting behind the door ahead, but we’re not all the way done yet. Go through the spirit door in this room. Use crushing prison against the golem and hit him with winter’s grasp if you want. Use the essence of dexterity here and then turn into a mouse. Wait a second for your spells to recharge and then go through the hole. Turn back into spirit form and hit one of the two golems with crushing prison. Some slashing along with winter’s grasp should kill the other, although the other one might survive crushing prison, so be ready to finish it off if you have to do so. Touch the essence of cunning here and then switch to golem form to knock off the door. Go through and touch the essence of constitution and the essence of dexterity. Backtrack through to the main hall and get ready to face Slavren.
It’s really anticlimactic though. Just open the door and hit the abomination with crushing prison. Then slash him and use winter’s grasp to effortlessly kill him. Use the fade pedestal to go back for some cleanup.
I suggest going back to Weisshaupt and The Raw Fade.
Quick Cleanup
Weisshaupt
Go get the essence of willpower if you didn’t already.
The Raw Fade
Go back down the path that gave us the mouse form. There is a spirit door along the way. Remember that you can use burning man to move faster. You can go through it to get to an essence of dexterity. There are two wisp wraiths here. You can just hit them with crushing prison and winter’s grasp for quick kills. Touch the essence of dexterity thing and work your way back out.
Darkspawn Invasion - Killing Uthkiel the Crusher
We actually spawn in the room where we learned spirit form, so we don’t have far to go. Switch to golem form and use it to knock off the massive door. Then rush out and start fighting the darkspawn. Just engage the first wave though, since we don’t want to trigger them all right away. They can barely dent you in golem form. Just use slam for quick damage and quake to stun them all. Hurl works, too. The only real threat is the darkspawn emissary, who doesn’t seem to use much magic but does seem to be hard to hit. You should honestly be able to just duke this one out. If you’re hurt though, then you can use the lyrium vein on the left side in the middle to heal up.
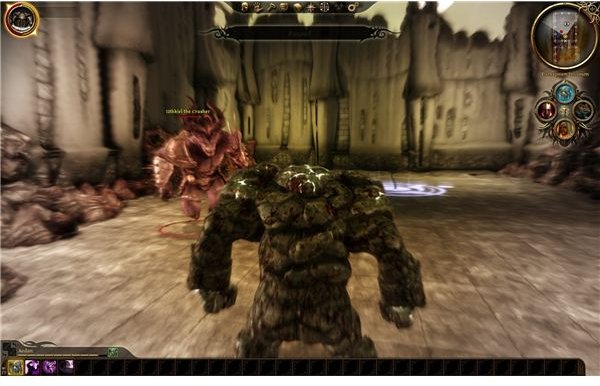
Wait a moment to heal up and then break off the second massive door. We can now see Uthkiel the Crusher. I had no problems with him by staying in golem form. You could probably switch to spirit form and use crushing prison on him if you want. He can do a lot of damaging attacks though and most of them can stun or knock you down. I suggest staying in golem form to be safe. He’ll get in some good hits, but your talents will dish back more than enough. Just use slam, quake, and then hurl to keep him stunned while you also get in some hard punches. He should die after a round or two of these talents.
Don’t leave just yet though. Switch back to burning man and run all the way back to the original starting point. There’s a massive door there that we can knock off now and get a font of strength bonus. After that, we’re done.
Move on to Burning Tower.
Burning Tower - Killing Rhagos
This is just like Darkspawn invasion. We’re in the area where we learned burning man. Use the golem to break off the door and charge into the room. Some burning templars, shambling corpses, and a burning mabari will attack. Just use quake to seriously hurt and stun most of them. Hurl can finish half of them off while you punch the rest. If you need it, there’s a lyrium vein nearby.
Break off the next door and get ready to attack Rhagos. This is just a rage demon. You can probably do this using burning man or golem form. I used golem and basically just punched him to death. The fire doesn’t do much damage to stone and his hands aren’t effective at melee. When he dies, touch the font of strength to gain a point in it.
We’re not done yet though. Switch to burning man and backtrack to the upper level that had the gridlike passages. We can go back and cross through the flames to get to a spirit door. Go through it to find an essence of cunning and an essence of constitution. Go down the steps in back and use golem form to bust off the door. You can find an essence of magic. Then just backtrack to a fade pedestal and go to the Templar’s Nightmare.
Templar’s Nightmare - A New Place
This is the big challenge and we’re taking care of it right before the inner sanctum. I always like to get my general trouble done first before committing to a new level. This one also needs you to use most of your forms, so it makes the most sense to leave it for the big end. Once this one is done, we’ll almost be ready to take on Sloth.
Look at the book in the room to get another codex entry. Then use mouse form to go through the hole. You’ll pop out into a poison trap and find an arcane horror. Switch back to spirit mode and fire off crushing prison to take him out. Go out the normal door and into the middle room. There are three abominations here, who are complete pushovers. Just slash them until they die. You can view another book for a codex and go through the mouse hole. In this new room, switch back to golem form and kill the blight wolf. Then touch the essence of dexterity. We’re ready to move on.
Go back to the room where we killed the arcane horror. The other door just portals us back to the start, so go through the second mouse hole. You’ll pop out by an ogre. Turn into the golem to fight fire with fire. Use slam, then quake, then slam. That should kill him. An abomination might wander in though. Just kill it if it does. Go out and kill the other abomination that’s behind the fire. Just turn into burning man. You can then use the mouse hole to get to the third room. You can also just blow the door off with the golem.
There are two more abominations here. Just kill them and turn into spirit form. Go through the spirit door and kill another two abominations. You can either use mouse form or the golem to get into the next room. There’s a shambling corpse and an arcane horror. I guess you could use spirit form to take it out, but I had more fun using the golem to punch it to death.
Templar’s Nightmare - Killing Vereveel
Switch to the burning man form and use the fade portal in the room. The next room is on fire, so this is a good idea. Run through the flames and open the door. We’ll face a few more abominations here. Just keep going forward and killing pairs of abominations until we get to the final room with the templar’s body. The desire demon, Vereveel, will rush into the mouse hole. Chase after her.
I suggest you go ahead and do spirit form. Burning man doesn’t have much to offer and golem can’t stand up to the magic she’ll use. She’s really good at freezing you. Spirit can use slashes and winter’s grasp to kill her fairly quickly. Crushing prison seems to not work that often though.
Once she’s dead, touch the essence of cunning to get the last one of these. We’re almost done. Use the fade pedestal and note that you should now have three islands lying on the bottom of the map. They are just called “A Nightmare.”
More Nightmares
Remember your companions? Well, that’s where they are. They’re stuck in their own little visions, since they couldn’t escape like we did. It’s different depending on your party, but you won’t actually need any specific skills. They can give unique options though. Don’t worry that they all “die” once you free them. They just can’t come with you. They’ll be back when you go to fight Sloth.
Leliana is praying. You just have to talk about her vision and the revered mother will slip up. Leliana will help you kill her once she turns into a greater shade. It’s a little tougher than the usual one, but we’ve faced a lot worse.
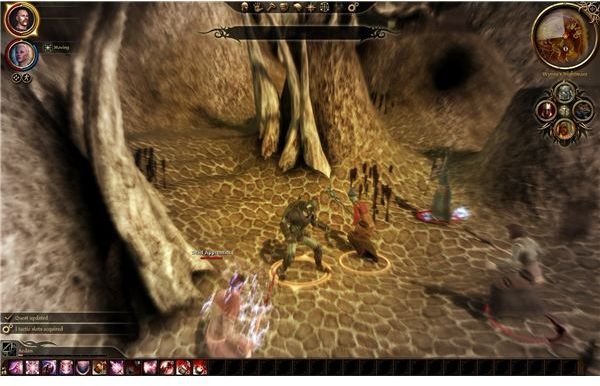
Wynne is surrounded by dead mages. You just need to make her question the reality of it all. Once she does, they will rise up. You can then help Wynne kill the three dead mages. Just slash them while Wynne heals you.
Sten is the one that deserves mention. He knows it is a dream, but he likes it. It seems that he misses his companions and is enjoying the break. If you demand that he soldier up, you should be able to call upon his oath to you. He’ll really like this and you’ll get two free approval points. He’ll then help you kill the two soldiers with him.
I’m not entirely sure of the rest, but it’s basically the same. You’ll enter a scenario and have to wake them up. You’ll then have to fight the characters or the abominations portraying them. You don’t have to do this, but if you don’t then they won’t be able to help you fight Sloth.
Inner Sanctum - Killing Sloth
Before you do this, make sure that you’re ready to go. The whole world will disappear with Sloth, so make sure you’ve got everything you want.
Talk to Sloth to bring in your 3 companions. If they don’t like you or if you said some really stupid things in your conversations with them or Sloth, then they might not show up. So
watch your tongue.
Sloth will ultimately fight you and go through a few forms to do it. He’ll start off as an ogre, and this is probably the toughest form. I suggest shapeshifting into a golem and using your usual ogre tactics to deal some damage and keep him occupied while Sten and Leliana work on him. Make sure that Wynne keeps an eye on you and heals your buffer. Sloth can do a lot of damage in this form, but you should be able to last against it if you can keep him pinned for a minute.
His next form is a rage demon. This is the fire one. If your warden is also a warrior buffer, then have him switch to burning man and distract Sloth. This will Leliana get in some ridiculously effective backstabs and let Sten do some serious damage. He should go down pretty quick. You can also use the spirit form to get him with winter’s grasp.
The next step is an abomination. This doesn’t have much going for it, except for a few combo attacks. Just gang up on him again. You might even want to just use your real form for this one.
His next form is some type of shade. This actually seems a bit weaker, and I believe I even managed to freeze this one once. You can just gang up on him again. Watch your characters though and remember to use poultices for the characters if Wynne is drained. She can also drink a few lyrium potions to get back into the fight.
The final form is the worst, since he’ll use his real self. This one can use crushing prison to basically kill one of your people. Wynne can use resurrection if you have time. Sten usually seemed to die here. I just accepted it as the cost of battle, since Sloth can dish out a ton of damage. Worst of all is the awful blizzard spell which covers the whole area and will just about kill your entire party. Your only hope is to just keep him surrounded and keep slashing and stunning him to get some interrupts. He will die if you can manage to bring some blades against him.
Once he dies, Niall will explain what needs to be done. He’s not going to be coming back with us, so once you spawn in the tower grab the Litany of Adralla off of his body. Then get ready for the last push to retake the Circle.
This post is part of the series: Dragon Age: Origins Walkthrough - Broken Circle
The quest to gain the Mage Circle’s help isn’t an easy one. We’ll have to clear out a 5 story tower, fight lots of demons and abominations, travel through the fade to beat the lieutenant demon, and finally fight and kill Uldred at the top. Look here if you need any trouble with the Circle Tower.
- Dragon Age: Origins Walkthrough - Circle Tower - Clearing the Tower
- Circle Tower Side Quests for Dragon Age: Origins
- Dragon Age: Origins Walkthrough - Circle Tower - Escaping the Fade Part 1
- Dragon Age: Origins Walkthrough - Circle Tower - Escaping the Fade Part 2
- Dragon Age: Origins Walkthrough - Circle Tower - Killing Uldred