You will need to command Hudson’s squad from the sky and also handle things on the ground in this split mission. After guiding the team through the hostiles at the entrance of the base, we’ll have to get them to Steiner’s research lab without raising an alarm or getting killed. Read more below…
WMD - Eyes in the Sky
Follow the code to fire the engines and take off.
Move up a bit and zoom in to confirm Hudson’s squad. Order them to move to the point in the road, then move them into the house to hide them from the enemy vehicles.
When you gain control and overcome the flashbang, watch for men coming through the window. Gun them down quickly from the cover of a desk. You’ll flip back to the pilot’s viewpoint once the room is clear.
Order the squad to actually attack the two men on the rear path. Don’t just have them move near them, put your cursor over the men and order an attack. Then move them to the objective. Order them to move to the barricades, but then hit “V” to order them to stop in the trees and hide from the patrol. Once it’s past, order the attack on the barracks.
When you regain control, fire on the men in the center and aim at the rear of the room. Take cover by a bunk bed on the right and fire through the gap to clear out the barracks. Your men should be able to handle the left. Clear out the back room and then plant charges on the internal comms line. Blow it up to finish the primary objective. Order them to follow the objective markers until they have to take cover from the patrol.
You’ll regain control permanently at this point.
WMD - Ghost Strike
Move forward, but hit the snow as soon as the guard comes out. Pick him off with the crossbow and knife the dog that attacks. Move up to the relay and rappel off of the marked spot on the railing. Note that you actually need to do it right in this one, as opposed to the method in Modern Warfare 2. Hit the button to rappel and release it to swing out, then use the brake to pull yourself back to the rock. Go down in short bursts. There’s no penalty for going slow, but going too fast will kill you. Once you make it to the bottom, hook in again and swing down to crash through the glass and attack the four men inside. Three should be on your side in a straight line, so just keep firing through the dust and bring them down.
Go back out to meet up with the rest of the team and head down the steps.
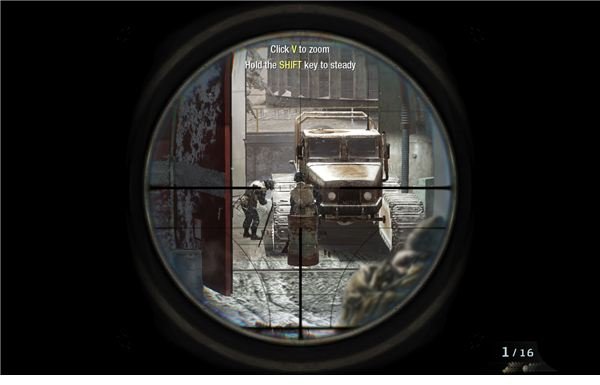
Help the team take out the two soldiers, then approach the facility. We need to do this without raising an alarm, so switch to the crossbow. Start by hitting the patrol outside the garage. Then shoot the soldier to the right inside the garage. Weaver should take out the other one at the same time. Turn to the right and face the truck. Shoot the soldier on the hood and Weaver will get the one by the passenger side door. Move up alongside Weaver and fire on one of the men by the door to the left. Weaver will get the other.
Turn to face the bulldozer. Shoot the man above the garage and then hit the one walking around outside. They shouldn’t see one another. Walk up and shoot or knife the man inside the garage to finish them off.
Approach the catwalk and aim at the final guard. If he sees you, just rush him and knife him. Wait for Weaver to silently kill the man inside and then follow him up to the central command center.
WMD - Taking Control
Once the team is in position, open the door and start shooting. Fire at the floor below and thin out the soldiers. This is a standard clearing mission. Just use the railing for cover and pick them off. Move along the walkway and take out the group of soldiers that rushes in from the side room. Go down the steps and hit the remaining soldiers on the floor. Use the panels and desks for cover and you’ll be fine.
Once it’s clear, disable the relay and walk out to the lower catwalk. After the RPG breaks the catwalk, quickly recover and sprint to leap across the gap and rejoin your team. Keep sprinting and try to just follow Brooks down the slope to outrun the avalanche. Jump off the ledge and use your parachute when you get the trigger.
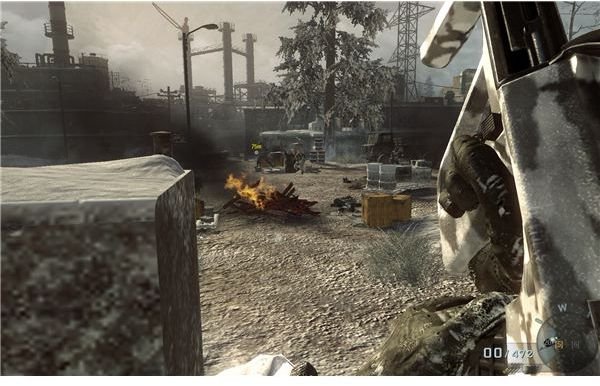
Move up and start shooting at the soldiers by the fire. Use the blocks and move forward to clear them all out. As you near the actual base, you’ll start to take fire from a machine gun in the tower. Just hide behind something and recover, then sprint through the marked door to get inside and away from the tower. Follow Weaver. There’s plenty of cover here, so just shoot accurately and you’ll be fine.
Once you come out, you end up in the command center. Watch the scene play out until the self-destruct sequence starts. Three minutes is plenty of time. Take cover behind some barrels and thin out the crowd that made it into the warehouse. Clean it out and run for the truck. Get on and start firing. Blow up both trucks that swing in behind the gate and keep firing at the soldiers on the ground. It should be easy to keep them suppressed until you can pull away.
This post is part of the series: Call of Duty: Black Ops Walkthrough - Part 2
Things are starting to heat up. We need to figure out what Dragovich is up to. We’ll need to try to rescue Clarke, go back to an old Soviet mission, attack a few Vietcong villages and finally start up the assault on Dragovich’s compound.