How to Connect the Wii to the Internet: Step by Step Instructions for Connecting Your Nintendo Wii to your Network

Why Go Online?
There are a wealth of free Wii games through the internet channel, as well as some really entertaining multiplayer games. In particular, if you are a serious or hardcore Wii gamer, you will definitely want to start taking advantage of the Wii’s online capability. There are great Wii games for kids online as well, so it is not all about hardcore gameplay.
Connecting the Wii to the Internet
One of the Nintendo Wii’s many amazing features is the ability to connect to the internet to download virtual console games, play against friends, send messages and transfer Miis, and even browse the internet. After previous generations’ offline-only approach to multiplayer, it’s nice to see that Nintendo finally saw the value of jumping on the online bandwagon.
Connecting your Wii to the internet is a relatively-painless process, but can be somewhat confusing for the newcomer. Luckily, you’ve found our step-by-step guide that will walk you through the entire process.
Before You Begin
You’re going to need a couple things before you get started connecting your Wii to your wireless network.
- A wireless router connected to the internet.
- The name of your network and the security password (if it’s a secured network).
If you have any problems concerning your individual router, be sure to check out the instruction manual or find troubleshooting tips on the hardware manufacturer’s website.
Locate Your Network
Once you’ve got everything you need, fire up your TV and your Wii. From the main menu, click the “Wii” button in the bottom left corner of your screen. It’ll be right next to the time and date on the bottom of the screen.
-
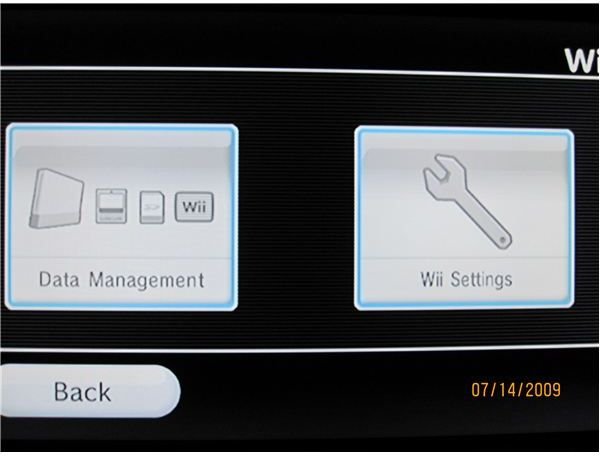
This will bring up the Wii screen. There are two options, Data Management and Wii Settings. Click the Wii Settings button on the right side of the screen.
-
You should now be looking at the Wii System Settings screen. There are three pages to choose from, and we’re looking for the second, so press either the arrow on the right side of the screen or the 2 button in the bottom right.
-
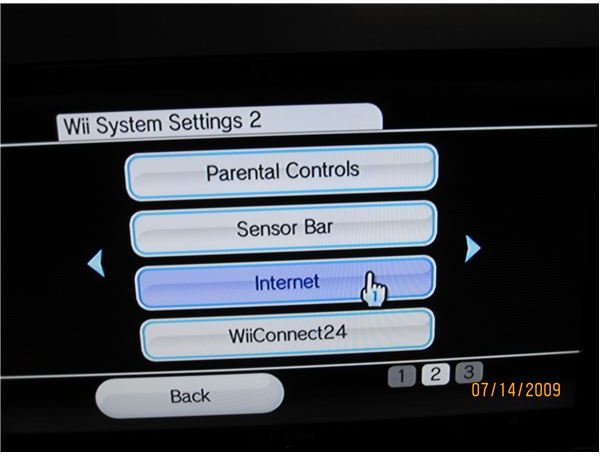
On the Wii System Settings 2 screen, there are several options. The “Internet” button is the second from the bottom; click it to continue with setup.
-
On the Internet screen, click on “Connection Settings.”
-
You should now see three connection options. It doesn’t matter which you choose, but it is easier if you pick one that hasn’t already been configured.
-
Choose a connection and click on it to continue. You’ll be offered the choice between a wireless and a wired connection. Choose “Wireless Connection.”
-
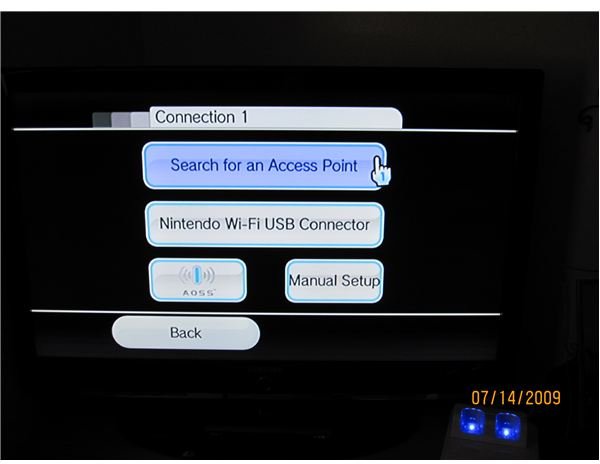
On the Connection screen, click “Search for an Access Point” to have the Wii automatically attempt to locate your network.
-
“Searching for an Access Point” will display for a few moments, and then the message “Choose the access point you want to connect to” will appear. Click “OK” to continue.
Connect to Your Network
The next screen will list all of the available connections your Wii has located. There may be many to choose from if you live in an apartment complex or just your own network if you don’t have any neighbors close by. Look for your network name and click on it to continue.
-
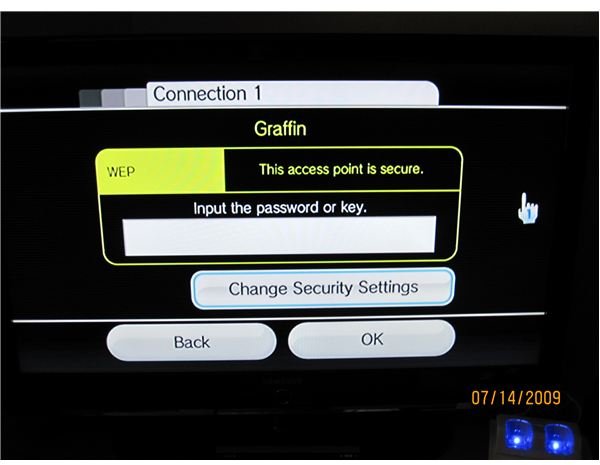
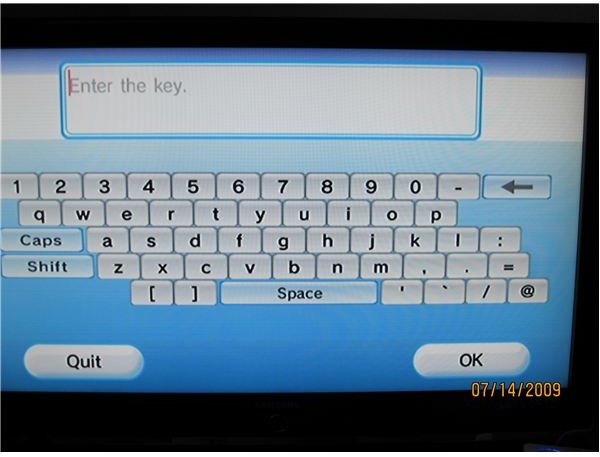
If your network is secure you will be asked to input your security key on the next screen. Click on the entry field to bring up the Wii virtual keyboard and type in your password, then press “OK” in the bottom right corner.
-
You’ll be returned to the security screen, and the password should now show up as a series of asterisks in the entry field. Click “OK” to continue.
-
If you haven’t entered the password correctly, a screen will pop up to inform you, and you’ll need to click the entry field to re-enter the password. If you’ve entered it correctly, the Wii will ask if you would like to save your settings. Click “OK” to continue.
-
The Wii will inform you that the connection settings have been saved. Click “OK” to start the connection test.
-
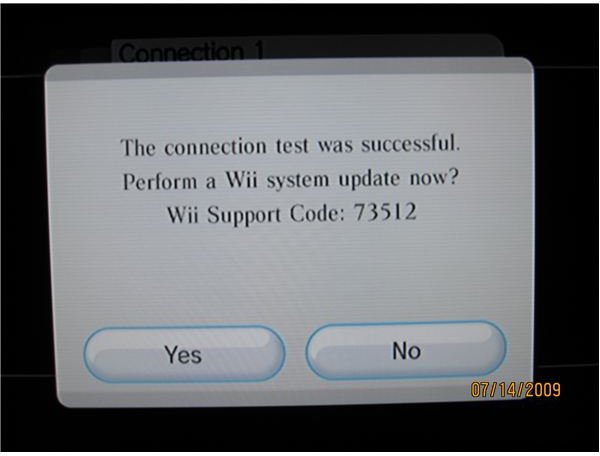
The test can take up to several minutes. Once it’s successful, the Wii may ask if you would like to perform a system update. The update will be necessary to connect your Wii to the internet, so choose “Yes” to continue.
-
The update can take some time, depending on the speed of your connection and what version of the software your Wii is running. The progress bar will give you some idea how long you have to wait.
-
Once the update is complete, a message about parental controls will pop up. Press “OK” to continue. The Wii will then return to the main menu.
Congratulations, you’re now ready to experience all the amazing online features of the Nintendo Wii. Feel free to jump into the Wii Shop channel and download the Internet Channel or get started entering friend codes so you can play with your buddies online.