Tomb Raider Underworld Walkthrough - Details on Mediterranean Sea Level 1 and 2

Mediterranean Sea Level 1
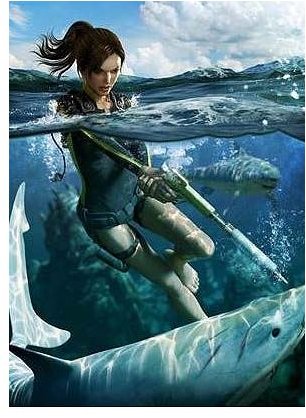
Lara is about to begin an adventure beneath the waves that will see her fight through seven levels of bad guys and threats that would love to see her disappear. Lara’s diving gear allows her to stay under water for as long as she wants without worrying about having to resurface for air. You’ll also notice that Lara begins this level equipped with the Spear Gun as her secondary weapon. It’s useful for battling the sharks that will threaten her while she is swimming around the sea. Once locked on, prepare to use your Swim Dodge when the shark breaks from circling and begins closing in fast and use Lara’s skills to deal with this threat. Lara starts this level sitting in the back of a boat, so dive into the warm sea and swim down to the bottom. Look for what looks like ruins sitting quietly on the sea floor as you descend. Look for a main tower sitting within the moss-covered rocks with a stone path and outlying structures. This is the puzzle door cave.
Once you reach the door to the puzzle cave, you can begin solving the first puzzle (check section below) to open your path forward through Lara’s adventure.
Ocean Floor Puzzle Cave
Look for a smaller ruin facing the main tower, with a square stone doorway still in one piece. Swim inside the doorway, but watch out for the jelly fish that will sting you if you come in contact with them. Use the jelly fish as beacons to light your way. Follow the tunnel until you reach a large metal key and then take it from the plinth. Swim back the way you came in with the key and then head across and enter the main tower using the cave entrance at its base. Once inside the cave, swim down to the large ornate door composed of three large overlapping discs. The designs on the discs show closed and open eyes. Just insert the key you brought with you into either the left or right disc. Now, pick up the key from the plinth in front of door and insert it in the second disc. Turn each of the keys to rotate the discs until all three eyes meet in the center. This completes the puzzle.
Where to Find the Secret Hidden Treasures
Use the following Tomb Raider Underworld walkthrough tips to help you find secret hidden treasures in the Mediterranean Sea level 1:
- Face the Ocean Floor Puzzle Cave doorway from inside. Search up and to the right of the plinth and you’ll find a ceiling shaft that leads back outside the Main Tower. You’ll find a treasure sitting on a ledge about halfway up the ceiling shaft.
- Look at the Sonar Map and you’ll see how the Main Tower resembles a face or helmet. Swim up the outside of the Main Tower to the area where the left eye would be near the top and look in the small alcove to find a treasure.
- The third treasure is found on the floor of the room where you found the first key. Pass under the fallen stone beam to the left as you enter the room and look in the back corner to find the treasure.
- The entrance to the cave where this treasure is found is completely covered by kelp and is hard to find. You’ll find it in the prominent ruin to the left of the ocean floor puzzle cave entrance. The treasure is hidden in the chamber to the left as you enter the cave, above the part of the cave with the empty plinth. Just swim to the top of the cave to find the doorway to the chamber.
- This treasure is hidden underneath four jellyfish in a small cave, far off to the right of the ocean floor puzzle cave entrance. Look for large rectangular stone slabs that mark the entrance to the small cave.
- This treasure is hidden underneath a single jellyfish in a cave far off to the left of the ocean floor puzzle cave entrance. The entrance to this cave is also hidden by kelp and faces away from the main tower.
Mediterranean Sea Level 2
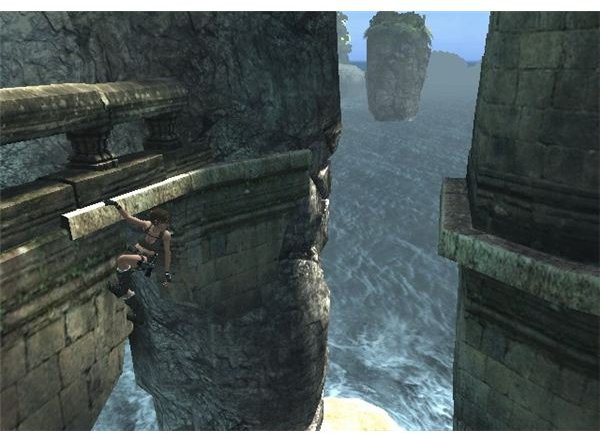
Once you swim through the door keep going ahead and up, past more jellyfish. Then follow the tunnel. Look for a hole in the wall up ahead and then swim through it and up to the surface of a cave. Climb out of the water, scale the large rocks on Lara’s left, and then drop down the other side. Keep going ahead until you come to another pool. Dive in and look for a ramp on the left of the pool to exit. Climb up the pile of rocks large rocks in front of you and then jump up and grab the ledge and move along to the right until you can’t go any farther. Jump up to the next ledge and move around to the right again. Leap backwards onto the pole when you come to it and then just swing on it and jump off onto the opposite ledge. Go around the corner and then just ascend two levels to reach the floor. Next you’ll tackle the Niflheim Door Puzzle.
Niflheim Door Puzzle
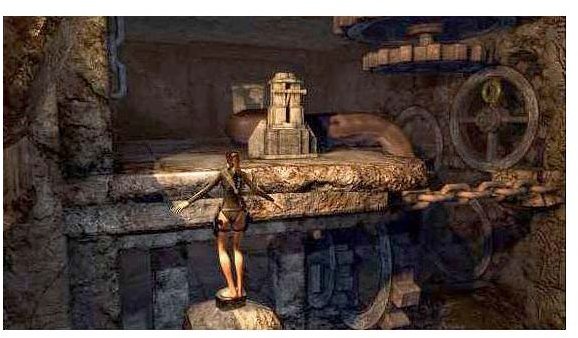
Begin opening this door by firing the Grapple at the head of the serpent statue to the right of the door. Once the Grapple is attached, just pull on it and the head will come off its perch and onto the floor switch below. Next, place both of the small stone blocks on the left floor switch to weigh it down. Now, head over to the center plinth in front of the door and pull the lever and the door will raise.
Location of the Secret Hidden Treasures
Use the following tips to help you find the secret hidden treasures located in the Mediterranean Sea level 2 of Tomb Raider :
- Right after swimming through the puzzle door, at several points the channel will become choked by fallen debris. The treasure is hidden on the other side of the pile of rubble at the third choke point on the floor to the left.
- Once you climb out of the water in Niflheim head right and you’ll see a treasure in the corner hidden in a urn.
- In the pool in the room with the serpent’s head statue, swim to the far corner to the left of the entrance and dive down to get the treasure.
- While in the pool in the room with the serpent’s head statue, climb up the ramp. Jump up onto the block, and then climb up and around the ledges to spin across three horizontal poles. On a corner platform you’ll see urns you can look in, after that just dive in the pool to get down.
- Once you finish the Niflheiim Door Puzzle, the corridor turns right. Look left while on the second pile of blocks and you’ll spot a high alcove with three urns. The treasure is in the middle urn.
- Just before you head up the stairs to take a look at the Kraken, look in the urn on the right side of the wall to find the treasure.
Mediterranean Sea Level 3
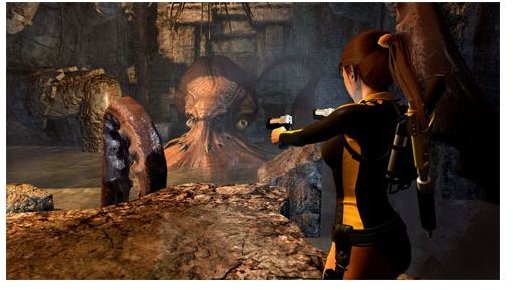
Once you make it to the top of the stairs, look in the alcove on the left for a health pack. Move to the end of the corridor and the game will ask you if you want to take a look at the Kraken through your Field Camera. Begin by moving down the right path and using the wall ledges to traverse the intervening pit drops. Next, jump onto the pillar and then jump from pillar to pillar until you stand on the last one. Leap from the last pillar and grab the ledge you can see on the other side. Shimmy right along the ledge until you reach the walkway and pull yourself up.
As you move down the walkway, Situational Adrenalin will suddenly begin. Immediately jump off the walkway towards the handy horizontal pole. Swing on the pole and then leap on the next walkway and then head down the right path. Traverse the hole in the floor in the far left corner using the ledges on the left wall. Jump backwards onto the pole, and then swing backwards from that onto the ramp and slide down to the floor.
Once you have had your little talk with the Kraken (refer to the Taking Care of Kraken section below), attach the Grapple to the anchor ring and rappel to the bottom of the cavern and then just pull the lever on the right to open the door.
Taking Care of Kraken

At this point in this Tomb Raider Underworld walkthrough for PC, fire your Grapple and attach it to the ring above the tentacle and then heave on it and the Kraken will get upset. Go back up the way you ascended and then pull the lever to retract the first of the two metal bridges holding the sunsphere. Then head into the Kraken’s home and around to the right of the big stone head.
Once you’re on the hand platform, leap across to the Sunsphere and then continue all the way across until you pass the other stone head. When you reach the next room, fire your Grapple at the anchor ring and pull the giant cog toward you until it won’t go any farther and you hear it click into place. Now, pull the other lever to damage the tentacle. This will retract the second bridge holding the Sunsphere. Once finished, go back the way you came to the lair room and this time go around the left side of the giant stone head.
At the edge, jump across to the ledge on the left side. Move around the corner, and then leap backwards to stand on the central platform. Pull the lever and shoot out each of the broken chain links to drop the sunsphere and eliminate the Kraken.
Hidden Treasure in Mediterranean Sea Level 3
Use the following Tomb Raider Underworld tips to help you find hidden treasure located in Mediterranean Sea level:
- When you come near the Kraken for the first time, you’ll see a torch lit room on your right as you travel down the hallway. The treasure is in one of the four urns.
- After looking at the Kraken through your Field Camera, turn right and slide down into a second pit. Turn left at the intersection and then drop down to the stairs below. Now, move to the left and you’ll find the treasure in one of the three urns available.
- After dropping down into the second pit above, go forward instead of left and you’ll find a treasure in one of the urns at the end of the walkway.
- Once you have fired the Grapple at the giant cog to take care of the Kraken, drop down to the lower area below and travel through the exit. Follow the path and then turn right at the intersection and you’ll see some urns. This is where you’ll find the treasure.
- Once you are standing on the middle platform where you found the lever that raises the Sunsphere above the Kraken, you’ll see huge metal chains. You have to wall jump behind either chain to reach the urns above the lever.
- Once you have finished with the Kraken, swim to the statue on the left of the lever that opens the door. Dive down to the submerged stairs to the left of the statue and you’ll find the treasure.
- Once again, after eliminating the Kraken move down the stairs that lead to the lever that opens the door. Move down the passageway until you’re at the same height as he Kraken. Now, dive into the water and you should find a treasure on the bottom.
Mediterranean Sea Level 4
Go through the door and up the stairs until you see a hole in the floor beneath you. Traverse this hole by wall climbing along the left. Drop down, and then travel up the stairs until you reach the next hole in the floor. Carefully walk across the beam and then crawl under the rubble and then keep going up the stairs.
Once you have opened the door to the Gauntlet Chamber using the information in the section below, enter the room and a cut scene will start. You have to race back to the surface now. Run out of the chamber and turn right and take the exit made by the blast. Ascend the stone blocks and pass through the hole to enter a room with all kinds of broken pillars.
Don’t be frustrated by the brief encounter with Thor’s Gauntlet and your inability to explore all of its possibilities, you’ll see it again later on in the adventure.
The Gauntlet Chamber Door Puzzle
At this point in Tomb Raider Underworld, ascend the pillar on the right, jump through the visible gap and then drop down. Pick up one of the stone blocks and stand on the floor switch to open the door.
Throw the stone through the door and pick up a second stone and just do the same thing over again. Run as fast as you can through the door before it closes. Place both stone blocks you brought with you onto the nearest floor switch. Doing this will retract one of the metal brackets securing the gate.
Once this is done, attach your Grapple to the anchor ring on the main door and then stand on the other floor switch, while pulling the Grapple Line around the pillar. Now that both metal brackets have been retracted, just tug on the Grapple and the door will come crashing to the floor.
Mediterranean Sea Level 5
Once you have successfully crossed the pillar room using the information in the “Navigating the Pillar” section below, pass under the rubble to your left and then keep going until you come to the main chamber where you eliminated the Kraken.
Travel right and then Grapple swing across to the other platform and grab the health pack to the left of the platform. Ascend the rubble pile and jump over to the pole and swing over to the next platform. Now, slide down the ramp to your right and then run around to the left. Leap onto the ledge on the left wall and shimmy right and then drop down three levels.
Travel back the way you came. The path should be familiar. Head down the stairs, jump up twice and then move along the ledge that takes you across the broken floor. Travel right until you can’t go any further, drop down to the lowest ledge and then shimmy around the corner. Pull yourself up and crawl under the rubble and then go down the stairs. Ascend the rubble on the left of the path, leap across and jump down. Move down more stairs and through the entrance. Leap into the pool and leave by going left. Ascend the rubble and jump down, dive into the pool and swim out by following the path you used to come in. Swim out and back up to the boat to trigger the cut scene.
Navigating the Pillar Room
- Standing at the entrance, climb up the pillar on the right and then jump over to the second pillar and leap backwards onto the platform behind you.
- Standing on the edge of the platform, leap diagonally over to the broken pillar on the left of the room and then over to the next bit of floor.
- Jump across and wait on the top of the first of two broken pillars, and then just jump to the next one, from there just leap over to the doorway.
Locating Hidden Treasures in Mediterranean Sea Level 5
The following Tomb Raider Underworld walkthrough tips will help you locate the hidden treasures in Mediterranean Sea Level 5:
- Take a look in the urn to the left of the door as you enter the room with the broken pillars.
- Once you Grapple your way across the Kraken’s chamber, look in the urns to the right of the pile of rubble to find another treasure.
- Look in one of the three urns in the far left corner of the room with the broken pillars.
- Look for the treasure in one of the three urns on the left as you crawl under the pile of rubble.
Mediterranean Sea Level 6
Jump across from the boat onto the anchor and then climb up to the first deck of the ship. Eliminate all the enemy soldiers on this deck and then travel across the containers to ascend to the upper deck.
Once you reach the upper deck, move towards the rear of the boat. Eliminate all the enemies along the way with a combination of melee and gun attacks and grenades in tight spaces. Run down the stairs past the first chopper to the lower helicopter pad and then down two more sets of stairs. Once there head toward the rear of the ship, while throwing grenades around the corners ahead of you.
Travel through the center doors and then move down the passageways, while using the available cover to help you take out the bad buys. Once you reach the engine room, watch the cut scene. Head down the next corridor and then turn left when you come to the intersection.
Your goal is to get off the ship before it sinks. Run out of the room and head left and then right and right again and run through the next door. The ship will lurk to the left as it sinks, so keep an eye on the cargo as it will tumble around the deck and you need to avoid it. Move around the corner and a Situational Adrenalin episode will begin. Sprint or roll to the right to avoid the blazing barrels coming at you.
Make your way to the end of the passage and climb up the wall on the left. Keep moving sideways or upwards, using the exposed pipe work as hand-holds to help you.
Once at the top, go along the next passage and up the ladder on the right. Wall climb to the top, shimmy along to the left, and then leap backwards over the intervening beam to the other side of the corridor. Now to complete this Tomb Raider Underworld walkthrough of the Mediterranean Sea Level 5, leap up and over to leave the sinking ship.
References
- Screenshots created by Sheila Robinson.
This post is part of the series: Tomb Raider: Underworld Walkthrough
This five part article series takes you through all seven levels of Tomb Raider: Underworld for the PC. We’ll walk you through from Mediterranean Sea, right through to Lara’s final battle in the Arctic Sea. Have fun and good luck adventurer!