Tomb Raider Underworld - Tips for Beating the Game at Master Survivalist Difficulty Level - Includes Southern Mexico, Jan Mayen Island and Artic Sea Locations

Introduction to Master Survivalist
Once you have finished Tomb Raider Underworld at least once and have found all the treasure and relics available in the game. You might decide to give Underworld’s Master Survivalist difficulty setting a try and may find that the more difficult battles are a little more than you can handle. This article contains hints and tips on making it through the toughest battles on each of the levels of the game on the Master Survivalist difficulty setting, except for the Andaman Sea level, (which is really just a level designed for you to enjoy your hard-won new powers and divine artifacts). For more hints and tips on using Lara’s gadgets and combat hints and tips for the game, click on the respective links provided.
The Master Survivalist difficult setting does make it harder for Lara to survive, she has 20% less health on this setting, has less time to execute Saving Grabs to half a second and her opponents are stronger and more robust. In addition, Lara receives more damage if she touches fire or falls from height.
Mediterranean Sea & Croft Manor

Mediterranean Sea - Mediterranean Sea level in Tomb Raider Underworld becomes difficult as you make your way onto Amanda’s ship. Use the slow and methodical approach to eliminate your enemies on each of the decks as you make your way to a meeting with Jacqueline Natla. Find a good position to view the area on each deck and then lure your enemies over individually and eliminate them. You should have plenty of ammunition at this stage and you’ll find lots of Health Packs.
Croft Manor - The moment you regain control of Lara while in Lara’s father’s secret room, immediately leap onto the nearest ledge. From the height advantage you have now gained, you can take the Tiger Thralls out easily with grenades, rather than deciding to take them out with your shotgun.
Coastal Thailand
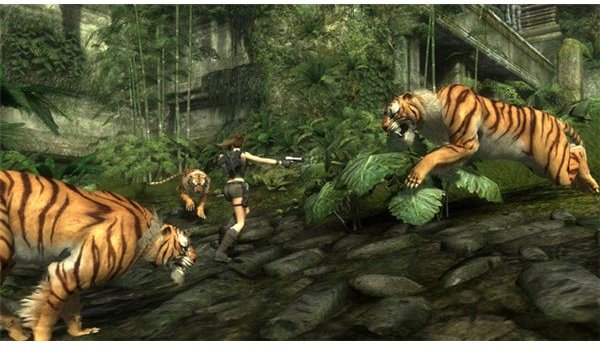
Tomb Raider Underworld becomes difficult at times during the Coastal Thailand level, with the first challenge being the first encounter with three tigers. The best and simplest way to deal with these tigers is to sprint to the left immediately and start your climb right away. Once Lara is off the ground you’re safe from these tigers, so just keep going.
The second encounter with a trio of tigers occurs after you climb to the upper level, but it’s easy to make it through. Just be quiet and run past this trio of tigers as fast as you can through the entrance and then jump onto the broken beam situated directly over the pit. Once on the beam, watch out for the bats that will be disturbed by your sudden appearance.
After Lara’s near death experience with a faulty elevator, you will have to face a naga that is tough and challenging. You can decide to try to beat the naga. Instead, avoid the naga by sprinting straight down into the depths of the temple. The Shiva Gem Room battle with naga, bats, and spiders is the most difficult battle of this level. You need to make sure Lara is always on the move and climbing the walls when fighting a naga to gain height advantage against these tough and challenging opponents. Once you’re above the naga, they’ll try to climb the walls to reach your perch. You can shoot them off the walls with your pistols nicely, but when they start to get close take out your shotgun to make sure they can’t get a handhold on your ledge. You can also kick a naga if they’re attempting to climb onto your ledge and your hands are busy firing your guns.
Southern Mexico
The Southern Mexico level (see the Tomb Raider Underworld walkthrough on this area) will become almost impossible to beat once you reach the last stage of this level because of the Mayan Thralls that you’ll encounter. In order to make defeating the Mayan Thralls easier, save your shotgun ammunition to take care of this threat. Also, be aware that Lara will take more damage if she’s involved in collisions with walls and obstacles on the Master Survivalist difficulty setting.
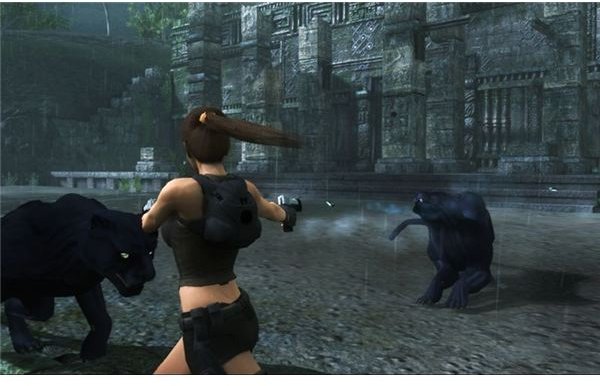
Once you have collected the Jaguar Head from within the first ruin, you’ll encounter an intelligent panther that will stay out of your range by moving away if you try to eliminate it from a place of safety. Instead, run over and get on Lara’s motorcycle. After a few moments, the panther will return with a friend, but neither are that tough. You can eliminate them easily by hitting them with Lara’s motorcycle using doughnuts and power slide attacks.
Upon arriving at the ruin that contains the Stone Skull, hang back, and don’t move down the stairs and get involved in the fight. You need to save ammunition for other battles, so use Lara’s pistols to eliminate opponents from range. Only venture forward to lure opponents close to your position away from their friends and then move back to eliminate them. Once you run out of targets to eliminate at range, you’ll have to move forward and engage each one in turn to eliminate them. You’ll be attacked by another group of bad guys if you decide to leave by the broken door. Instead retrace your steps to the entrance using Lara’s Grapple and the handy iron poles.
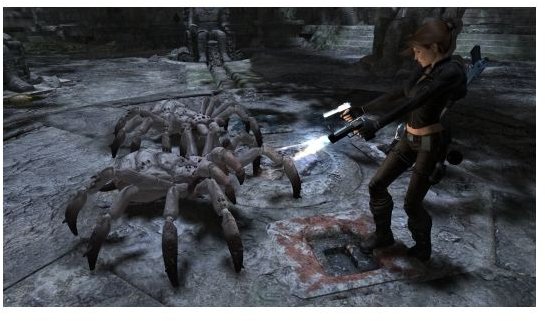
Once you activate the third set of ramps on the path leading to the Xibalba Trap Rooms, Lara will encounter three giant spiders that climb from the depths below. These spiders are fast and leap at Lara from distance and the room is too cramped for Lara to effectively avoid their leaping attacks. To survive you need to exploit the weakness of these spiders by immediately jumping down once the switch moves into place and getting onto Lara’s motorcycle. Executing continuous power slides and doughnuts attacks can quickly take these beasts out with little damage to Lara.
The last difficult battle you’ll take part in occurs in Jormungandr’s Pool room, where you’ll put all the shotgun ammunition you have been saving to best effect against the Mayan Thralls. Keep moving around as you blast the Mayan Thralls to bits using your shotgun and then kick and stomp them to finish them off.
Jay Mayen Island & Arctic Sea
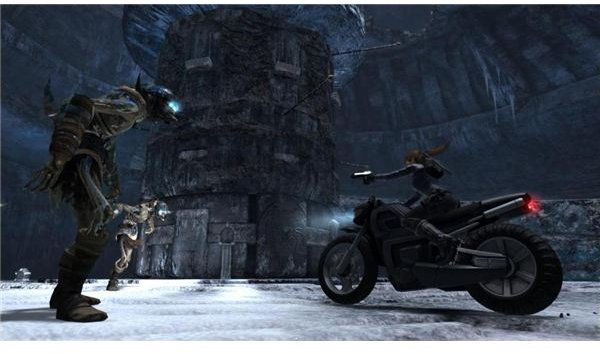
The Jay Mayen Island level (see the Tomb Raider Underworld walkthrough on this area_)_ only has one difficult battle on the Master Survivalist difficulty setting, which is your first meeting with a Yeti Thrall. The battle with the Yeti Thrall on this level is a set piece battle and this opponent has incredible strength and endurance that aren’t a factor if you stay on the move. Let the Yeti Thrall follow you into a handy nearby corridor and then move around while taking it out with grenades. Just don’t forget to finish the Yeti Thrall off by stomping and kicking it, once you blow it to pieces.
The Arctic Sea level is only difficult because the effective range of Thor’s Hammer is reduced to close range while Lara is under water. Wait until the sharks that attack Lara get to close range before using Thor’s Hammer on them and they’ll quickly be deterred from attacking you. Once you use Thor’s Hammer or a spear gun on the sharks that attack Lara, you’ll be back on dry land and Thor’s Hammer is unbeatable. Just make sure to use all of the health pickups you’ll find in the subterranean cavern and retreat when the numbers of opponents is threatening to surround Lara, and you won’t have a problem. Have fun and good luck!
References
- Screenshots created by Sheila Robinson.