Witcher 2 Walkthrough - Death to the Traitor
Once you agree to help Roche with the raid, he’ll go over the plan. We’re the infiltrator, so get ready to go once it’s dark. You can either wait for it and do some last minute exploration, or meditate until midnight.
When you’re ready, approach the commando near the alley at the back of Loredo’s residence. He’ll send you over the wall and start off the attack.
Entering Loredo’s Residence
Just climb up and over onto the wall, then look down. You’ll see the merchant looking for his prostitute in the square section of the garden.
Jump down and hide on the wall. If you can’t move down to stun the merchant, just wait for him to walk around the square. He should move past the corners by a bit, so you can slip behind him and knock him out.
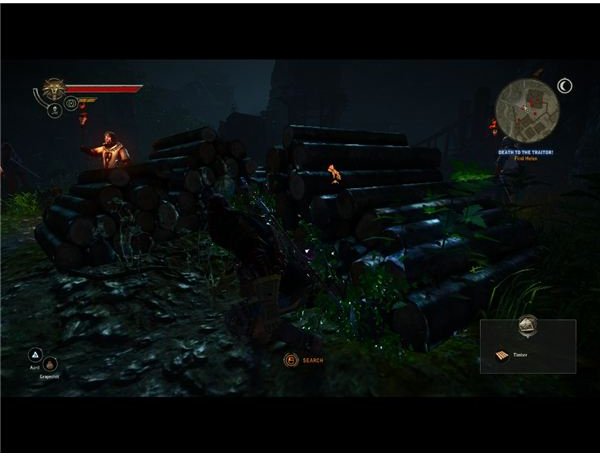
The guards aren’t a huge threat. The men sitting around the camp aren’t any real danger and have a very small line of sight. Just watch for the two carrying torches and the one urinating under the window. You can probably just ignore the one on the left. If you want to take him out, just swing to the left past the gambling men and knock him out while he’s around the corner at the end of the path.
Move down and knock out the man by the gate into the storage area. That’s where we want to go. Move down to the log pile and wait for him to start walking. You should be able to just get in behind him and knock him out. You can then safely go over the wall and into the storage area to find the girl. She’ll talk to you and pass along Ves’ message. It seems like the extrication phase got a little complicated for Ves, so we need to hurry. Climb the platform and go through the open window to enter Loredo’s house.
A Short Climb
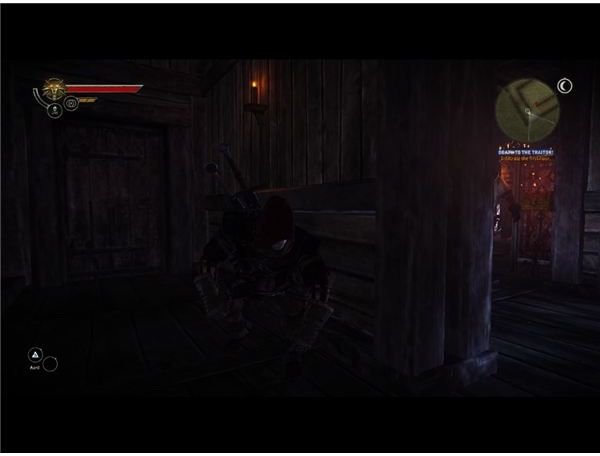
Start out by waiting for the closest guard to turn his back, then stun him. Move into the nearby room to trigger a cutscene with Loredo’s mother. After she throws the fisstech in your eyes, you’ll need to repeatedly left-click to clear them. If you can pull that off, you’ll decapitate Marietta in the cutscene and end this.
Loot the keys to the upper floor of the tower off of her body, and then move upstairs. There’s not actually a time limit, so it’s a good idea to clear this floor while you’re here. There are three guards inside. One on a diagonal patrol, one on a horizontal patrol in back and a third that walks around around the front of the room.
Wait at the corner for the first guard to step out by the window in the hallway. Move out and stun him. Move inside and follow the guard inside as he walks on the diagonal to the back of the room, and take him out, then quickly shift to the left to knock out the final guard while he’s still at the window.
Take what you want, and nab the letter in the box by the door for more backstory of Loredo’s betrayal. Then move up a floor to reach Loredo’s level. The personal bodyguards are all passed out on the level below. If you approach Loredo’s door, you’ll find that you need another key to unlock it. There’s one more stealth spot.
Walk inside and take the long path around the beds. You can knock over a few things, like the sword stand (apparently), but the bottles and stool lining the direct route will wake up the men sleeping close to them. If you go around the beds and then carefully watch the floor, you should be able to get into the back area. Turn inside and go to the left to get the key out of a glowing chest, then backtrack out and make it up to the steps.
Killing Loredo
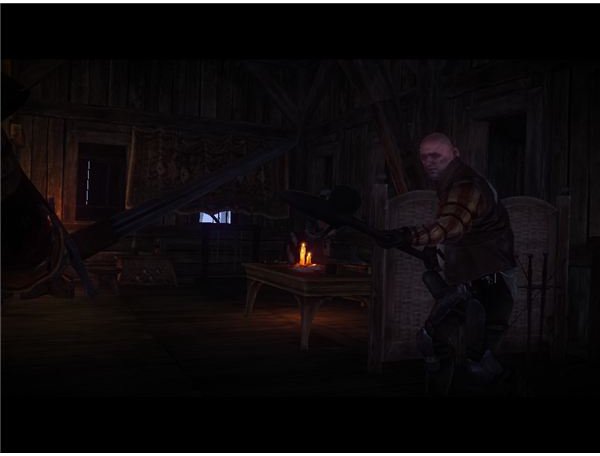
Open the door and walk inside for a cutscene. Get ready though, right after Ves warns you of the trap you’ll need to left-click and beat the QTE to parry Loredo’s blow and get the fight off to a good start.
The fight shouldn’t actually be that hard. It’s a breeze next to Letho, at least. Start by going into your inventory and adding a little hanged man’s venom to your blade, and make sure that you still have your steel sword equipped. Mine was unequipped during the stealth section, and it’s not fun trying to fight him with a silver sword.
Use the steel sword and then get ready for a fairly basic fight. If you have riposte, then you’re basically set. Just hold your parry and use riposte when the symbol flashes and you’ll be done in a few hits. If you don’t have it, you’ll need to stay a bit more mobile. Parry his close attacks, and roll away from his charge attacks. If you get room, cast Quen. Aard can do wonders for opening him up to attacks, so just keep up the pressure and you’ll be fine.
Once he dies, just walk over and free Ves. Loot Loredo’s body, and then head into the back room to find Moril on the bed. Move down the steps until Ves tells you that Moril has to go back up to give birth. It seems like the stealth section is over.
A Not So Subtle Exit
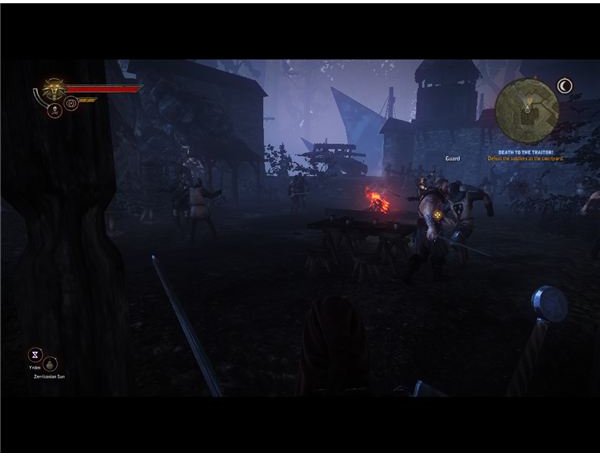
Draw your sword again and move down the steps. Most of the guards on the second floor should be stunned already, so just take up a spot on the steps and fight the wave that’s moving up. In this bottleneck, they’re very vulnerable. Parry and counterattacks are fine, especially since you might still have the poison on the blade. These guys are just grunts, so Aard and Quen will do most of the work for you.
As you cut your way downstairs, move down to the first floor and head out the front door to the courtyard to enter the battle. Roche’s commandos actually have things under control, so just move around and pick off the surviving guards at the edges. You might want to keep Quen up for your own safety, but the rest of this should be close to shooting fish in a barrel.
When you talk to Roche, he’ll flashback to his encountered with the escaped Ioverth. From what I can tell, this is a very easy exchange. 1 riposte, or two normal slashes, were enough to disable him. Just finish the fight and watch the exchange to get the final pieces of story for the chapter.
That’s also about it for the gameplay. There’s a QTE to slap a racist soldier, but the rest is just the story surrounding the baby and Moril. With Loredo dead and the spy captured, we’re ready to move out to Vergen. Just watch the scenes and wait for it to play out.
References
All information and screenshots from a “normal” difficulty playthrough of Witcher 2
Due to the branching nature of the game, your experience may differ. Please feel free to note any differences that you find in the comments below.