Front Mission 2089: Border of Madness Game Guide and FAQ
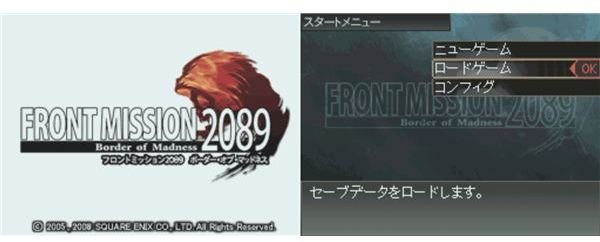
Table of Content
Part I: Introduction (page 1)
Translation of the introduction and explanation of the various options available.
This section covers the various options available on menu you’ll access in between battles.
Covers everything to know about the mechanics involved in the movement of your Wanzers.
Part IV: Mission 1
Information and help about the first mission of the game.
Part V : Battle Mechanics
In depth review of Battle Mechanics.
Front Mission 2089: Border of Madness
Front mission is a game which requires little introduction. Considered by many to be one of the best tactical strategic games out there, it is almost unbearable to us Westerners fans when a game of this franchise is released in Japan without being translated in America. This is why I have put together a game guide so that the language barrier doesn’t hinder eager players from enjoying the game.
Introduction (Front Mission 2089: Border of Madness Game Guide and FAQ)
The introduction of the game appears when you launch the game (provided you don’t press Start):
太平洋に浮かぶ島は ハフマン
2089 - In the middle of the Pacific Ocean lies Huffman Island.

以前の戦争から19年の時が経ち、島は再び戦いの気配を漂わせていた。
19 years have passed since the last war and there are once again signs of strife.
島を二分する大国両軍は、多くの傭兵を雇い、国境警備にあたらせた。
The island is separated into two major forces and many mercenaries are hired to protect the borders.
歴史に名を残さぬ多くの傭兵たち。。。
The names of those mercenaries were not kept in history
その中には大国の陰謀に巻き込まれ、数奇な運命を辿る者たちがいた。
Of those mercenaries, there were some who went through strange destiny because they were involved in plots of superpowers.
狂気の境界線にあるくの島で。彼らの戦いが、今始まる___
The island now on a verge of madness, their battle begins…
The Main Menu (Front Mission 2089: Border of Madness Game Guide and FAQ)
After loading up the game, you’ll get to the title screen (as you’ve probably guessed already). I’ve provided a translation for you for the three options on the title screen (look at the picture, I’ve identified each option with a letter):
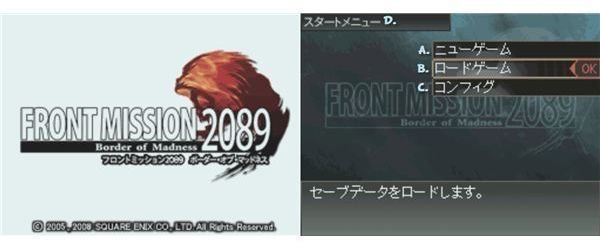
A. New Game
B. Load Game
C. Settings (configuration)
D: Start Menu
E: (the description of the option selected, in this case: “Load your Saved Data”)
I guess what you’d like to do just now is to go straight for the “New Game” option but let’s take our time and check out the “Setting Options” as you might find something to your liking there.
Select the third option from the top to access the Settings.
The Settings (Front Mission 2089: Border of Madness Game Guide and FAQ)
Now that you’ve selected the “Settings” you will be taken to this submenu:
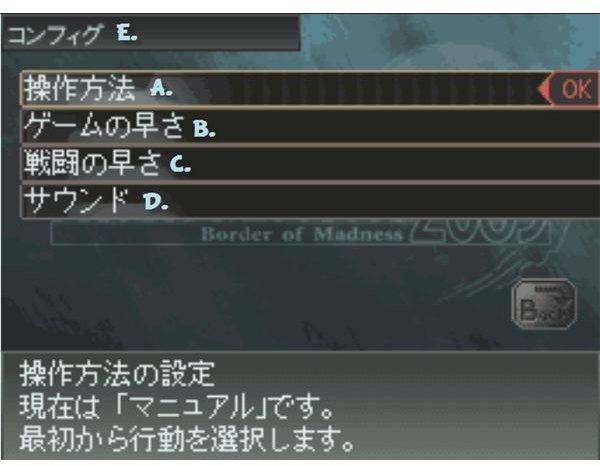
How to change options:
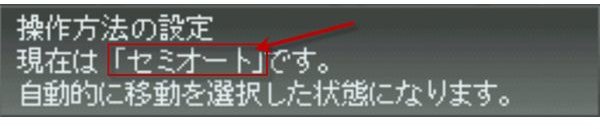
In order to change your current option, simply press the A button and you will see the option changing between the Japanese quotation marks. Take a look at the picture below to get a better idea of what I mean:
In order to select which option you’d like, just look right below; I’ve translated everything for your convenience.
______________________________________________________________________________________________________________________
A: Selection Mode*:
マニュアル**:**Select this option manual selection.
セミオート**:**Select this option for semi-auto selection.
*This simply refers to how you would like to select your Mechas. By selection manual, you will need to select which one of your character will act first. Once you’ve finished your action with that character, you will need to manually select the second one, third one and so forth.
I would personally recommend using the semi-auto mode which picks the Mecha for you. If you don’t like the selection order of the Mecha, you can always select a different one on the spot so there’s really no advantages to choosing the manual option (in my opinion).
B: Game Speed**:
通常:Select this option for normal speed.
高速:Select this option for high (fast) speed.
**Refers to the opponents speed.
C: Battle Speed:
通常:Select this option for normal speed.
高速:Select this option for high (fast) speed.
D: Sound:
ステレオ:select this option for “Stereo” sound.
モノラル:Select this option for “Mono” sound.
E: Settings
Name Selection (Front Mission 2089: Border of Madness English Guide)
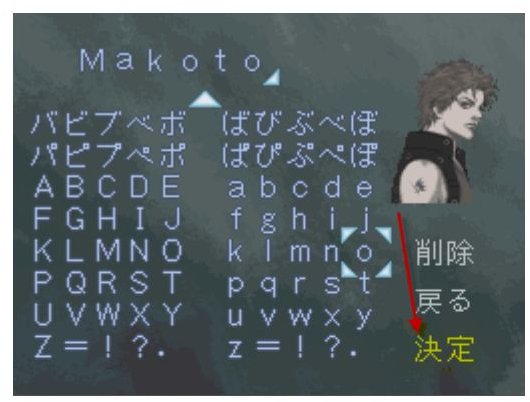
Now that you have a general idea about the introduction, select “New Game” to find out more about the story.
At the very beginning, you will be prompted to enter your name which you can do if you want to although I personally prefer to keep the default name (although this time I’ve changed the name to show you how it worked). If you’d like to stick to the default name (Storm), simply press start. If you prefer, you can delete the default name and write your own by selecting the characters available in the box. Once you’re done, click on the option highlighted on the picture:
Once you’ve selected your name, you’ll find out a bit more about Huffman Island.
You’ll then learn a bit more about the situation on Huffman Island.
The Story (Front Mission 2089: Border of Madness English Guide)
これは、大国の陰謀に翻弄された
傭兵部隊。。。
The mercenary forces have been pawns in a plot of the great nation.
歴史に名を残さぬ、傭兵たちの物語する。
_This is a story about mercenaries who won’_t leave their names in history.
O.C.U.陸防軍, 第1軍機化師団国境維持部隊。
O.C.U. Ground Defense Force, First Army Mechanized Division Border Security Force
西暦2089年。初夏。
2089 A.D. Beginning of summer.
第18傭兵部隊基地、詰所。
Mercenary Force Base No. 18, guardroom.
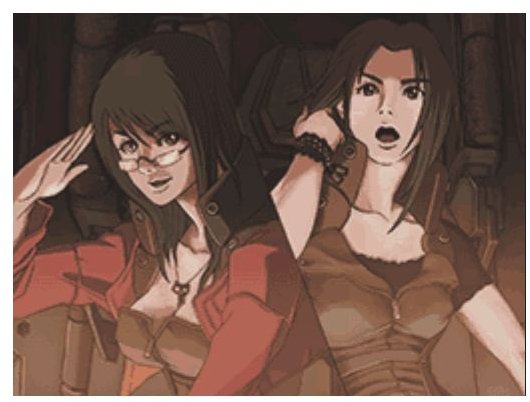
The First Meeting (Front Mission 2089: Border of Madness English Guide)
Follows up a conversation between two main characters of the story.
Rain:
あなたが、今日着任された。。。
You take up your post today…
???:
コードネーム:ストームだ。
君は?
Codemane Storm, and you are?
Rain:
あなたの補佐を務めます。
I am your assistant, ready for duty.
レインです。
My name is Rain.
Storm:
この傭兵部隊では補佐が付くのか?
In this mercenary force you have an assistant assigned?
Rain:
はい、軍の脱走者対策です。
Yes, it’s the army counter-measure against desertion.
当基地での規則です。
That is the rule of the base.
Storm:
何かご不満でも?
Doesn’t that make you want to complain?
Rain:
不満は無い。
I don’t have any complaints.
しかし君も傭兵ではないのか?
This being said, you’re also a mercenary aren’t you?
Storm:
そのような脱走の監視役はたいてい正規軍の人間が当たるはずだ。
The grunts are supposed to handle that kind of watchdog work.
Rain:
あなたも知ってのとおり、現在正規軍は人手が足りないのです。
As you already know, the regular army is short of soldiers.
そのための傭兵募集です。
Thus the recruitment of mercenaries.
Storm:
そうだったな。
So it seems…
Rain:
ところで、基地には慣れましたか?
By the way, have you gotten familiar with the base?
Storm:
着任してまだ半日だ。
I’ve only been there half a day.
基地も予想外に広い。
I didn’t expect such a large base.
Rain:
Ah really?
Have you been to the headquarters yet?
Storm:
いや
Nah.
Rain:
ファルコン司令があなたをお捜しでした。
Commander Falcon was looking for you.
司令部の場所はご存知ですか?
Do you know where the headquarters are located?
Storm:
ここの建物の隣たったな?行ってみる。
It’s right next to this building? I’ll go and have a look.
Front Mission 2089: Border of Madness Walkthrough
In the last article I finished explaining the various options available in the main menu. In this article we’ll familiarize ourselves with the various battles commands. The first mission is meant to be a tutorial so it’s very easy. Let’s take the opportunity to explore some of the information available.
About Movement (Front Mission 2089: Border of Madness Walkthrough)
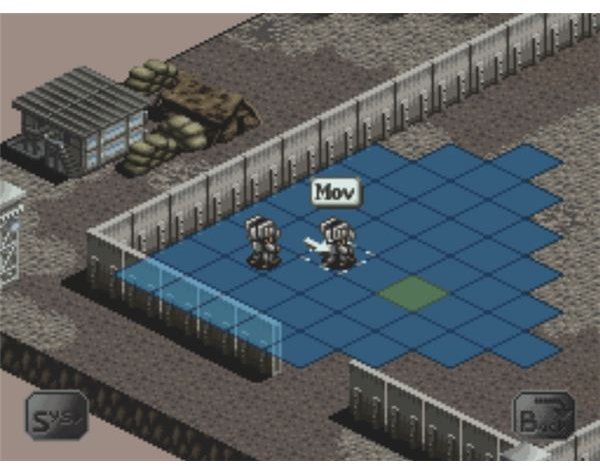
First of all, as soon as you have control of Storm (the main character), you’ll notice an area of blue squares surrounding him. This is the movement range of this character. Different characters will of course have different movement ranges. You can use the stylus and tap the blue screen to move the wanzer there or simply use the D-pad.
As you’ve probably guessed by now, the green square serves as a waypoint of sorts and this is where you’ll need to go to move forward in the tutorial. Before doing so however, let’s explore the mechanics of movement a bit further.
How far you can travel with your wanzer depends on two things: the equipped leg part and the terrain.
In order to better explain this, let’s look at this machine status for a bit:
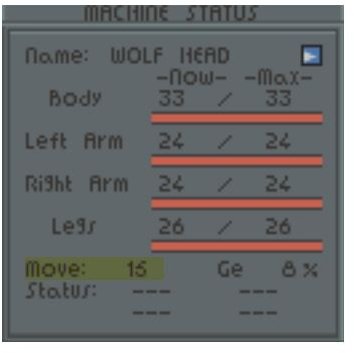
You can see the name of the Wanzer (Wolf head) and the hit points of the various part of this Wanzer (body, left arm, right arm, legs). Right underneath this, you’ll see your “move” characteristic (in this case 15).
The higher your move characteristic, the farther you are likely to travel. The move characteristic is influenced by terrain however.
Terrain (Front Mission 2089: Border of Madness Walkthrough)
Move your cursor around the battlefield, the game will give your information about the terrain you’ve selected.
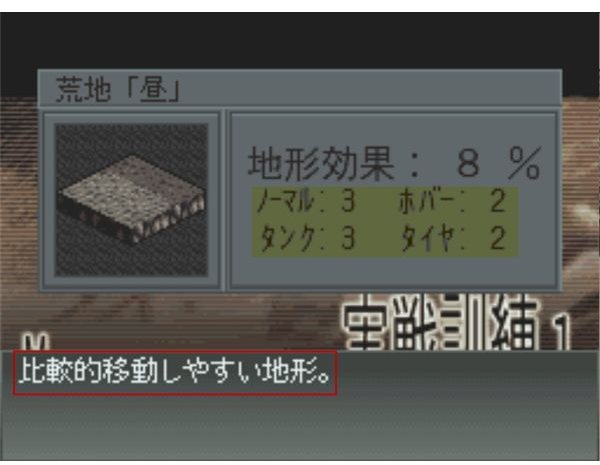
In the screenshot above, I’ve highlighted four different values. Those four words describe the different kind of legs you Wanzer can be equipped with a number next to it.
The number represents how many of your “move” you have to spend to cross one square. Here’s an example:
Wolf Head has a move of 15 and has “normal” legs. If you look up at the screen above next to normal (ノーマル), you’ll see that the movement cost to cross this kind of terrain is 3. Since you have 15 movement, you can travel to a maximum of 5 squares.
As you can see, the hover type (ホバー)has a movement cost of 2. This means that you could travel farther if you had “hover” part legs.
You’ll also find a terrain description under the terrain statistics. In this case it says:
比較的移動しやすい地形。
A comparatively easy land to travel on.
Finally, you’ll also find the terrain defensive benefit highlighted in green.
The First Foes… (Front Mission 2089: Border of Madness English Guide)
Time to move to the green checkpoint. For more information about movement, check out the table of content at the beginning of this article.
When you move over to the checkpoint, two options will pop out.

A: This command is for the use of items.
B: this command: 終了 is used to end the turn of this Wanzer.
Since your Wanzer is already in good condition, select option B to end your turn.
Once you’re done, Falcon will talk a bit more:
Falcon:
すばやいな。
Great.
それでは仮想敵出撃。
Let’s summon the virtual opponents.
Rain:
攻撃を選択すると、
When you choose to attack,
攻撃範囲が赤く表示されます。
The range of your weapon will be displayed in red.
攻撃可能な敵を選択して。。。
Time to choose an enemy to attack…
Storm:
そのあと、武器を決定する。
I need to choose a weapon then.
戦場の地形が命中率や, 移動コストに影響するから注意する。
I need to be aware of the movement cost, the hit probability and the demography.
WAPのマニュアルを読んでいるのか?
So, have you read the WAP manuel yet?
Rain:
失礼しました。
つい、新人相手のつもりで。。。
Sorry, I haven’t… I’m still just a rookie, so…
Storm:
攻撃を開始する。
Let’s launch the attack.
Rain:
了解。
Roger.
Initiation to Combat (Front Mission 2089: Border of Madness English Guide)
On this dialogue is over (better get used to it, there’s plenty more dialogues where this comes from), you’ll be in control of Rain (since Storm’s turn just finished).
You’ll notice that the four virtual opponents have appeared (they’re in red).
Before you attack one of your opponents, let’s cover a few important elements.
First of all, if you look at the bottom section of your character, you’ll find information about the weapons you are carrying (if any):

Name: the name of the Wanzer (in this case, Blue Iris).
Left Grip: weapon carried with your left arm.
Right Grip: weapon carried with your right arm.
L. Shoulder: Weapon (or shield) equipped on your left shoulder.
R. Shoulder: weapon (or shield) equipped on your right shoulder.
Next to this, you’ll find the name of the weapon, the type of damage, the ammunition available and the range.
Ammunition: a lot of weapons have unlimited ammunition (such as is the case there). Other weapons however, like long range weaponry (missiles, rockets and so on) can only be fired a limited amount of time in battle before they run out of ammo, so keep your eyes peeled on your “bullet” when you use those kind of weapons not be caught off guard.
Range: range describes from how far you can attack your enemy. In this case, the range is 1, which means you have to stand right next to the enemy to attack. Weapons like rifles have a longer range than melee weapons so it’s always a good idea to keep the weapon range in battle.
Getting Rid of the Opposition (Front Mission 2089: Border of Madness English Guide)
All you need to do to finish the first mission is to destroy those four robots. Simply move Rain and Storm on the battlefield and when you stand next to an enemy, a new command will appear.

It simply means “attack”. Select the command and a red square will show up with a “fire” button on top of your opponent. Press “confirm” to attack.
You’ll then be prompted to select between two weapons (the first one is a punch while the second one is a machine gun). Take a close look at the window at the bottom and you’ll find information about each weapon:

I’ll explain each term, starting from the top left to the bottom right:
Name of the weapon: in this case, Siege (シージュ)
Type of weapon: MG stands for “Machine Gun”
手武器(weapon)/近(short)
攻:This is the amount of time you’ll attack your opponent. In this case, since it’s a machine gun, you’ll fire the weapon 5 times for a damage of 2 each time.
**的:**This represents your hitting %.
射程 : this is the range of the weapon selected (1).
**弾:**This is the total ammo for this weapon. In this case, unlimited ammo.
残弾数: this is the remaining ammo for this weapon.
Once you’ve made your selection, you’ll actually attack your foe.

Keep repeating the process and your foes will be down in no time and that’s it! You’ve succeeded your first mission!
Disclaimer
About the pictures: all pictures shown in this walkthrough come directly from the game and are the property of Square-Enix.
About the translation: This walkthrough has been written to provide a general understanding of the game. So in some cases, some of the translations might not be as accurate as say, someone from Square would have put it. This being said, I am committed to providing the most accurate translation as possible. If you have suggestions for better translation of certain terms or reformulation of certain sentences, please leave a comment below, no subscription is necessary.
ther Hints and Tips: if you have your own strategies which you’d like to share, please leave a comment below. I will add your suggestion to the guide as well as credit you for the information.