A Guide to Starcraft: How to Complete Protoss Mission 6

Mission 6: Into the Darkness
Objectives:
Rescue Zeratul
Send Tassadar and your Zealots south along the path. Go up the stairs and through the gate. You will find some Marines who wish to join you. Bring them along and continue following the path to the west. You will find some Hydralisks and more Marines.
NOTE: You will encounter Infested Terrans during this mission. Kill these quickly, and as far away from your forces as possible. They do massive damage and can kill Tassadar with a direct hit. If Tassadar dies, the mission will be over. Also beware of where your High Templars are casting Psionic Storm. Remember, it can damage friendly units as well as enemy units.
Head back to the gate you came through and go southeast. Follow the path until you reach a beacon. Stepping on the beacon will bring in some Protoss reinforcements. Go back a little ways, then head southwest.
Send Tassadar southeast at the 4-way intersection. He will find some Marines, then get ambushed by a bunch of Zerglings. Bring him and the remaining Marines back to the main group, then head northwest. Note that each time a Marine “hears a sound”, an Infested Terran is nearby.
Head up the stairs and into a large room filled with Zerg. Use Psionic Storm on them and head southwest to find more reinforcements. Save your game. Put Tassadar in the back of the group before the hallway turns. As you move down the hall, a large group of Zerglings and Hydralisks will attack. Try and hit them with Psionic Storm before they can swarm your troops.
Continue down the hallway. Ignore the open rooms; those held the Zerg that just attacked you. Step on the beacon at the end of the hallway. This opens the one locked door you just came by. Go back and through the locked door. Step on the last beacon to finish the mission.
Mission 7: Homeland
Objectives:
Destroy the heart of the Conclave
Immediately pull your units back to the base. There is a perimeter defense already in place which should turn the attackers back. You’re fighting your fellow Protoss this time, and they’re out for blood. Build up the base defenses a little further by concentrating on unit production and upgrades.
NOTE: You now have access to the observatory, which allows you to create Observers. These are permanently cloaked and reveal large portions of the map with ease. Use them to scout ahead and find enemy troops. It is also wise to send at least one along with a squadron of Scouts, so that they can attack any hidden units.
Build some Dragoons and Reavers to shore up your defenses. The enemy will be throwing them at you, along with Scouts and Carriers. Responding quickly to attacks is very important here. Build up a large force of Zealots, Dragoons and Scouts; you will need them. The key here is a mix of air and group power. The enemy tends to favor ground power.
Put three Probes into a Shuttle and send it to the east as soon as you can. There is a large resource cache here that is relatively (or totally, depending on how quickly you make it there) undefended. Take the position and set up a secondary base. Use this base as an assembly area for your attacks into the northeast territory.
Build at least two Reavers, 12+ Zealots, 12+ Dragoons, 2-4 Observers and 12-24 Scouts. This is your main attack force. Move them
to the northeast, with the Zealots and Reavers in front. Have the Reavers destroy the Photon Cannons at the entrance, then move the Zealots and Scouts in after them. Arbiters should always be your first targets. Their cloaking fields conceal any nearby enemy units. Destroying them will allow you to attack the hidden units.
Clear the area and set up a third base. Like the other two, this one will also need to be heavily fortified. Replace any losses and get ready to move to the next base. The final Conclave base is to the south of your third base. You will need to Shuttle-drop your troops in, which means using Scouts to secure a beach head for the landing. Make sure you have at least 12 Scouts to do this.
You can also build six additional Scouts and send them to attack from the east or west. This will draw some attention away from your main assault force. It will cost a bit in terms of troops and resources, but it may give you the time you need to get your troops on the ground. Once you’ve cleared the outer defenses, allow the ground forces some time to make some headway before you send your Scouts back in. Remember, destroy Arbiters first and attack the Carrier itself instead of the fighters. Keep pushing through the enemy lines until you destroy the Nexus in the far southeast corner.
Mission 8: The Trial of Tassadar
Objectives:
Destroy the Stasis Cell
There are two entrances to your base. Move Raynor’s Battlecruiser, the Hyperion, to one end and your Carrier to the other.
NOTE: You now have access to the massive Protoss Carrier. In order to attack, they must have Interceptors built. Make sure you research the Interceptor bonus and always send Carriers into battle with an Arbiter (preferably 2) and an Observer.

Build your defense around the two entry points; this is where most of the attacks come. Dragoons and/or Photon Cannons can be placed around the edges to fend off aerial attack, but this can be done later. For now, build your base and fortify your defenses around the entrances.
Build 12 Zealots, 14 Carriers and 2 Observers. Make sure you have researched all the upgrades and Carrier upgrades before you go. Send the Zealots ahead of the Carriers, to the southwest corner. This is where the enemy base is. The Zealot’s job is to draw fire away from the Carriers long enough for them to punch a hole in the enemy’s defenses. Destroy Arbiters, Carriers, Photon Cannons, Dragoons and Scouts first; these will be the greatest threats to your Carriers. Once they are gone, your Carriers can decimate the enemy base relatively unhampered.
Move any remaining Zealots to the Stasis Cell and have them do as much damage as possible before the Carriers arrive. Note that you need not destroy the entire base; just punch a hole to the Stasis Cell and concentrate all fire on it until it blows.
Mission 9: Shadow Hunters
Objectives:
Use Zeratul to destroy the Zerg Cerebrates
Send your units to the southwest corner and set up a base. Move quickly, time is limited. The Zerg will begin attacking in short order, so get your defense up quickly. Keep your Arbiter close to your starting units so they remain cloaked. From now on, none of your attack forces should be without an Arbiter. The main Zerg attacks will come from the central area of the map. Place your Zealots and Dragoons facing towards the center.
TIP: Make sure you build enough Observers. The Zerg will use a lot of Defilers to chip away at your unit’s health. Observers will help you ferret them out and destroy them before they can do too much damage.
Send a few Probes to the southeast corner once your base is secure. Have them set up a second base so you can start gathering more resources. Make sure to fortify this base heavily as well.
Build an Observer and have it follow Zeratul. Send him around to destroy the scattered Zerg defenses before you begin your main assault. There are Zerg outposts with resource caches to the north of both your bases. Take advantage of these as early as you can. Fortify these upper bases with a wall of Photon Cannons and Dragoons. This will help a great deal in fending off air attacks.
Build 12 Carriers, 2 Arbiters and 2 Observers. This is your main fleet. Send them along the east edge of the map. They will come across a small outpost, which is easily eliminated. Use this area as a staging area from which to launch your main attack. Build some Zealots and Dragoons. These will help draw fire away from your fleet.
Head directly west from your staging area to find the first Cerebrate. While the fleet is busy leveling the base, bring Zeratul up in a Shuttle. When the Cerebrate is exposed, have Zeratul kill it.
Replace any lost Carriers, Arbiters and Observers before moving on. Head west when you are ready. Again, send your ground forces in first to draw fire away from the Carriers. When the path to the Cerebrate is clear, send Zeratul in to destroy it.
Mission 10: Eye of the Storm
Objectives:
Destroy the Overmind
Raynor, Tassadar and Fenix must survive
You now have command of two armies: one Terran, one Protoss. Both will need to be heavily defended to ensure your survival. Once the bases are secure, begin construction of your fleets. You will need 12 Battlecruisers, 12 Carriers, 4 Arbiters, 2 Observers and 2 Science Vessels. The first fleet is the Protoss fleet of 12 Carriers, 2 Arbiters and 2 Observers. The second fleet is the Terran fleet of 12 Battlecruisers and 2 Science Vessels. Feel free to send any ground forces you can spare for the assault, but when fully upgraded, these two fleets should be enough.
Pick a rallying point in between the two bases. The fleets will be most effective if they work together. Not much will stand up to 12 Battlecruisers and 12 Carriers moving in on the same target.
The key to this mission is defense. The Zerg will slam you with rush after rush. Fortunately, Terrans are excellent defenders. Feel free to send a few Siege Tanks to the Protoss side and a few Reavers over to the Terran side for added defense.
Send Probes or SCVs to the northeast and southwest corners. Both have huge resource caches which remain untouched by the Zerg. Defend them lightly and begin harvesting their resources as soon as possible.
Once your two fleets are assembled, build 12 Marines and send them ahead of your fleets into the fray. Don’t worry, their job is to get chewed up and draw fire away from your fleets, allowing them to punch a huge hole in the enemy defenses. Alternatively, you can also bombard the outer Zerg defenses with nukes and Yamato Cannon strikes. The Overmind is surrounded by four large Zerg hives. Destroying at least two (preferably all) of them, you will make the final push much easier.
Destroy a Zerg hive (any of them), then retreat to rearm and replace any losses. Once you are ready, head back in and destroy another. Defenses are very heavy, but are relatively easy to overcome with your giant fleet. Destroy at least one more hive, then retreat and rearm again. Save your game.
There are two further options. One is to unload ALL your units and throw every single one of them at the Overmind. This is risky, but makes for a really cool fight, even if you lose. The other option is to do what you’ve been doing: destroy a Hive, retreat/rearm, then destroy the next. This is safer, plus it allows you to destroy the Overmind all by itself.
References
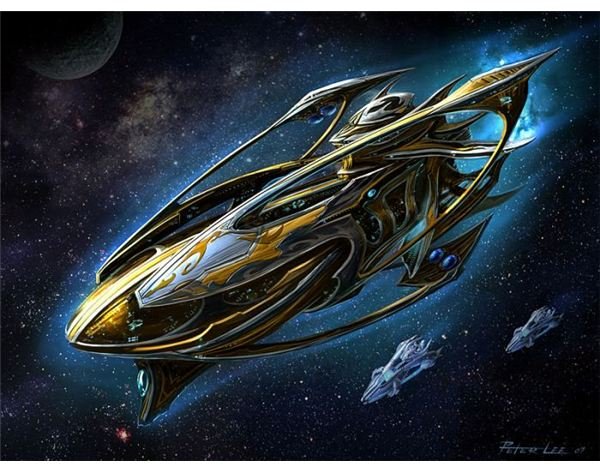
- Image Credit www.starcraft.wikia.com, http://starcraft.wikia.com/wiki/Carrier
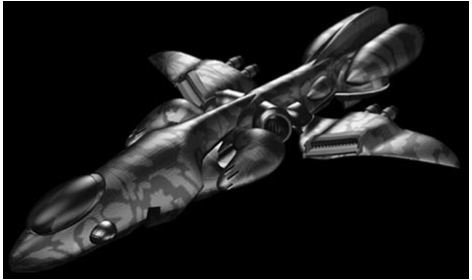
- Image Credit www.starcraft.wikia.com, http://starcraft.wikia.com/wiki/Scout
This post is part of the series: Starcraft Walkthrough
This guide will take you through all the missions in the original Starcraft real-time strategy hit from Blizzard Entertainment. The missions are all linear and although you can play the campaigns in any order you wish, it is highly recommended to play them in order.
