Game Guide Star Wars: The Force Unleashed

The Prologue
The game begins with the cut scene of the events of the last prequel movie, Revenge of the Sith. The Jedi are being wiped out by
both the clone troops and that of the newly acquired Anakin Skywlker. The prologue is a bit like a tutorial, where you take control of the new Sith Lord, Darth Vader on the planet of Kashyyyk. This bit goes into how to use your Force powers, what the controls are, how to move, etc.
The point of this mission is to find the last Jedi on the planet, but you will be facing Wookie forces that will try and stop you. Players who would normally play light sided characters will need to be strong to test out their powers on Chewbacca’s kin, but it will give you an idea on how to use your powers for levitation, Force Push, and of course the fan favorite of Force Lightning.
The boss Jedi at the end of the Prologue is the Rogue Jedi. There will be a cut scene in which he will try and stop you from reaching the huts behind him. This fight can be tricky, as you are still learning the different sets of power and you will need to make sure to use either Force Push or Repulse when the Jedi begins to fling out his lightsaber.
You need to quickly bring his health down, so start out by using Saber Throw, and then follow with a quick combo and his health should be taken down a notch. When this Jedi master starts to get weak, he will pull out his biggest attack, which will be pulling a passing TIE fighter right out of the sky and dropping it on top of Vader’s head. Pull out just before this attack and keep moving around and you should miss getting hit by most of the explosion, and then finish this master Jedi.
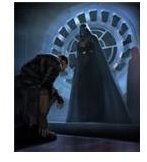
When you have brought down the Jedi’s health enough, this will trigger a cut scene in which Vader tortures the man for information. Before the Sith Lord can continue, a small boy approaches and tries to save the man. Vader is impressed by the boy’s talent and recruits him as his apprentice.
Mission 1 – The TIE Construction Yard walkthrough
Years pass and the apprentice has grown into an adult and is ready for his first official mission. This is also where the player will begin
to take control of Starkiller, the apprentice. Consider this a more advanced version of a tutorial, as you will be learning some different powers to use with Starkiller. There will be a fight scene with your droid companion before you are introduced to Juno Eclipse, your pilot and love interest.
Your first mission is to kill General Kota in the TIE hanger of Nar Shaddaa. There are five separate zones in this area - the hangar (where you start), flight tower, control rooms, wing assembly, and cockpit assembly - before you end with the boss fight with Kota.
Use Force Grip on the hanging TIE fighters in the hangar bay and throw them into the groups of enemies and you should take most of them out immediately, if not all of them. While in the hangar bay, go over to the parked shuttle and jump from the tail wing using a double-jump and Force Dash to reach the catwalk, where there will be a Saber Crystal: Yellow Jedi holocron. Use Force Grip to bend the beams along the walkway outward into the path of the attacking TIE fighters and then double-jump across the broken section at the end of the walkway.
When you make it to the room with the laser gate defeat the attacking soldiers by using Force Grip to throw them into the deadly barrier for the easy kill. After eliminating the soldiers, use Force Grip to rip the power supply off the nearby wall to bring down the laser gate. You need to reach the high opening in this room, so use Force Grip to pull out the metal block located in the left wall, and then Force Grip the slab of metal just below the door to lower it. Now, double-jump up to the platform, and then jump up and through to leave the room.
TIE Contruction Yard Continued
In the first TIE wing assembly chamber you need to throw objects at the construction walker using Force Grip to defeat it, and then
simply follow the on screen information provided to disable it for good. There are two Jedi holocrons on the second catwalk level, but you will need to ride a TIE wing past the first catwalk to reach this height and retrieve your prizes.
Enter the second TIE wing assembly chamber, here you will find the Jedi holocron that gives you the Rubat lightsaber crystal. You will need to use Force Grip to raise the pair of TIE wings on the ground and fit them into the spaces above to provide additional platforms in the gaps where wings are missing. After that you simple jump from one wing to the next, until you reach the catwalk, and your important prize.
When you reach the assembly line chambers you will need locate the power supply on the wall and tear it off the wall using Force Grip to turn off the laser fields.
Boss Fight - Rahm Kota
The first Jedi you target for elimination is General Rahm Kota, a vetern of the Clone Wars and one of the surviving members of the
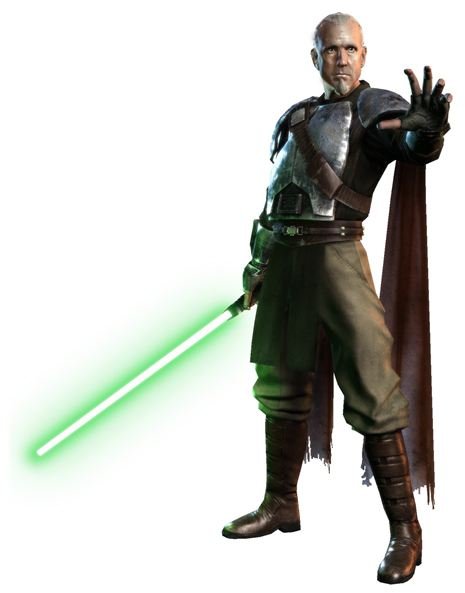
Jedi to have escaped slaughter. Kota is a powerful Jedi Master who will use a number of strategies to keep you jumping during your battle. If he puts a glowing shield around himself, just sit back and don’t attack; he’s invulnerable, so avoid him and he’ll make his move. He’ll throw several large and deadly objects in the room at you one at a time using Force Push, so just use Force Dash and you should avoid too much trouble.
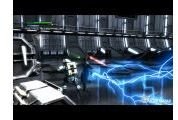
The general’s second major attack begins if he tosses his lightsaber into the air and jumps after it. When he lands he’ll create a shockwave that radiates from his position. You need to leap to keep from being hit by this attack. Keep moving, especially when Kota gets down to half life, as he will ignite the room you’re standing in by sending it into the Smuggler’s Moon’s atmosphere. Make sure to stay out the flames on the ground, instead keep Kota grounded so that he’ll lose his life and not you.
All boss fights need to be defeated by using button finishers which appear on screen. This will create a small cut scene in which Starkiller will perform the move, thus defeating the boss.
This post is part of the series: Star Wars Force Unleashed Walkthroughs
Walkthroughs and extra level guides for Star Wars Force Unleashed.