Sherlock Holmes Versus Jack the Ripper Walkthrough - Part 1 of 5 - Holmes Starts Investigating Jack the Ripper
Holmes Suffers from Boredom
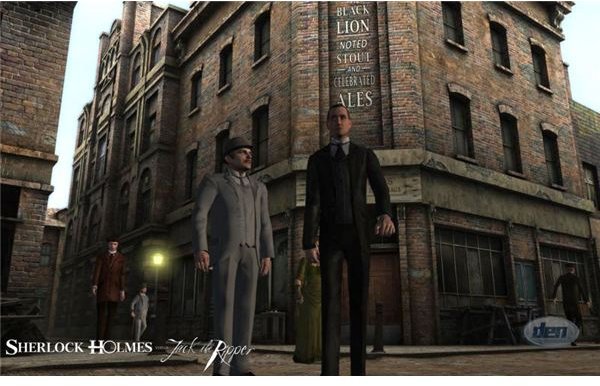
Sherlock Holmes solved the case of a mummy and a Cthulhu Cult. The game pits the fictional character against the most famous mass murderers to walk the streets of London. Sherlock Holmes Versus Jack the Ripper starts with Holmes blowing smoke rings in Watson’s face in their Baker Street apartment. The lecture takes the form of the one that takes place early in the Sherlock Holmes stories, but the drug used here is tobacco, not cocaine.
Holmes laments the lack of intellectual stimulation. Why this game shies away from the fact that Holmes does cocaine is odd, considering its subject matter. Watson suggests that the two retire for the evening, and the matter will resolve itself the next morning.
This prophecy comes true the next morning. Doctor Watson reads his companion the contents of the newspaper, which tells the story of a horrific murder in Buck’s Row in the Whitechapel district of London. The great detective seems nonplussed by this news, and his companion asks for Homes to show some compassion as a poor woman was murdered. The discussion at Baker Street leads Holmes to speculate about the profession of the woman.
With the lack of intellectual stimulation now resolved, Holmes suggests that they need to head to the Whitechapel District. Start by locating the map of London. Go over to the desk and get the map from it. The map interface will open. Select the Whitechapel police station and the game will automatically transport you to the Whitechapel district.
Finley’s Low Class Boarding House
Enter the police station. Walk in and talk to Constable Humphries. He recognizes the duo as they enter and asks if they are there about the murder. Holmes assures the constable that he has come on an unrelated matter, but says that he can help with the case if the constable provides him a copy of the preliminary report. The constable starts a trend that becomes annoying in this game. Humphries asks you to find the bundle of papers he lost on his rounds earlier. He states that he lost them near a seedy boarding house not far from the station.
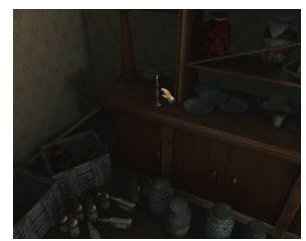
Go out onto commercial street and turn into the next alley. (The alley is to the left in third person mode.) The entrance to the boarding house rests halfway back the alley. Turn left in third person mode and you will find a figure busily sweeping a porch. The game goes into a cut scene and comes up with a series of questions. Finley has seen the folder you seek, but informs you that some local ruffians took it away. Finley informs Holmes that he has no chance of finding the folder, but Finley says that he can get the folder. All you need to do is perform a small favor for the landlord. He wants you to talk to the police about a man named The Captain.
The Captain’s Niece
Return to the police station. You can either click on the location on the map or walk back to the police station. Talk to Constable Humphries about the gentleman known as the Captain. Humprhries tells you that the man has a constant cough and he has a niece who lives just past the alley where the boarding house is.
If you are using third person mode, go back and out of the police station and turn right. When you find yourself underneath the window, you will see a cut scene of a woman leaning out of a window. She tells you about her uncle, the Captain. Lucy also tells you that she used to let him stay here, but her landlord made her kick him out. She will describe her uncle’s poor health, and Lucy tells you that she has not seen him recently. Sherlock Holmes says that he likely has many informants in this area, and the game shows a cut scene of a teenage boy standing against a nearby wall. The boy is one of the Baker Street Irregulars.
Talk to the boy. Find out that the Captain lives at the end of the alley. The spot where the Captain rests is placed on the map. You can use the map or just walk down the street. Go down the street until you hear coughing. Run over to the Captain and Watson will examine him.
Watson examines the Captain and estimates that the Captain has one month to live. A certain medicine may relieve his suffering. Use Walk to go to the end of Whitechapel Street and go through the alleyway. (The alleyway will be to the left in third person mode.) The alleyway contains a few people drinking, a police constable, and a few turns. None of these people know any useful information. Go down Whitechapel Street until you see a fence. If you press the space bar, the game’s rather useful in-game hint feature tells you that you can open the gate. Open the gate and walk through the small yard. Open the door and you will find a doctor inside.
Consulting a Doctor
Talk to the Doctor Gibbons. He tells you that the medicine you seek is expensive and you will need documents to obtain it for free. Holmes suggests that the doctor take his spare change instead. Finish the conversation and get the medicine. Use the map to go back to the alleyway. Select the medicine from your inventory and talk to him again. His cough is cured and he can stay with Lucy for a bit. Go back to the boarding house and talk to Finley. He gives you the case. You must return to the police station.
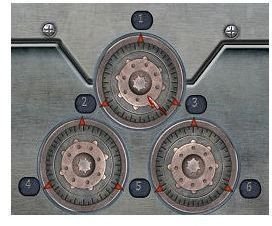
Watson does not accompany you during the next few scenes. Head to the police station. When you enter, select the folder from the inventory and give it to Humphries. The local ruffians could not open the case, but they have messed up the lock mechanism. Grab the folder and the game will show a puzzle with three wheels. The goal of the puzzle is to get the locks to read 1,2,3,4,5, and 6. Most people should figure out this puzzle without too many problems.
The case opens and you now have access to the preliminary reports. Read the documents, including the one newspaper clipping that suggests the murderer was left-handed. You can refer to these items from the dialogue page at any time.
Going to the Crime Scene
Travel to the area on Buck’s Row that you could not visit before. The police have left, but a number of people are still standing around. Holmes suggests that he and Watson come back during the evening.
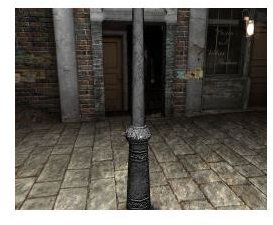
Use the space bar hint feature to find clues. The street light, for example, provides poor lighting to the area. If you walk far enough down the street, Watson says that only the prostitutes come here “to exercise.” Go over to the chalk outline. Click on the ground and Holmes notices that it is wet. Click on the wall to find out there is no blood on the wall. Click on the corpse to see a drawing of the body. Examine the tongue, the pool of blood, and the cheeks on the close up format. The tongue is swollen, the blood flows out in a pool, and there are bruise marks on the cheek. Take note of the location of each one, as it indicated the right hand was used to strangle the woman.
Examining the Victim – Polly Nichols
Examine the cuts on the victim’s throat. The wounds go from left to right, which for some reason indicates that the victim used his left hand to cut his victim. (Someone did not think about this one.) Exit from the close up mode and examine her stomach area. Holmes says some euphemistic phrase about fingers being on the barn door. The game will not shy away from words like vagina as the game progresses.
The game then introduces you to the deduction board during this sequence. You must place the conclusions on the board and use what you have learned. The famous principle first penned by Arthur Conan Doyle applies here, and the deduction board is a good place to use it. For those who do not remember principle it is, “Whenever you have eliminated the possible, whatever remains, no matter how improbable, must be the truth.”
You need to come up with a series of two deductions here. Correct conclusions are outlined in green.
Conclusions about the Polly Nichol’s Murder
The fist three facts, a poorly lit street, a bonnet in the left hand and a street where prostitutes exercise leads to the conclusion that the victim had the bonnet in her left hand and was not afraid of her attacker.
The second set of conclusions that the victim had her throat slit and that there was no blood on the walls means that the victim did not have her throat slit while standing. This will also lead to the conclusion that she was dead before she had her throat slit. The set of facts that go with this conclusion is a little pool of blood and cool and damp ground. These lead to the fact that he did not have relations on the ground and that the blood did not flow in strong spurts.
You will also have to reenact the murder, play-by-play. Watson gets used as the murder victim. Start out by strangling Watson with your bare right hand. The next sequence involves knocking him down and slashing his throat with the knife in your left hand. This is a good spot to save the game.
Determining Jack the Ripper’s Motives
Oddly, as Watson remarks, the strange behavior of the original dynamic duo seems to alarm no one in the area. You will go back to the lodgings on Baker Street and need to draw the board. You need to match each motive up with the likely reason. You must also determine which ones are likely and which ones are not. Holmes’s Responses help you determine this, but the motives match up this way.
Yes - Revenge - Resentment can lead to unspeakable acts
No - Love - The victim was an occasional prostitute without family or ties
No - Theft - The victim lived in misery
Yes - Madness – The Victim suffered a horrible mutilation
Yes - Black Magic – Credible Motive, even if it’s a field Holmes Doesn’t Know
Exit the motive board screen and wait for the Chief Inspector to show up at Baer Street. He specifically asks Holmes not to continue his investigation as it will make things more complicated. Holmes agrees to this.
The Star, the newspaper read by Watson and Holmes regularly carries a report on a figure known as Leather Apron a few days later. The police seem to think they have the Buck’s Row killer, but Holmes is not convinced. He wants to investigate, but cannot go directly. Instead, Holmes sends Watson back to Whitechapel to continue his investigation.
This post is part of the series: Sherlock Holmes Versus Jack the Ripper Walkthrough
The fictional detective tries to solve a series of very real murders. He will succeed where the police of Victorian London failed?
- Sherlock Holmes versus Jack the Ripper Walkthrough - Part 1 of 5 - Baker Street 1889
- Sherlock Holmes Versus Jack the Ripper Walkthrough - Part 2 of 5 - Watson Investigates Whitechapel
- Sherlock Holmes Versus Jack the Ripper Walkthrough - Part 3 of 5 - The Spiritualist
- Sherlock Holmes Versus Jack the Ripper Walthrough - Part 4 of 5 - Holmes’s Experiments and the Dutfield Murder
- Sherlock Holmes Versus Jack the Ripper Walthrough - Part 5 of 5 - Identifying the Perpetrator